Category: Japanese Tea Guides

  • Sobacha (Buckwheat Tea): What It Is, How It Tastes and How to Brew It

    Sobacha (Buckwheat Tea): What It Is, How It Tastes and How to Brew It

    Disclosure: This post contains affiliate links. If you buy through one of them, I may earn a small commission at no extra cost to you. Important: sobacha is made from buckwheat, a common and potentially severe allergen – please read the allergy note below before trying it.

    Sobacha in 30 Seconds

    Sobacha (そば茶) is Japanese roasted buckwheat tea. It’s made from buckwheat kernels roasted until golden, not from the tea plant, so it’s naturally caffeine-free. It tastes nutty, toasty and lightly sweet, with no bitterness. Before you try it, though, read the allergy note below – buckwheat is one of the more serious food allergens.

    Quick Picks

    • Easiest first try: sobacha tea bags – no strainer needed. Buckwheat tea bags on Amazon
    • Best flavor: loose roasted kernels – toastier, and you can eat them after brewing. Loose sobacha on Amazon
    • Rounder, earthier cup: dattan (Tartary) sobacha. Dattan sobacha on Amazon
    • Want a gentle real tea too? Kukicha (stem tea) is one of the lowest-caffeine green teas. Nio Teas’ kukicha collection – at the time of writing, ordering through the links on this page automatically applies a 10% discount at checkout, no code needed. (Nio Teas doesn’t sell sobacha; the discount applies to their teas. Offers can change, so check the final price in your cart.)

    Below: the allergy note, regular vs dattan sobacha, how it tastes, how to brew it hot or cold, and what to do with the kernels afterward.

    The first time I had sobacha was at the end of a meal in a soba restaurant, where it arrived unasked, in a plain cup, the way water does in most places. I assumed it was some kind of hojicha. It wasn’t – it was roasted buckwheat, with a toasty, slightly sweet flavor and no bitterness at all, and it turned out to contain no caffeine whatsoever. That last part is what eventually made it a regular in my kitchen: it’s the Japanese “tea” I drink when I don’t want tea.

    The Problem You’re Actually Trying to Solve

    Most people looking up sobacha want one of two things: a caffeine-free drink that still feels like part of Japanese tea culture, or an explanation of what they were served at a soba shop. Sobacha answers both, but it gets confused with hojicha and mugicha constantly, and the labeling – “sobacha” versus “dattan sobacha” – isn’t explained on most packages.

    Who This Article Is NOT For

    • If you want a roasted flavor but don’t mind a bit of caffeine, hojicha is the closer “real tea” option – my matcha vs. hojicha caffeine comparison explains how much it actually contains.
    • If you’d prefer a genuine green tea that’s simply low in caffeine rather than caffeine-free, kukicha is the gentler step down.

    Buckwheat Allergy: Read This First

    If you have a buckwheat allergy, or don’t know whether you do, please don’t try sobacha casually. Buckwheat allergy can cause severe reactions, including anaphylaxis, and it’s serious enough that buckwheat is one of the allergens Japan requires food labels to declare. Brewing doesn’t make it safe, and even the steam from cooking buckwheat can affect very sensitive people. If in doubt, talk to a doctor first. If you’re serving sobacha to guests, tell them what it is before they drink it.

    What Sobacha Actually Is

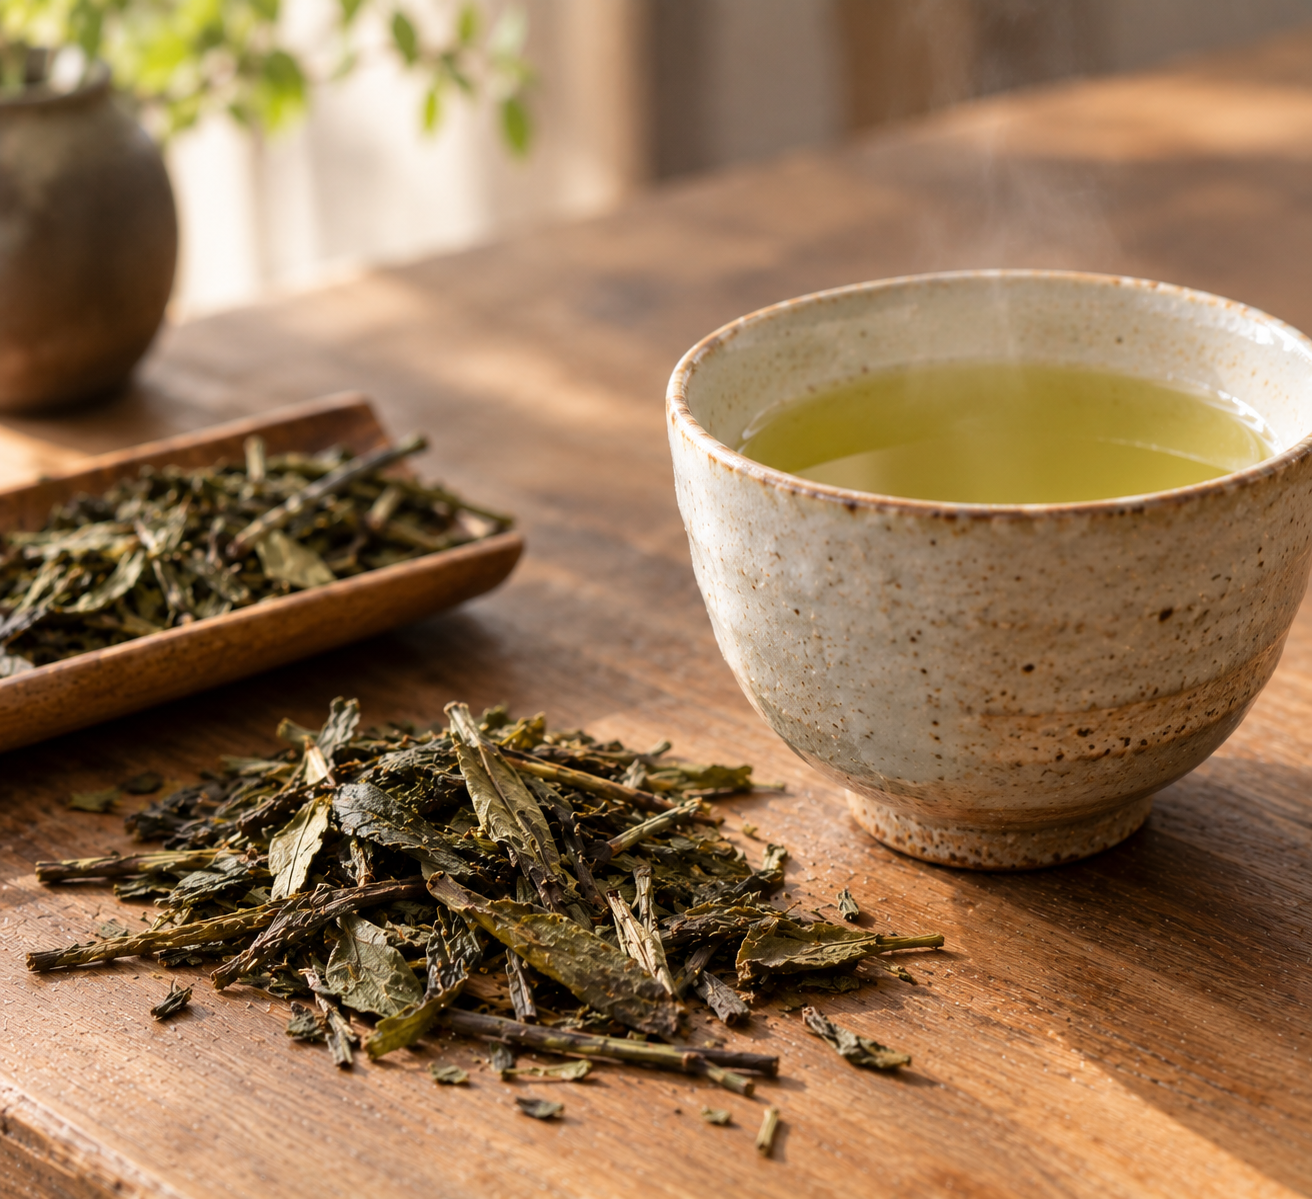
    Sobacha is an infusion made from buckwheat kernels that have been dry-roasted until golden brown. Despite being called “cha” (tea), it doesn’t come from the tea plant (Camellia sinensis) at all – which is exactly why it has no caffeine. In that sense it belongs to the same family as mugicha (roasted barley tea): a roasted grain drink that’s part of everyday Japanese life, rather than a tea in the botanical sense.

    It’s also served routinely in soba restaurants, often complimentary with or after the meal – which is where most visitors to Japan first encounter it.

    Regular vs. Dattan Sobacha (Tartary Buckwheat): The Difference

    You’ll see two kinds on the shelf, and they’re genuinely different plants:

    Regular sobachaDattan (Tartary) sobacha
    PlantCommon buckwheat (Fagopyrum esculentum)Tartary buckwheat (Fagopyrum tataricum)
    KernelsLargerSmaller, rounder, thinner hulls
    Brew colorWarm amberLighter, with a faint yellow-green tinge
    FlavorStronger toasted-grain characterRounder, earthier, slightly bitter edge
    Rutin contentLowerMuch higher – often cited as 50-100x common buckwheat

    Rutin is a plant flavonoid, and it’s the main reason dattan sobacha is marketed as the “healthier” option. I’d treat that cautiously: having more of a compound in the cup isn’t the same as a proven health effect from drinking it. Choose dattan if you prefer its taste, not because of a label promise.

    How It Tastes

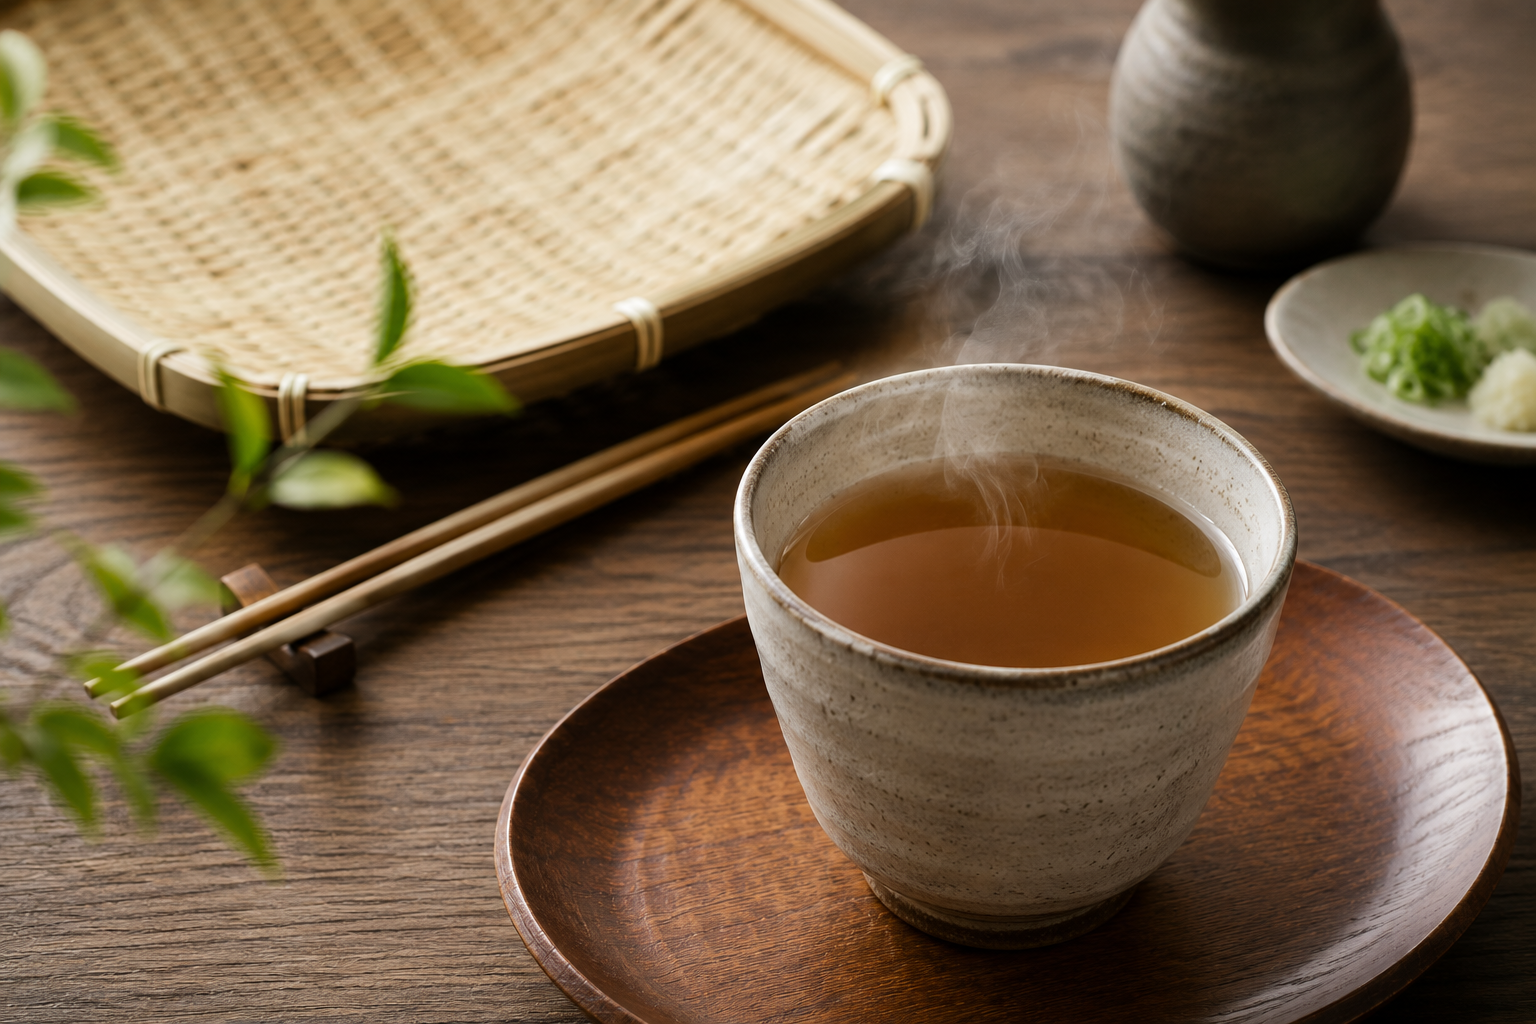
    Nutty, lightly sweet, with almost no bitterness – somewhere between toasted sesame and a mild barley tea, sometimes with a hint of popcorn. It’s a clean, palate-cleansing drink that sits alongside food without competing with it, which is exactly why soba shops serve it.

    How to Brew It

    Hot:

    • About 1 tablespoon of kernels per 240ml (8oz) of water
    • Water just off the boil, around 93°C (200°F) – unlike green tea, there’s no bitterness to avoid by cooling the water
    • Steep 3-5 minutes: 3 for lighter, 5 for deeper. Some people go as long as 10 for a strong cup
    • Use a mesh strainer or infuser – the kernels are small and slip through wide filters

    Cold:

    • Double the amount of kernels, steep in the fridge for 4-8 hours
    • The result is noticeably sweeter and smoother than hot-brewed
    • Drink within about 2 days

    Don’t Throw Away the Kernels: How to Eat Them

    Once steeped, the kernels are soft and fully edible. It’s one of the few teas where the “leaves” are as good as the drink:

    • On yogurt or oatmeal for a nutty crunch (dry them briefly in a pan first)
    • Mixed into rice while it’s still hot
    • On salads, like toasted seeds
    • In soup, stirred in just before serving

    Sobacha Latte

    Brew a strong cup – about 2 tablespoons of kernels in 120ml of near-boiling water for 5 minutes – then top with an equal amount of steamed milk or oat milk. A little honey brings out the toasted-grain sweetness. It’s a cozy, caffeine-free alternative to a hojicha latte for the evening.

    A Few Things People Ask Me

    Is sobacha gluten-free? Buckwheat itself isn’t related to wheat and contains no gluten. That said, buckwheat is sometimes processed in facilities that also handle wheat, so if you have celiac disease, check the package for a gluten-free label rather than assuming.

    What’s the difference between sobacha and hojicha? Hojicha is roasted green tea and contains some caffeine. Sobacha is roasted buckwheat and contains none. Both taste toasty, but hojicha has a slight tea-like depth that sobacha lacks, while sobacha is sweeter and more grain-like.

    Can I drink it at night, or give it to kids? With no caffeine, it’s a common choice for evenings and for all ages in Japan – with the same important caveat as above: buckwheat allergy is serious, so introduce it carefully and only if you know it’s safe for you.

    Where can I buy it? Dattan sobacha on Amazon is the easiest place to find both types outside Japan. If you’d rather have a gentle drink that’s actual tea, Nio Teas’ kukicha is a low-caffeine alternative – and the link-only 10% discount mentioned at the top applies there.

    Where I Landed

    Sobacha took me a while to appreciate because I kept judging it as a tea, and as a tea it’s simple. As what it really is – a roasted grain drink built to sit quietly beside a meal – it’s very good. I keep a jar of it for evenings and for the times when a full-flavored green tea would be too much. It’s the closest thing to drinking the end of a soba-shop meal at home, and the kernels at the bottom of the pot are a small bonus I’ve come to look forward to.
  • Shincha: Japan’s “New Tea,” and Why It Only Makes Sense for a Few Weeks

    Shincha: Japan’s “New Tea,” and Why It Only Makes Sense for a Few Weeks

    Disclosure: This post contains affiliate links. If you buy through one of them, I may earn a small commission at no extra cost to you.

    The first time I bought shincha, I treated it like any other sencha – put it in the cupboard, drank it slowly over the summer, and by August I was wondering what the fuss was about. That was the mistake. Shincha isn’t a separate tea variety so much as a moment: the first sencha of the year, sold and drunk while it’s still at its freshest. Drink it slowly and you’ve effectively turned it back into ordinary sencha, at a premium price.

    The Problem You’re Actually Trying to Solve

    Most people who look up shincha have seen it as a limited seasonal listing – “Shincha 2026, available now” – and want to know whether it’s genuinely different or just marketing around a date. The honest answer is both: the leaf is real first-flush sencha with a character you can’t get later in the year, but most of that character depends on how quickly you drink it, which is the part almost nobody explains.

    Who This Article Is NOT For

    • If you want the chemistry of why spring tea tastes sweeter than summer tea – theanine, catechins, the full harvest calendar – my ichibancha vs. nibancha breakdown covers that in detail. This article is about shincha as a seasonal tea you buy and drink, not harvest science.
    • If you’re looking for matcha specifically, shincha almost always means loose-leaf sencha, not powdered tea.
    • If you prefer to stock up on tea and drink it gradually over months, shincha’s main selling point mostly disappears – a good regular first-flush sencha will serve you just as well for less.

    What Shincha Actually Is

    Shincha (新茶) literally means “new tea”: the first sencha harvested in a given year. Picking starts in mid-to-late April in Kagoshima in the south and moves north over the following weeks, wrapping up in most regions by May, with shincha generally on sale from mid-April through mid-June.

    Technically, shincha is the same leaf as ichibancha – first-flush tea. The difference is emphasis. “Ichibancha” tells you which harvest the tea came from; “shincha” tells you it’s this year’s first harvest, sold fresh, now. A tin of ichibancha sencha bought in December is still first flush. It just isn’t shincha anymore in the sense anyone means when they use the word.

    The 88th Night

    The date most associated with shincha is hachijuhachiya – the 88th night counted from risshun, the traditional start of spring on the Japanese calendar, which falls around May 1-2. Tea picked on that day is traditionally said to bring good health and luck for the coming year, and there’s a well-known children’s song about tea picking that opens with exactly this date.

    Whether 88th-night tea genuinely tastes better than tea picked a few days earlier or later is debatable – producers themselves tend to admit it’s more tradition than measurable fact. But it’s a good marker for when shincha season is at its peak, and it’s part of why the tea feels like a seasonal event in Japan rather than just another product.

    Why It Tastes Different (and Why It Doesn’t Last)

    Shincha’s sweetness and low astringency come from the nutrients the plant stores through winter and pushes into its first spring buds. What makes shincha shincha, though, is the aroma – a sharp, fresh, grassy top note often described as aoka (literally “green fragrance”) that you only really get in the first weeks after processing.

    That aroma is the fragile part. Shincha is typically finished with a lighter final firing (hi-ire) than sencha destined for longer storage, which preserves the fresh character but leaves the tea more vulnerable to oxygen, light, and moisture. The practical rule: open it soon after it arrives and try to finish an opened bag within a few weeks, kept airtight and away from heat. Unopened, it’ll keep longer in the fridge, but the top note fades steadily regardless. My green tea storage guide covers the general storage rules; with shincha, the main difference is simply that the clock runs faster.

    How to Brew It

    Shincha brews much like a good sencha, and you can steer it toward sweetness or aroma with temperature:

    • Leaf: about 5g (roughly 2 teaspoons) per 200-250ml of water
    • For sweetness: around 70°C (158°F), steeped about 60 seconds
    • For the bright, grassy aroma: around 80°C (176°F), steeped 30-45 seconds
    • Second infusion: slightly hotter water, shorter steep – 15-20 seconds is plenty

    I’d brew the first cup from a new bag on the cooler side to taste the sweetness, then try the hotter, quicker method on the next round to see the aroma side – it’s one of the few teas where the difference between the two is obvious even to a beginner.

    It’s Autumn – So What Now?

    If you’re reading this in autumn, shincha season is long over, and anything still sold under that name has had months to lose exactly what made it special. Two better options:

    Pre-order next spring’s shincha. Many Japanese tea sellers take pre-orders and ship by air shortly after processing, which is the only way to get shincha internationally while it’s still genuinely fresh. Sea freight or a long sit in a warehouse defeats the point.

    Try kuradashi instead. Autumn has its own seasonal tea that’s almost the mirror image of shincha. Kuradashi (“taken out of storage”) is high-quality spring tea deliberately aged in cold, airtight storage and released in autumn and winter. Where shincha is brisk and green, kuradashi turns smoother, deeper, and less astringent, sometimes picking up notes of honey, nuts, or fruit. It goes back to the Edo period, when tea jars were stored over summer in cool mountain storehouses and opened in autumn – a tradition still marked in tea ceremony as kuchikiri, the ceremonial opening of the jar. Drinking shincha in spring and kuradashi in autumn is a nice way to taste the same first-flush leaf at both ends of its life.

    A Few Things People Ask Me

    Is shincha worth the higher price? If you’ll drink it within a few weeks of it arriving, yes – you’re paying for an aroma you can’t get at any other time of year. If it’ll sit in your cupboard for months, no; buy a regular first-flush sencha instead.

    Is shincha the same as ichibancha? It’s the same harvest, so the leaf itself is ichibancha. “Shincha” adds the promise that it’s this year’s tea, sold fresh. All shincha is ichibancha, but not all ichibancha is still shincha.

    Should shincha be stored in the fridge? Unopened, a fridge is fine and slows the aroma loss. Once opened, keep it in an airtight container at room temperature away from light – repeatedly taking a cold bag in and out of the fridge invites condensation, which is worse for the leaf than mild warmth.

    Where should I buy it? Shincha listings disappear outside spring, so in the off-season I’d look at Nio Teas’ sencha selection and watch for their spring releases. Whatever you buy, an airtight tea canister on Amazon is worth having before it arrives, since shincha is the tea that suffers most from a loosely folded bag.

    Where I Landed

    Once I stopped thinking of shincha as a type of tea and started thinking of it as a time of year, the whole thing made sense. It’s not that spring sencha is magically better than every other tea – it’s that for a few weeks it has something it will never have again, and the only way to taste it is to drink it while it’s there. Buy a small amount, open it right away, and drink it often. Then, come autumn, let kuradashi show you the other end of the same leaf’s story.

  • How to Make Matcha Without a Chasen: What Actually Works

    How to Make Matcha Without a Chasen: What Actually Works

    Disclosure: This post contains affiliate links. If you buy through one of them, I may earn a small commission at no extra cost to you.

    Not owning a chasen shouldn’t mean giving up on matcha – but it’s also where most people go wrong, reaching for a regular spoon or a dinner fork and ending up with a cup full of green clumps floating in water. The actual fix isn’t finding something that moves exactly like a bamboo whisk; it’s understanding why a chasen works in the first place, then picking a substitute that recreates the part that actually matters.

    The Problem You’re Actually Trying to Solve

    Matcha clumps because it’s an extremely fine powder that resists dissolving in water on its own – it needs real mechanical agitation to break up. A chasen’s dozens of thin bamboo tines create a lot of fast, repeated motion in a small space, which is what breaks up the clumps and incorporates air for foam. Most without-a-whisk failures happen because people skip the paste step and try to dissolve dry matcha directly into a full cup of water, where there’s too much liquid and not enough agitation to catch the clumps before they settle.

    Who This Article Is NOT For

    • If you already have a chasen and just want to get more out of it, my matcha whisk buying and care guide is the better read.
    • If you’re making a matcha latte specifically and don’t care about ceremonial foam, my matcha latte guide already covers a simple method using what most kitchens already have.
    • If you want the full traditional whisking experience rather than a quick substitute, none of what follows replicates that – it’s aimed at getting a decent, clump-free cup without the ceremony.

    The One Step That Matters More Than the Tool

    Whatever you use, make a small, concentrated paste first: 1 teaspoon (about 1g) of matcha with just 1-2 tablespoons of water, mixed aggressively until completely smooth with no visible lumps, before adding the rest of your water or milk. Skipping straight to a full cup of liquid is the single most common reason any of these methods fail – there’s simply too much volume for whatever tool you’re using to catch and break up the clumps once they’ve already spread out.

    Four Real Alternatives, Ranked by How Well They Actually Work

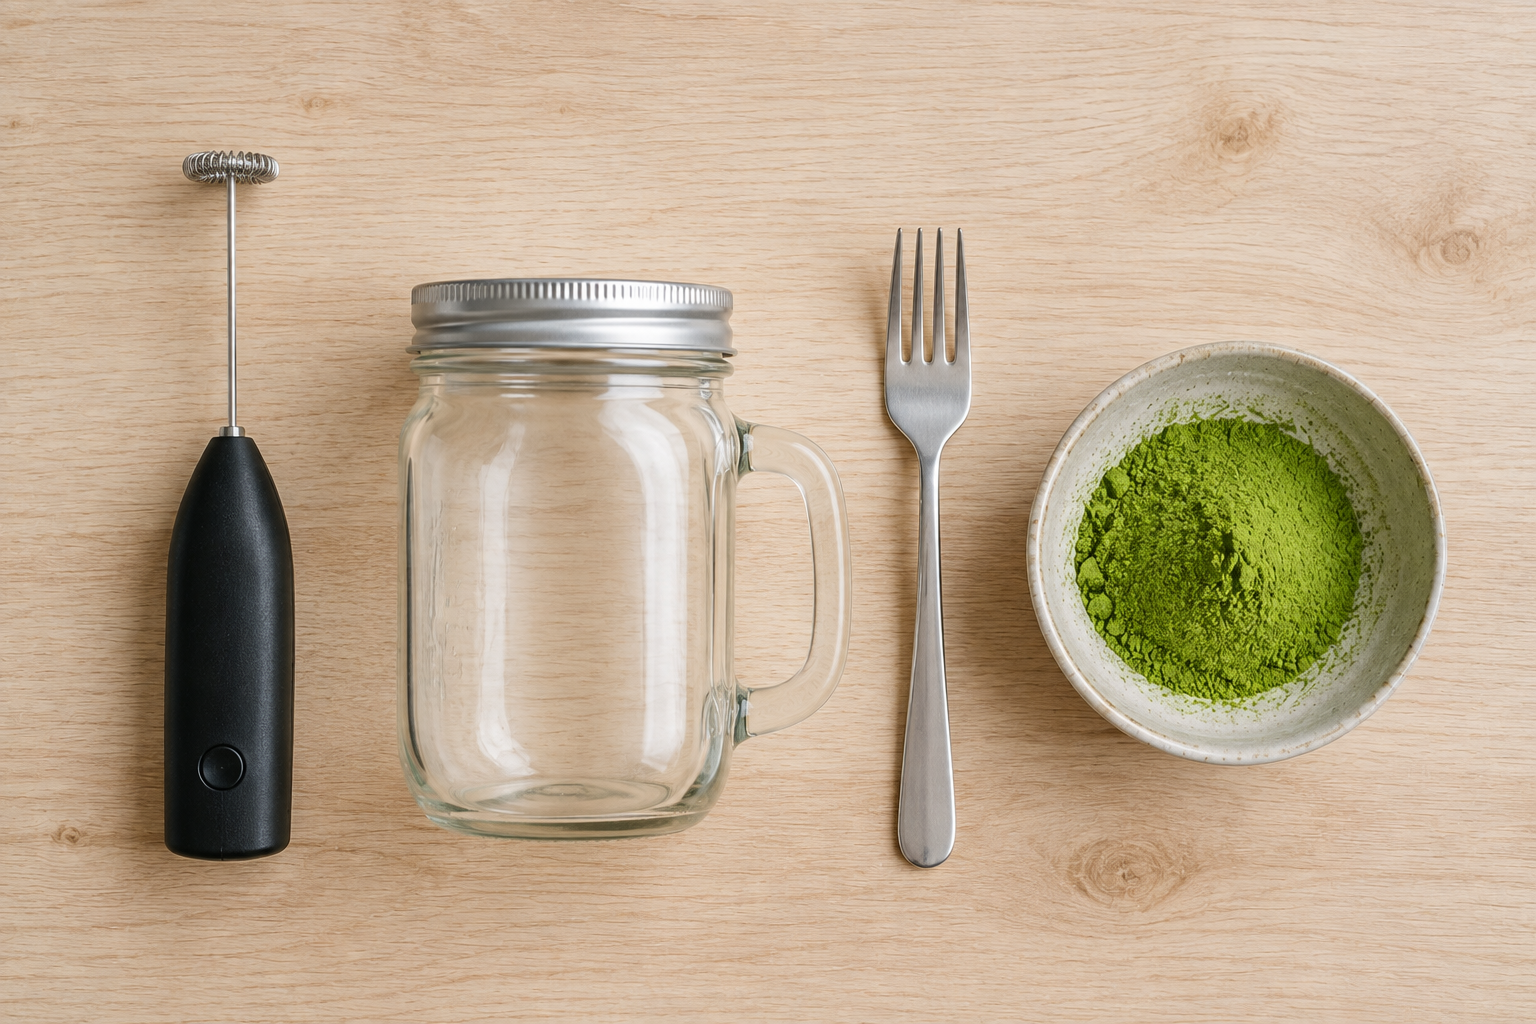
    1. Electric milk frother (best overall). Sift the matcha into your cup, add 2 tablespoons of room-temperature water, submerge the frother head and run it for about 10 seconds until smooth, then add your remaining hot water (75-80°C) or milk and froth again for 15-20 seconds. A small handheld frother creates a fast spinning agitation that’s genuinely comparable to a chasen’s W-shaped motion, and it’s the closest thing to matching both the smoothness and the foam of a traditional whisk with none of the technique.

    2. Blender. Add the matcha with a small amount of water first and pulse for a few seconds to break up the paste, then add the rest of your liquid and blend another 10-15 seconds. This produces excellent, genuinely smooth results and can even edge out a chasen for pure lump-free texture – the tradeoff is more cleanup, and you shouldn’t blend very hot liquid in a sealed blender due to steam pressure building up.

    3. Shaker bottle or wide-mouth mason jar. Make the paste directly in the jar, add your water (warm rather than boiling), seal tightly, and shake vigorously for 15-20 seconds. This works well for cold or iced matcha specifically – a wide-mouth jar froths noticeably better than a narrow bottle – and it’s the most practical option if you’re making matcha somewhere without an outlet, like while traveling.

    4. A regular fork, in a genuine pinch. Mash and mix the matcha with a small amount of cold water using the fork tines for about 30 seconds until it’s a reasonably smooth paste, then stir in hot water vigorously for another minute. Being honest about this one: it’s passable, not good. You’ll likely get a few small remaining clumps and essentially no foam, but it beats drinking gritty matcha water, and it requires nothing you don’t already own.

    A Few Things People Ask Me

    Does the health value of matcha change depending on how I prepare it? No – the antioxidants, L-theanine, and caffeine content come from the powder itself, not the whisking method. A frother or blender doesn’t give you “less” matcha than a chasen does.

    Is a hand whisk (like a mini metal whisk) worth trying instead? It’s a middle option – better than a fork, meaningfully more effort than a frother. Whisk in an M or W pattern rather than circles, which more closely mimics how a chasen actually breaks up clumps, and expect to spend closer to a minute working at it rather than the 15-20 seconds a frother needs.

    Which of these is worth actually buying if I don’t want a chasen at all? A handheld milk frother on Amazon is inexpensive and does the best job of any non-chasen tool here. If you decide you’d rather go the traditional route after all, Nio Teas’ matcha tools is where I’d start looking for a real chasen instead.

    Will my matcha taste worse made this way? Flavor itself won’t change meaningfully – what changes is texture and foam. A frother or blender actually gets you closer to a chasen’s result than a fork or spoon ever will, so “no whisk” doesn’t have to mean “worse matcha,” just a different-looking cup.

    Where I Landed

    The chasen isn’t doing anything mystical – it’s just an efficient tool for fast agitation in a small space, and once you understand that’s the actual job, it’s easy to see why an electric frother gets remarkably close with a fraction of the effort. I still reach for my chasen most mornings because I like the process, but on days I don’t feel like washing bamboo tines, the frother isn’t a downgrade so much as a different tool doing the same job faster.

  • Bancha: The Everyday Japanese Tea Everyone Skips Past for Sencha

    Bancha: The Everyday Japanese Tea Everyone Skips Past for Sencha

    Disclosure: This post contains affiliate links. If you buy through one of them, I may earn a small commission at no extra cost to you.

    Bancha gets treated as the tea you settle for, not the tea you choose – the cheaper option on the shelf next to sencha, made from later, lower leaves rather than the prized spring flush. That framing undersells it. Bancha isn’t a lesser sencha; it’s a genuinely different, milder tea with its own flavor identity, and it’s also the quiet base ingredient behind two teas most people already like without realizing where they come from.

    The Problem You’re Actually Trying to Solve

    Most people encounter bancha as an afterthought – either the budget bag next to sencha at a Japanese grocery store, or a term they see mentioned in passing while reading about hojicha or genmaicha. Understanding what bancha actually is, why it’s cheaper, and why it tastes so different from sencha makes it a lot easier to decide whether it’s worth buying on its own rather than only as a component of something else.

    Who This Article Is NOT For

    • If you want the brighter, grassier, more vegetal flavor Japanese green tea is known for, sencha is the better starting point – my sencha vs. gyokuro comparison covers that leaf-forward end of the spectrum.
    • If you’re specifically looking for a roasted, nutty tea, you actually want hojicha or genmaicha, both of which are often made from bancha but taste quite different after roasting or blending with roasted rice.
    • If you want the lowest-caffeine option possible, kukicha (twig tea) runs even lower than bancha, since stems contain even less caffeine than older leaves.

    What Bancha Actually Is

    Sencha is made from young sprouts picked from the top of the tea plant during the first flush in spring. Bancha comes from further down the plant, and typically from a later harvest – the third or fourth flush, picked later in the season after the prized early leaves are gone. Older leaves simply contain less caffeine and fewer catechins than young spring growth, which is the whole reason bancha tastes and behaves differently from sencha rather than just being a cheaper version of the same thing.

    That harvest timing is also exactly why bancha costs roughly half what sencha does – it isn’t a quality shortcut so much as a genuinely different point in the plant’s growth cycle, priced accordingly.

    How Bancha Actually Tastes

    Where sencha brings grassy, vegetal, slightly citrusy notes, bancha shifts toward something milder and more rustic – earthy, woody notes with hints of cereal, and sometimes a faint caramel or popcorn-like sweetness. It’s a quieter tea by design: less bitterness, less brightness, and a flavor that holds up fine as a background, everyday drink rather than something you sit and savor the way you might a good sencha or gyokuro.

    The Connection to Hojicha and Genmaicha

    Here’s the part that surprises people: both hojicha and genmaicha are frequently made using bancha as their base. Hojicha is bancha (or sencha) leaves roasted at high heat until the flavor shifts entirely toward toasty and nutty; genmaicha is bancha blended with roasted rice. Both are cheaper than straight sencha for the same underlying reason bancha itself is cheaper – they’re built on the same later-harvest, lower-leaf base. If you already like hojicha or genmaicha, you’ve been drinking bancha’s flavor profile all along, just transformed by roasting or blending.

    How to Brew It

    Bancha is forgiving, which is part of its appeal as an everyday tea:

    • Water temperature: 70-80°C (158-176°F) – hotter than you’d use for sencha, since there’s less risk of bitterness from the lower caffeine and catechin content
    • Amount: about 3-4g of leaves per 120-150ml of water
    • Steep time: 30-60 seconds
    • Good for 4-5 infusions, more than sencha typically tolerates, since there’s simply less to extract on the first pour

    Because it’s less prone to bitterness than sencha, bancha is a reasonable tea to brew a little looser with – slightly hotter water or a slightly longer steep won’t punish you the way it would with a delicate first-flush sencha.

    A Few Things People Ask Me

    Is bancha lower quality than sencha, or just different? Different, more than lower quality. It comes from a later harvest and lower leaves by design, which changes the flavor and caffeine profile rather than making it a failed attempt at sencha. Comparing them directly is a bit like comparing a young wine to an aged one – different intent, not a strict hierarchy.

    Does bancha have less caffeine than sencha? Yes, noticeably – roughly half of sencha’s caffeine per cup, since older leaves contain less caffeine than the young spring growth sencha uses. That makes it a reasonable afternoon or after-dinner option where sencha might feel like too much.

    Is Kyoto’s “kyobancha” the same thing as regular bancha? It’s a regional variation – roasted over an open flame in a style specific to Kyoto, giving it a smokier character than standard bancha. The base leaf category is the same; the roasting process is what sets kyobancha apart.

    Where can I actually try bancha? Nio Teas’ bancha is a straightforward place to start, and a simple kyusu teapot on Amazon works fine for brewing it – bancha doesn’t need anything specialized to taste good.

    Where I Landed

    The thing that actually changed how I thought about bancha was realizing how much of what I already liked – hojicha’s toastiness, genmaicha’s popcorn note – was quietly built on this exact tea underneath. Once I tried it plain rather than only encountering it disguised inside something else, it stopped feeling like the tea you settle for and started feeling like a genuinely different, low-key option worth keeping around specifically for the days sencha feels like too much.

  • Kukicha: The Twig Tea That’s Basically Green Tea’s Low-Caffeine Byproduct

    Kukicha: The Twig Tea That’s Basically Green Tea’s Low-Caffeine Byproduct

    Disclosure: This post contains affiliate links. If you buy through one of them, I may earn a small commission at no extra cost to you.

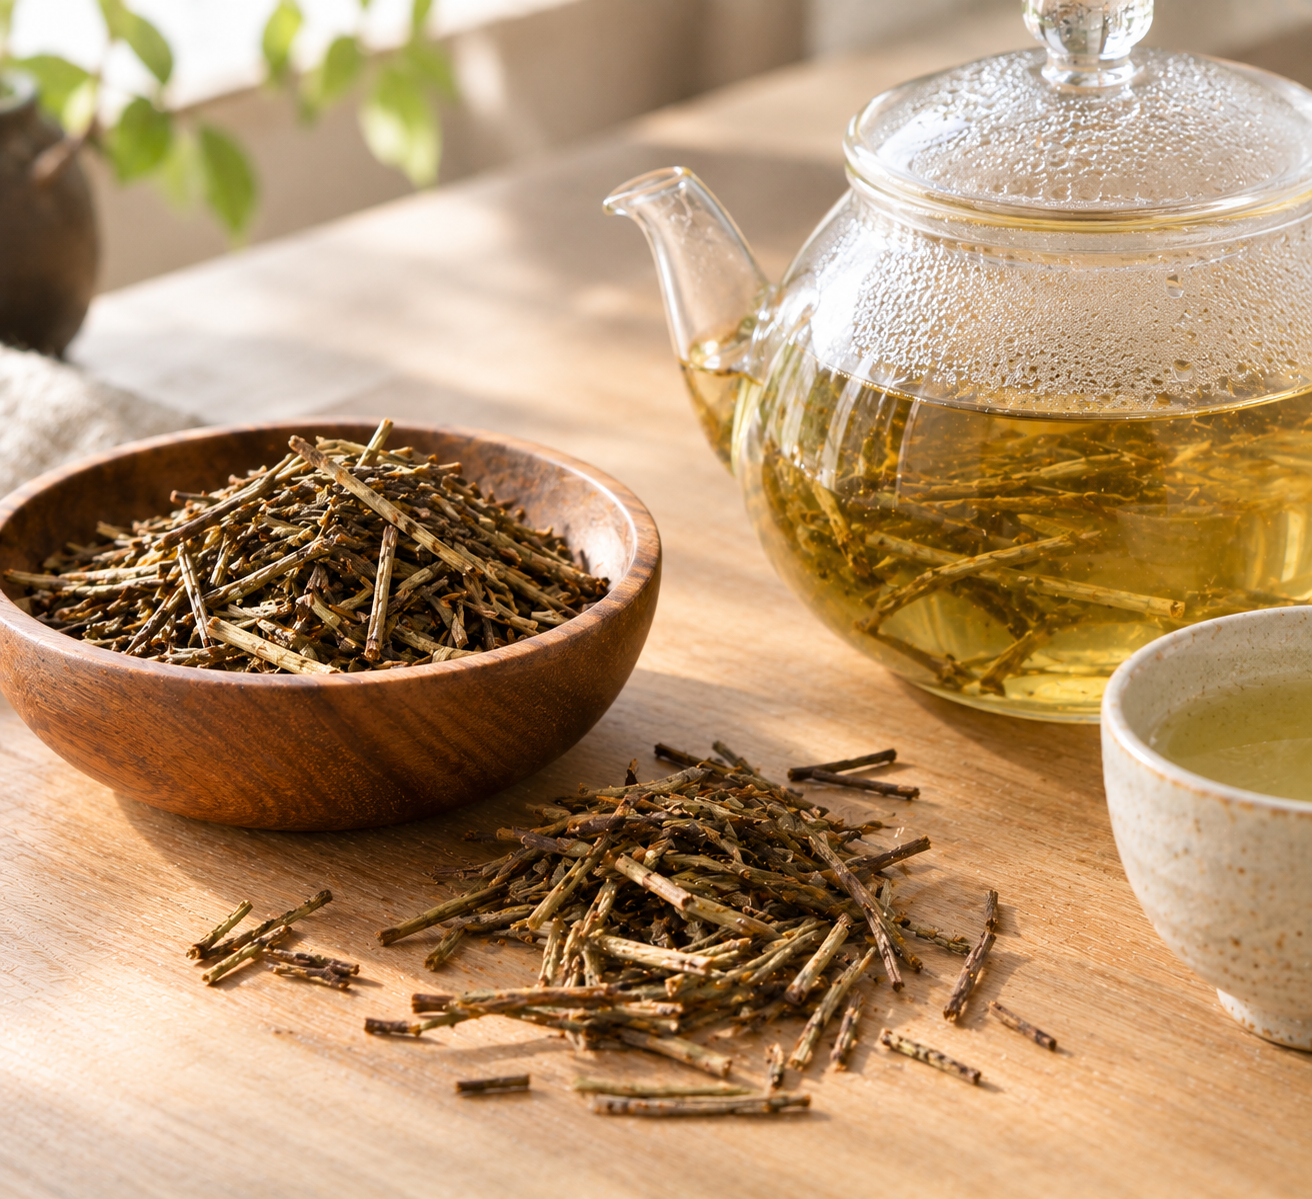
    The first time I saw kukicha described as “twig tea,” I assumed that meant something scrappy or lesser – literal sticks steeped in water. It’s actually the opposite kind of story: kukicha is made from the stems and twigs left over after sencha or matcha leaves are processed, and because caffeine and bitterness concentrate mostly in the young leaves rather than the woodier stems, what you get is a genuinely pleasant, naturally low-caffeine tea that happens to be a byproduct rather than a compromise.

    The Problem You’re Actually Trying to Solve

    Most people looking into kukicha are trying to solve one of two things: finding a green tea they can drink in the evening without the caffeine hit of sencha or matcha, or figuring out what to do with the stems left over if they’re processing their own tea. Kukicha answers both, but it gets brewed wrong constantly – people treat it like sencha and oversteep it in water that’s too hot, which is one of the few ways to actually make this forgiving tea taste bad.

    Who This Article Is NOT For

    • If you want maximum caffeine from your green tea, kukicha is deliberately the wrong choice here – my matcha vs. coffee caffeine comparison or a standard sencha is a better fit for that.
    • If you’re drinking tea specifically for the umami and richer flavor of whole leaves, kukicha’s stem-based character is intentionally lighter and sweeter rather than deep – my sencha vs. gyokuro comparison covers that leaf-forward end of the spectrum instead.
    • If you’ve never brewed Japanese green tea before and want a single starting point, a standard sencha is the more typical entry tea – kukicha is a worthwhile detour once you already know what you like.

    What Kukicha Actually Is

    Kukicha is made from the stems, stalks, and twigs separated out during the final sorting stage (shiage) of sencha or matcha production – not a tea grown and picked on its own, but a genuine byproduct of premium tea that would otherwise go to waste. That byproduct status is exactly why it’s traditionally inexpensive despite tasting good on its own merits, and why it’s long been associated with macrobiotic diets as an everyday, sustainable tea.

    There’s a quality hierarchy within kukicha worth knowing. Standard kukicha uses stems from various green teas, including sencha and fukamushi sencha. Karigane, the higher-quality version, comes specifically from gyokuro stems – and when that gyokuro-derived kukicha comes from Kyushu specifically, it’s sometimes called shiraore. If you see “karigane” on a package, you’re looking at the stem-tea equivalent of upgrading from sencha to gyokuro.

    Why It’s So Low in Caffeine and Astringency

    Caffeine and catechins (the compounds responsible for bitterness and astringency) concentrate heavily in young leaves, which is the plant’s own defense mechanism against insects. Stems and twigs, being older and woodier, simply contain much less of both. The rough numbers: kukicha runs somewhere around 5-10mg of caffeine per 8-ounce serving, compared to roughly 20-30mg for sencha and 70-80mg for matcha – a meaningful drop, not a marginal one.

    The flip side of lower catechins is higher theanine relative to the tea’s other compounds, which is part of why kukicha tends to taste sweeter and less astringent than leaf teas, with a milder, nuttier, slightly creamy character rather than sencha’s grassier bite. It’s also genuinely hard to oversteep into bitterness the way you can with sencha, since there’s simply less of the compound responsible for that bitterness to extract in the first place.

    How to Brew It

    For unroasted (green) kukicha:

    • Water temperature: 75-80°C (167-176°F)
    • Amount: 4-5g of kukicha per 200ml water
    • First steep: 60-90 seconds
    • Good for 2-3 infusions, though flavor drops off noticeably after the first

    For roasted kukicha (often labeled bocha):

    • Water temperature: 85-95°C (185-203°F) – it tolerates hotter water well
    • Steep time: 30-60 seconds
    • Good for up to 5 infusions

    Roasting changes the character substantially – unroasted kukicha stays pale gold with a light, vegetal sweetness, while roasted bocha develops a warmer, toasty, almost grain-like flavor from the same compounds (pyrazines) that show up in roasted hojicha. If you already like hojicha, roasted kukicha is worth trying as a close relative with an even gentler caffeine profile.

    A Few Things People Ask Me

    Is kukicha the same thing as hojicha? No, though they’re often confused. Hojicha is roasted sencha leaves (and sometimes stems); kukicha is specifically stems and twigs, which may or may not be roasted afterward. A roasted kukicha and a hojicha can taste fairly similar, but they start from different parts of the plant.

    Is karigane worth paying more for over regular kukicha? If you already like kukicha’s flavor and want to see the upper end of it, yes – karigane’s gyokuro-stem origin gives it a noticeably smoother, sweeter cup than stems sourced from sencha. If you’re just trying kukicha for the first time, standard kukicha is a perfectly good and cheaper starting point.

    Can I drink kukicha at night without worrying about caffeine? It’s genuinely one of the better options if you want green tea’s flavor without much caffeine – at roughly a quarter of sencha’s caffeine content, most people can drink it in the evening without issue, though anyone very caffeine-sensitive should still treat “low caffeine” as different from “no caffeine.”

    Where can I actually get kukicha or karigane? Nio Teas’ kukicha is a straightforward place to start, and a basic kyusu-style teapot on Amazon works fine for brewing it if you don’t already have one – kukicha doesn’t demand anything specialized.

    Where I Landed

    What changed my view of kukicha wasn’t the tea itself so much as the framing – once I stopped thinking of it as “leftover tea” and started thinking of it as a deliberately different part of the same plant, the low caffeine and mild sweetness stopped feeling like a downgrade from sencha and started feeling like their own, genuinely useful thing. It’s the tea I actually reach for later in the day now, precisely because it isn’t trying to be sencha.

  • Dirty Matcha (Matchiato): How to Actually Get the Layers Right

    Dirty Matcha (Matchiato): How to Actually Get the Layers Right

    Disclosure: This post contains affiliate links. If you buy through one of them, I may earn a small commission at no extra cost to you.

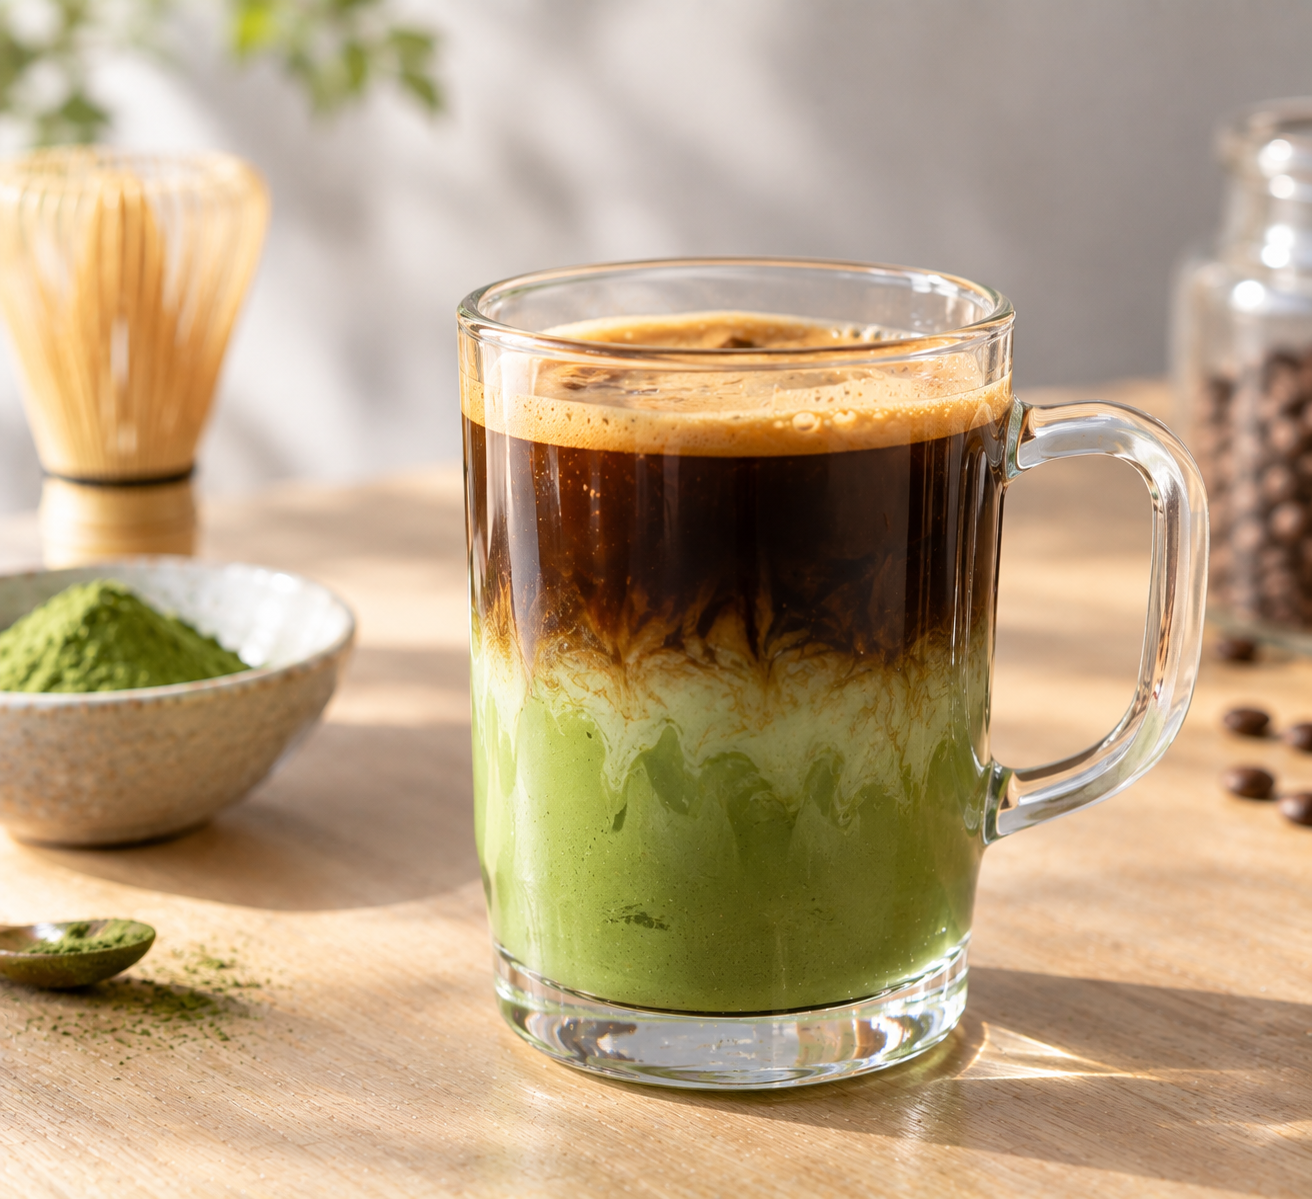
    A dirty matcha – sometimes called a matchiato – is exactly what it sounds like: matcha and espresso in the same glass, deliberately not mixed together into one uniform drink. The name comes from that imperfection. Coffee sits on top, matcha sits on the bottom, and you drink through both layers rather than a single blended flavor. My first attempt turned into a fully mixed, muddy-looking latte because I didn’t understand that the “dirty” part – the messy, unmixed layering – is the entire point, not a mistake to fix.

    The Problem You’re Actually Trying to Solve

    Most people attempting a dirty matcha at home either stir everything together immediately, losing the visual layering and the point of drinking through two distinct flavors, or get the ratio wrong and end up with coffee completely overpowering the matcha (or the reverse). Getting both the layering technique and the ratio right is really the whole recipe.

    Who This Article Is NOT For

    • If you want a fully blended matcha coffee drink rather than distinct layers, this technique isn’t necessary for you – just combine matcha and coffee together directly rather than layering.
    • If you’re sensitive to caffeine, this combines two caffeinated drinks into one, so it runs notably higher than either a matcha latte or a coffee alone – my matcha vs. coffee caffeine comparison is worth reading first if that’s a concern.
    • If you just want a simple matcha latte without any coffee involved, my guide to making a matcha latte at home is the more straightforward option.

    The Actual Recipe

    Ingredients:

    • 2 tsp matcha powder
    • 1/4 cup milk (oat milk works particularly well)
    • 2 tbsp hot water (just under boiling), for dissolving the matcha
    • 2 tsp sugar, or to taste
    • 2 tsp espresso or strong coffee
    • Ice

    Method: Sift and whisk the matcha into the hot water until completely smooth, then whisk in the sugar and milk. Pour this matcha mixture into a glass filled with ice. Separately, pull or brew your espresso and let it cool slightly – chilling the coffee somewhat before pouring helps it layer rather than immediately blending into the matcha below. Pour the espresso over the ice slowly, directly on top of the matcha layer rather than stirring it in. Done correctly, you get a visibly distinct dark coffee layer sitting over the pale green matcha, which you drink through both layers of rather than mixing.

    The 1:1 ratio of matcha to coffee by volume above is a reasonable starting point, but it’s worth adjusting to taste: if the coffee is overpowering the matcha’s flavor, reduce the espresso slightly and increase the matcha a touch rather than assuming the ratio is fixed.

    Getting the Layering Right

    Three things actually matter for clean layers rather than a muddy mix:

    Ice, and plenty of it. A glass well-filled with ice before either liquid goes in gives the two layers something to separate around, rather than immediately merging in a glass with too little ice and too much empty space.

    Pour slowly, and pour the coffee last. The matcha-milk mixture goes in first, over the ice; the coffee goes in afterward, poured slowly and gently rather than dumped in, which helps it settle as a distinct top layer rather than crashing through and mixing everything below.

    Let the coffee cool slightly first. Pouring hot espresso directly onto ice and cold matcha creates more turbulence and mixing than pouring espresso that’s had a minute or two to cool down first – the temperature difference between the two liquids is part of what keeps them from blending immediately.

    A Reasonable Substitute If Coffee Feels Too Harsh

    If straight espresso feels too aggressive against the matcha’s own flavor, hojicha powder is a genuinely good substitute for the coffee layer – it shares some of coffee’s roasted character without coffee’s sharper bitterness, giving you a tea-forward alternative that still creates the same layered visual and flavor effect, just gentler.

    A Few Things People Ask Me

    Is a dirty matcha the same thing as a matchiato? Functionally, yes – both names describe the same drink (matcha plus espresso, deliberately layered rather than fully mixed), with “dirty matcha” being the more common term and “matchiato” showing up as a playful variant riffing on “macchiato.”

    How much caffeine does a dirty matcha actually have compared to a regular latte? Meaningfully more – you’re combining matcha’s caffeine with a full shot of espresso, so the total easily exceeds either drink on its own. This isn’t a light afternoon pick-me-up; treat it more like a double-strength coffee in terms of caffeine load.

    Do I have to drink it through the layers, or is it fine to stir it together? Stirring is completely fine if you’d rather have a uniform flavor – the layered presentation is traditional and visually distinctive, but nothing about the drink requires drinking it unmixed. Some people stir the first sip to taste the layers separately, then mix the rest.

    What matcha works best for this specifically? Culinary-grade matcha on Amazon is fine here, since the coffee’s flavor is doing plenty of the work alongside it – no need for an expensive ceremonial-grade tin for a drink that’s half espresso anyway. Nio Teas’ matcha is what I used in testing the recipe above.

    Where I Landed

    The thing that took me longest to accept was that “dirty” wasn’t describing a flaw in my technique – the imperfect, unmixed layering is the actual design of the drink. Once I stopped trying to make it look like a clean, uniform latte and just let the coffee sit messily on top of the matcha, the drink started working the way it’s supposed to: two distinct flavors you move through in one glass, rather than one blended, muddier one.

  • Matcha for Breakfast: Overnight Oats and Pancakes Worth Waking Up For

    Matcha for Breakfast: Overnight Oats and Pancakes Worth Waking Up For

    Disclosure: This post contains affiliate links. If you buy through one of them, I may earn a small commission at no extra cost to you.

    Matcha at breakfast usually means a latte on the side, not something actually mixed into the food itself. That’s a missed opportunity – matcha holds up well in both a no-cook overnight oats base and a proper cooked pancake batter, and in both cases it’s doing more than adding color. The bitterness cuts through the natural sweetness of maple syrup or fruit toppings the same way it does in a dessert or cocktail, just at breakfast volume rather than dessert richness.

    The Problem You’re Actually Trying to Solve

    Matcha breakfast recipes online often treat the matcha as an afterthought – a spoonful stirred in at the end that leaves visible green clumps in the finished dish, rather than fully incorporated the way the rest of the ingredients are. Both recipes below solve that the same way: get the matcha fully dissolved into a liquid before it meets anything solid, rather than trying to fix clumping after the fact.

    Who This Article Is NOT For

    • If you want a quick drinkable breakfast rather than something you eat with a spoon or fork, my guide to making a matcha latte at home is the faster option.
    • If you’re looking for matcha desserts rather than breakfast food specifically, my matcha dessert guide covers ice cream, cheesecake, and pudding instead.
    • If you don’t have a blender and don’t want to whisk matcha by hand carefully, the overnight oats recipe specifically benefits from blending – it’s still possible without one, just more prone to clumping.

    Two Matcha Breakfasts Worth Making

    1. Matcha Overnight Oats

    A no-cook, make-ahead breakfast that’s ready the moment you wake up, with the matcha fully blended in rather than clumped on top.

    Ingredients (makes 3 servings):

    • 2 cups creamy non-dairy milk (cashew, oat, or soy work best)
    • 2 tbsp maple syrup, plus more to taste
    • 1 tsp vanilla extract
    • Pinch of salt
    • 1 tbsp matcha powder
    • 2 cups rolled or quick oats
    • 2 tbsp chia seeds
    • 1/2 cup plain unsweetened yogurt (dairy-free or regular)

    Method: Add the milk, maple syrup, vanilla, salt, and matcha to a blender and blend on high for 30-45 seconds, until the matcha is fully incorporated with no visible clumps – this step is what actually prevents the gritty, unevenly green result most people get from just stirring matcha into oats directly. In a separate large bowl, combine the oats and chia seeds. Pour the blended matcha milk over the dry ingredients, add the yogurt, and stir well. Let it sit for 5 minutes, stir again, then let it rest another 5 minutes to thicken further. Transfer to jars and refrigerate for at least 4 hours, ideally overnight. If you don’t have a blender, an immersion blender or even a chasen whisked vigorously into the milk first can substitute, though the blender gives the most reliably smooth result.

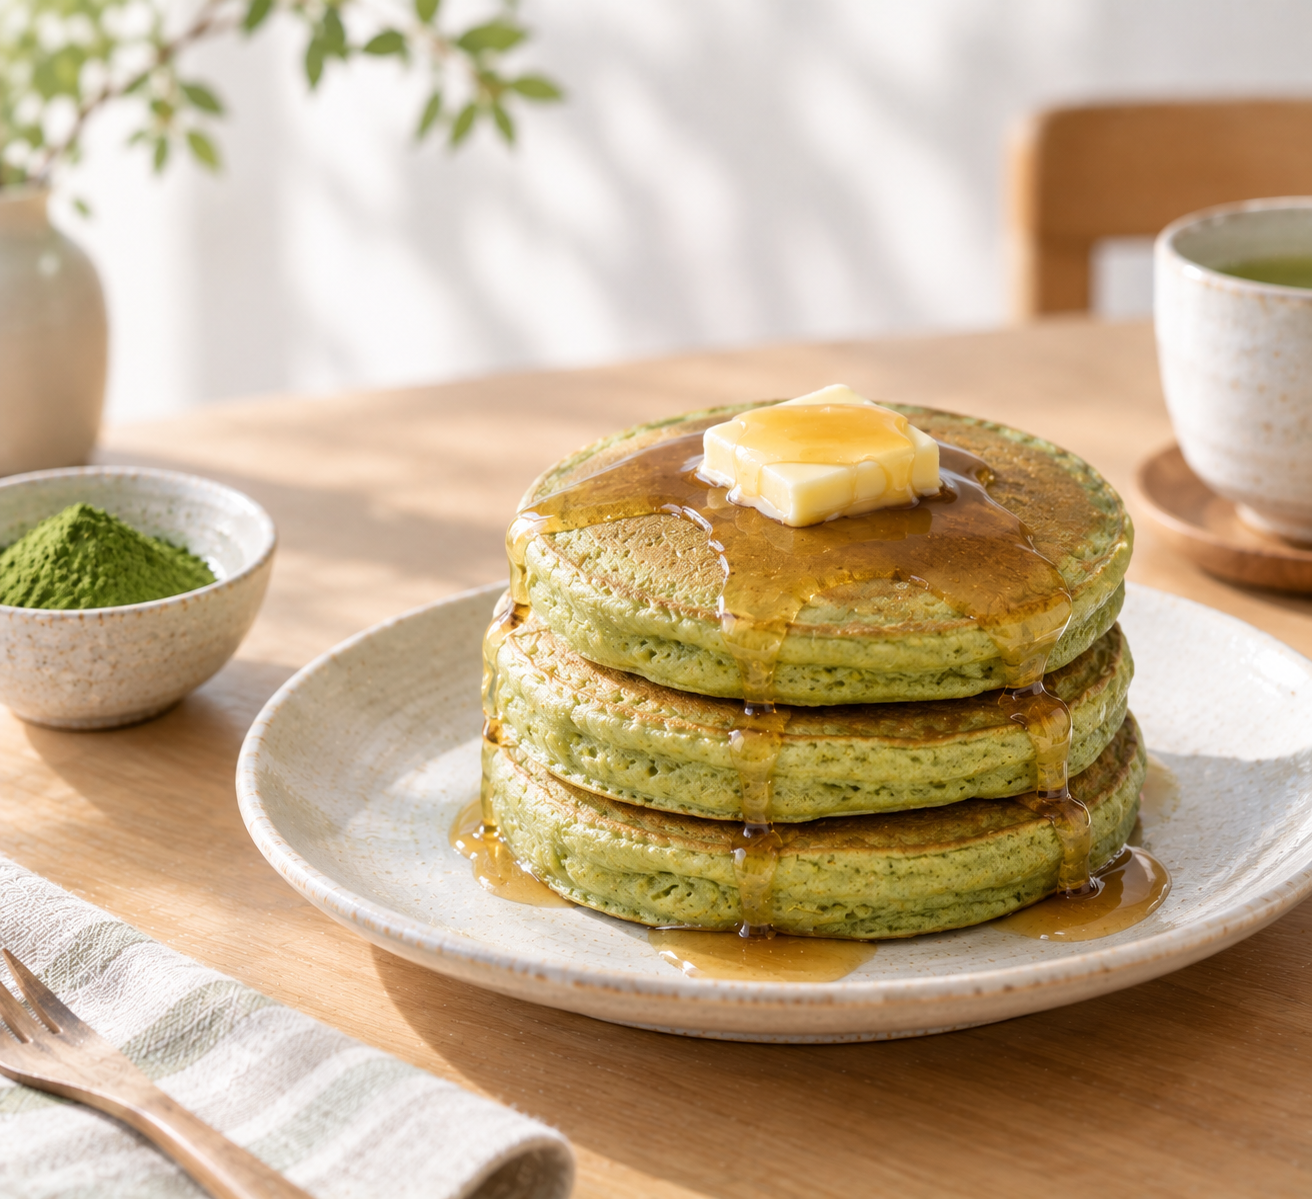
    2. Fluffy Matcha Pancakes

    A proper cooked breakfast for when overnight oats feels too light, using matcha the same way you’d use cocoa powder in a chocolate pancake – sifted into the dry ingredients rather than dissolved separately.

    Ingredients (serves 4):

    • 1 1/2 cups all-purpose flour
    • 2 1/2 tsp baking powder (aluminum-free, to avoid a metallic taste fighting the matcha)
    • 1 tbsp matcha powder
    • 1/2 tsp salt
    • 1 tbsp sugar
    • 1 1/4 cups milk
    • 1 egg
    • 1 tsp vanilla extract
    • 3 tbsp melted butter

    Method: Sift together the flour, baking powder, matcha, salt, and sugar in a large bowl – sifting matters more here than with most dry ingredients, since matcha clumps more than flour does on its own. Make a well in the center, add the milk, egg, vanilla, and melted butter, and whisk until nearly smooth – stop as soon as most lumps disappear rather than mixing until perfectly uniform, since overmixing is what makes pancakes dense instead of fluffy. Heat a griddle to 300-350°F, grease lightly, and pour 1/4 cup of batter per pancake. Cook for about 2 minutes until the edges look set and bubbles appear on the surface, then flip and cook about another minute. Serve with your preferred toppings.

    A Few Things People Ask Me

    Can I use ceremonial-grade matcha for either of these, or should I stick with culinary-grade? Culinary-grade is the more sensible choice for both – neither recipe is showcasing matcha’s flavor on its own the way drinking it does, and culinary-grade holds up better against the other ingredients while costing less.

    Why does my matcha pancake batter still have small green flecks even after sifting? Sifting reduces clumping significantly but doesn’t always eliminate it completely by hand – if you want a fully smooth result, whisking the matcha into a small amount of the milk first (the same technique used in the overnight oats recipe) before combining with the rest of the wet ingredients gets you closer to zero visible flecks.

    How long do matcha overnight oats keep in the fridge? Up to about 5 days in a sealed container, making this genuinely useful for a make-once, eat-all-week breakfast routine rather than something you prep fresh daily.

    What matcha would you recommend keeping on hand for breakfast recipes like these? Culinary-grade matcha on Amazon is the practical choice here, and Nio Teas’ matcha is what I used for both recipes above if you want a specific brand to start with.

    Where I Landed

    Both of these recipes work for the same underlying reason: get the matcha smooth before it meets anything else, whether that’s blending it into liquid for the oats or sifting it into dry ingredients for the pancakes. Once that step is handled properly, matcha stops being a garnish you’re working around and becomes just another breakfast ingredient – one that happens to add a genuinely useful bit of bitterness against all that maple syrup.

  • Matcha Mocktails: Non-Alcoholic Drinks Worth Making on Purpose

    Matcha Mocktails: Non-Alcoholic Drinks Worth Making on Purpose

    Disclosure: This post contains affiliate links. If you buy through one of them, I may earn a small commission at no extra cost to you.

    Most mocktails feel like an afterthought – the “virgin” version of something built around alcohol, missing whatever the alcohol was contributing and never quite replacing it. Matcha mocktails don’t have that problem, because matcha isn’t standing in for the alcohol’s flavor role. It’s doing the same job it does in a matcha cocktail: providing bitterness and depth that a purely sweet, fruity drink usually lacks. These recipes aren’t lesser versions of anything – they’re built to work fully non-alcoholic from the start.

    The Problem You’re Actually Trying to Solve

    Most matcha “mocktails” you’ll find online are just matcha cocktail recipes with the alcohol removed and nothing added to fill the gap it left, which usually results in something thinner and less interesting than the original. A mocktail built around matcha from the start – rather than alcohol with matcha added, minus the alcohol – avoids that problem, since matcha’s own bitterness and body were always doing real work in the drink.

    Who This Article Is NOT For

    • If you actually want the alcoholic versions of these drinks, my matcha cocktail guide covers gin, whiskey, tequila, and bourbon-based versions instead.
    • If you want a simple daily matcha drink rather than something more elaborate for entertaining, my guide to making a matcha latte at home is the more everyday option.
    • If you’re avoiding caffeine entirely, these all use real matcha rather than a decaffeinated substitute, so they’re not a caffeine-free choice.

    What Makes a Matcha Mocktail Work

    The same technical basics that apply to matcha cocktails apply here: matcha needs to be dissolved into a smooth paste or slurry with warm water before it goes anywhere near ice or carbonation, since it clumps in cold liquid on its own. And the same flavor logic holds too – matcha’s bitterness pairs best with bright citrus, mint, ginger, and tropical fruit flavors that give it something to contrast against, rather than purely sugary mixers that just make the whole drink taste flat and one-note.

    Three Matcha Mocktails Worth Making

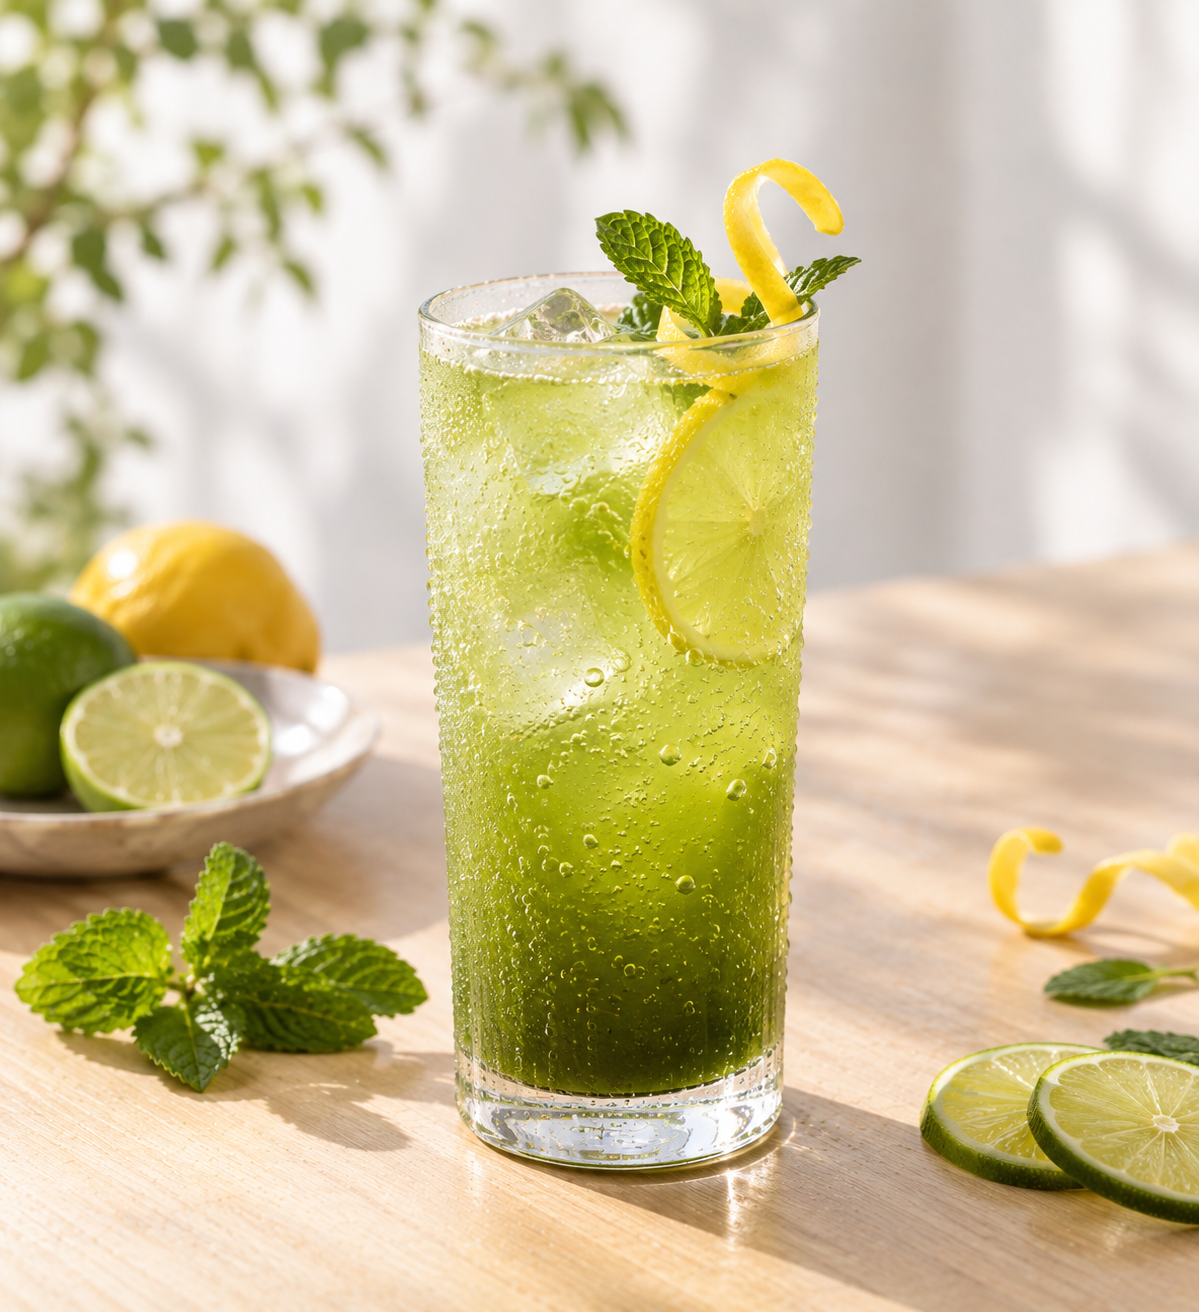
    1. Matcha Lemon Fizz

    A bright, citrusy sparkling drink that’s easy to put together and genuinely refreshing rather than just sweet.

    Ingredients:

    • 1 tbsp matcha powder
    • Juice of 1/4 lemon
    • 1 tsp sugar
    • Lemon-flavored sparkling water, to top
    • Ice

    Method: Shake the matcha, lemon juice, sugar, and a splash of water together with ice until the matcha is fully dissolved and frothy. Strain into a glass over fresh ice and top with sparkling lemon water. Garnish with a light sprinkle of matcha and a lemon twist. The sparkling water does a lot of the work here, carrying the citrus and giving the drink lift without needing anything more complicated.

    2. Matcha Mojito Mocktail

    A muddled mint-and-lime drink that borrows the mojito’s structure entirely, minus the rum.

    Ingredients:

    • 1 tsp matcha powder
    • 1 cup hot water (around 160°F/70°C)
    • 1 tsp maple syrup or mint simple syrup
    • 1 tbsp lime juice
    • 2 lime slices
    • 3-4 mint leaves
    • Ice

    Method: In your serving glass, muddle the mint leaves and lime slices together to release their oils – this matters more here than in most drinks, since there’s no alcohol to help carry the aromatics, so a good muddle does real work. In a separate cup, sift and whisk the matcha into the hot water until completely smooth, then stir in the maple syrup until dissolved. Fill the glass with ice, pour the matcha mixture over the muddled mint and lime, stir, and garnish with extra mint and lime.

    3. Matcha Piña Colada Mocktail

    A creamy, tropical option that leans into coconut and pineapple rather than citrus.

    Ingredients:

    • 1 tsp matcha powder
    • 1 oz warm water
    • 1/2 cup pineapple juice
    • 1/4 cup coconut milk
    • 1 tbsp cream of coconut, optional
    • 1/2 cup ice
    • Pineapple slice, for garnish

    Method: Whisk the matcha with the warm water until smooth and frothy – do this step separately before it touches anything cold, same principle as the other recipes. In a blender or shaker, combine the pineapple juice, coconut milk, cream of coconut if using, and ice. Add the whisked matcha and blend or shake until fully combined. Pour into a chilled glass and garnish with a pineapple slice.

    A Few Things People Ask Me

    Which of these is the easiest to start with? The Matcha Lemon Fizz, by a good margin – it’s the fewest steps and the most forgiving if your matcha doesn’t dissolve perfectly on the first try, since the sparkling water and shaking do most of the work.

    Can I make any of these ahead of time for a party? The matcha-and-liquid base for the piña colada version can be pre-blended and kept chilled for a few hours, though it’s best shaken again just before serving since it can separate slightly. The lemon fizz and mojito versions are best made fresh, since their sparkling and muddled elements don’t hold up well sitting around.

    Do these have less caffeine than the alcoholic cocktail versions? No – removing the alcohol doesn’t change the matcha content, so the caffeine level is roughly the same as the cocktail versions using an equivalent amount of matcha, just without the alcohol’s effects layered on top.

    What matcha works best for mocktails specifically? Since these drinks have plenty of competing flavor from citrus, mint, or coconut, culinary-grade matcha on Amazon works just as well as a pricier ceremonial-grade tin – save the ceremonial grade for drinking matcha on its own.

    Where I Landed

    What changed my mind about mocktails generally was realizing a good one isn’t built by subtraction – it’s built the same way a good cocktail is, just without alcohol as one of the flavor components from the start. Matcha happens to be particularly well-suited to that approach, since its bitterness and body were never dependent on the alcohol in the first place. If you want to try a specific brand across all three of these, Nio Teas’ matcha is what I used testing each one.

  • Cooking With Sencha: Ochazuke and Other Ways to Actually Eat Your Tea

    Cooking With Sencha: Ochazuke and Other Ways to Actually Eat Your Tea

    Disclosure: This post contains affiliate links. If you buy through one of them, I may earn a small commission at no extra cost to you.

    For years I only thought of sencha as something to drink, and threw the spent leaves straight in the compost after steeping – which, it turns out, was wasting a genuinely useful ingredient rather than a spent one. Sencha shows up in Japanese cooking well beyond the teacup: poured over rice as ochazuke, dried and turned into a seasoning powder, even mixed straight into rice or noodles. Once I started treating tea as something with a second life after brewing, I stopped throwing away half of what I was already buying.

    The Problem You’re Actually Trying to Solve

    Most people who cook with tea at all default to matcha, since it’s a powder that mixes easily into batter or dough. Sencha gets treated as purely a drinking tea, which means both the brewed tea itself (as a savory broth) and the leftover leaves after steeping go completely unused as ingredients, when both have real culinary applications specific to Japanese cooking that don’t require any special technique to try.

    Who This Article Is NOT For

    • If you’re looking for baking with matcha specifically, my matcha baking guide covers that separately – the technique and use case there is quite different from what follows.
    • If you don’t already drink sencha regularly, generating “spent leaves” as a byproduct of your normal tea habit is really the natural entry point here – buying tea specifically to throw away the leaves afterward defeats the appeal.
    • If you’re vegetarian or avoid fish generally, the classic ochazuke toppings below lean heavily on salmon and fish roe – the tea-over-rice base still works fine, but you’ll want to swap in pickled vegetables or umeboshi as the topping instead.

    Ochazuke: Tea Poured Over Rice

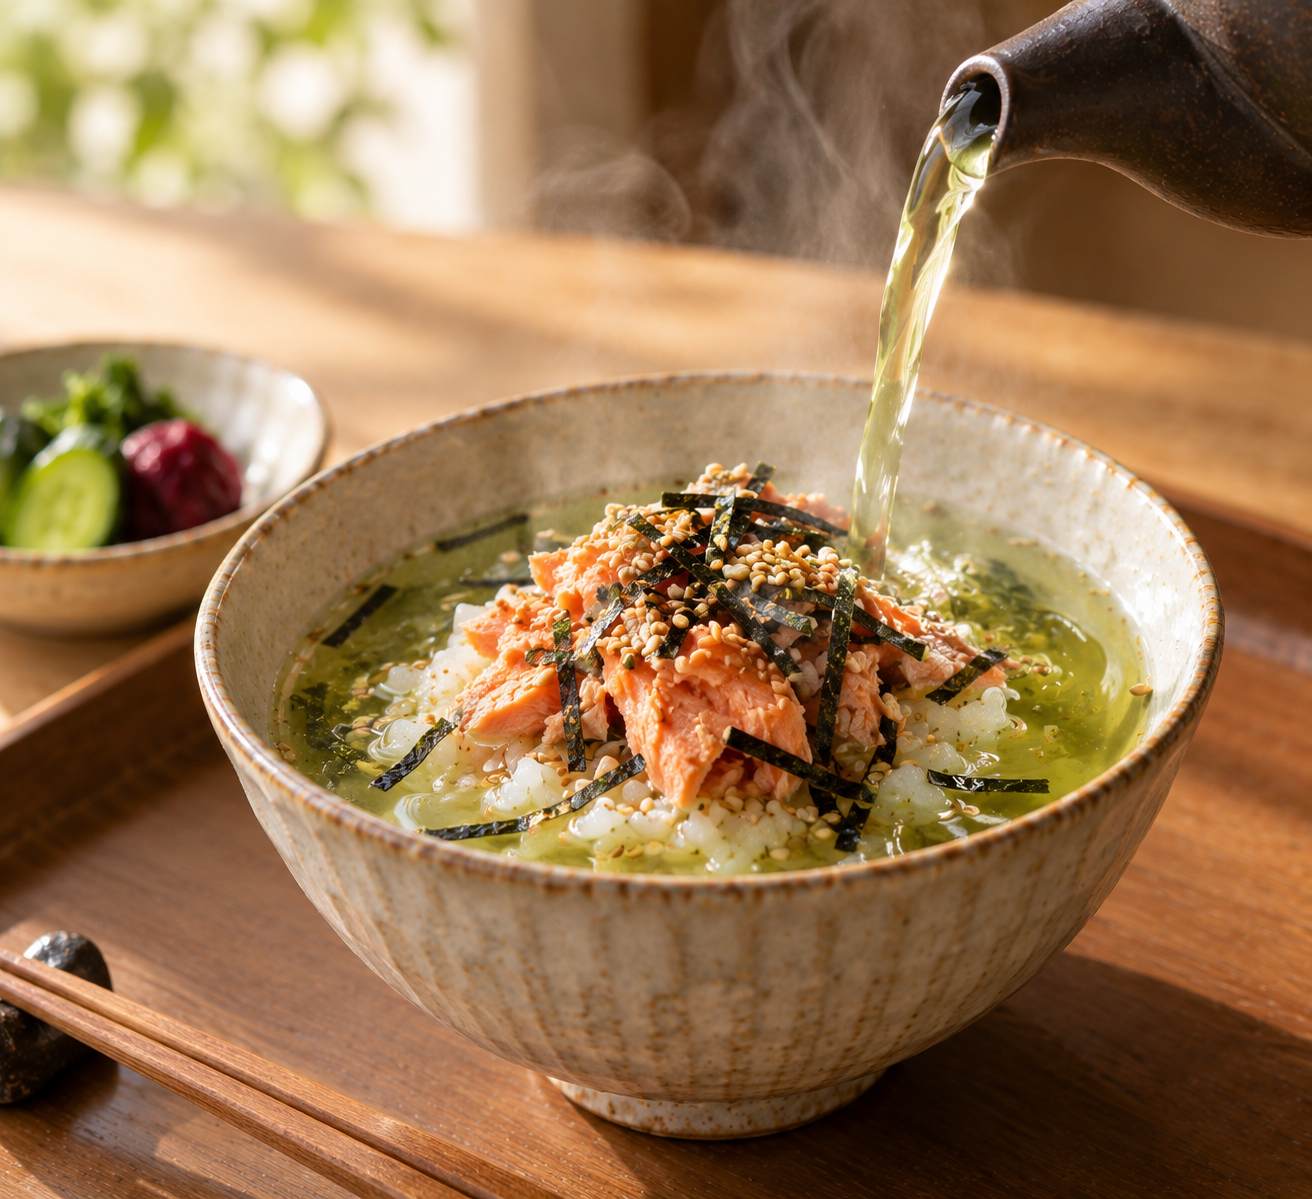
    Ochazuke is the most direct and well-known way sencha shows up in a meal rather than a cup – literally tea poured over a bowl of rice, plus toppings, eaten as a light meal or a way to use up leftover rice.

    The base: Cooked Japanese short-grain rice in a bowl, topped with something savory – classic options include flaked cooked salmon, umeboshi (pickled plum), salmon roe, shredded nori, sesame seeds, and a few sprigs of mitsuba or scallion.

    The tea: Brew 2 teaspoons of sencha leaves in about a cup of hot water for 1-2 minutes – genmaicha and hojicha work here too, each giving a slightly different character to the dish. A splash of soy sauce is a common addition to the brewed tea before pouring.

    Putting it together: Arrange the rice and toppings in a bowl first, then pour the hot tea over until it comes about halfway up the rice – not a full soup, just enough liquid to soften and flavor the top layer of rice while leaving the bottom more intact. Add wasabi if you want extra sharpness.

    There’s also a cold summer variation using chilled tea (or cold dashi) poured over room-temperature rice, which is worth trying specifically in hot weather when a hot bowl of anything feels unappealing.

    Three Things to Do With Spent Tea Leaves

    Once you’ve brewed sencha the normal way, the leaves themselves aren’t actually done working – they’ve released most, but not all, of their flavor and nutrients into the water.

    Ohitashi-style side dish. Blanch the used leaves briefly if you want a softer texture, squeeze out the excess water, then dress lightly with soy sauce and scatter bonito flakes on top. This turns leftover leaves into a small side dish rather than something to discard.

    Mixed into rice or noodles. Finely chop the spent leaves and stir them into freshly cooked rice, or add them during the final stage of cooking. The same idea works with noodles – fold chopped leaves into warm soba or scatter over udon, especially alongside sesame and a bit of soy sauce.

    Dried into a seasoning powder. Dry the used leaves slowly in a pan over low heat, stirring occasionally, until all the moisture is gone – this takes roughly five to seven minutes. Once fully dry, crumble the leaves and blend with sesame, dried bonito flakes, and salt to make a simple furikake-style seasoning. It doesn’t keep for long, so make it in small batches and use it within a few days.

    A Few Things People Ask Me

    Do I need to use fresh sencha for ochazuke, or can I use whatever’s already brewed? Freshly brewed is better for flavor – a stronger, more deliberate steep specifically for the dish tends to hold up better against the rice and toppings than tea that’s been sitting around cooling for a while.

    Is it safe to eat the actual tea leaves, not just drink the brewed tea? Yes – tea leaves are edible, and the practice of eating brewed leaves (as in the ohitashi-style dish above) is a real, traditional use rather than an unusual or risky one.

    Can I use gyokuro or fukamushi sencha instead of standard sencha for any of this? Generally yes, though gyokuro’s more delicate umami (see my sencha vs. gyokuro comparison for why) is arguably wasted poured over rice with strong toppings like salted salmon – it’s better preserved by drinking on its own. Standard or fukamushi sencha, with their more robust flavor, hold up better as an ingredient rather than purely a drink.

    What’s a good sencha to keep on hand specifically for cooking with, rather than just drinking? Nio Teas’ sencha works fine for this – you don’t need a premium single-origin leaf for cooking applications the way you might for drinking on its own. A donabe-style rice bowl on Amazon is also worth having if you plan to make ochazuke regularly, since the wider, shallower shape suits pouring tea over rice better than a standard deep bowl.

    Where I Landed

    The shift that actually mattered here wasn’t learning a new recipe – it was realizing sencha didn’t stop being useful the moment I finished drinking it. Between ochazuke as an actual meal and spent leaves turning into a side dish or seasoning, the same bag of tea does noticeably more work than “just a drink” once you start looking at it that way. If you already drink sencha regularly, most of what’s above costs nothing extra to try – it’s just using what you’d otherwise throw away.

  • Japanese Tea Ceremony Utensils: What Each One Actually Does

    Japanese Tea Ceremony Utensils: What Each One Actually Does

    Disclosure: This post contains affiliate links. If you buy through one of them, I may earn a small commission at no extra cost to you.

    The first time I saw a proper tea ceremony setup laid out, I counted at least seven distinct tools before I even got to the bowl and whisk I already recognized – a small silk cloth, a bamboo scoop, a lidded container that wasn’t the bowl, a second bamboo tool shaped like a ladle. It looked like more equipment than the actual drink could possibly justify. It isn’t excess, though – each piece has a specific, singular job, and most of them exist because chanoyu (the tea ceremony) treats the entire preparation, not just the drinking, as the point.

    You don’t need all of this to make good matcha at home – a bowl and a whisk genuinely cover the basics. But understanding what each ceremonial tool does makes it much easier to recognize what you’re looking at if you ever see a full set, whether in a shop, a museum, or an actual ceremony.

    The Problem You’re Actually Trying to Solve

    Most casual explanations of tea ceremony either overwhelm with the full ritual choreography (which utensil moves where, in what order, with what gesture) or undersell it down to just “bowl and whisk,” skipping the several other tools that have real, specific functions. If you want to actually understand what you’re looking at in a tea ceremony set without committing to studying the full ceremonial practice, a plain-language rundown of each piece’s job is the more useful starting point.

    Who This Article Is NOT For

    • If you already own a chawan and chasen and just want to make good matcha at home casually, my matcha whisk buying guide covers the two tools that actually matter for that, without needing the rest of this list.
    • If you want to learn the actual ceremonial choreography and etiquette rather than just what each tool is called and does, my simplified home tea ceremony guide is a better starting point for that.
    • If you’re shopping for a complete ceremonial set to actually practice chanoyu formally, this is background knowledge rather than a buying guide – working with an instructor is the better route for building out a proper set.

    The Core Utensils, One at a Time

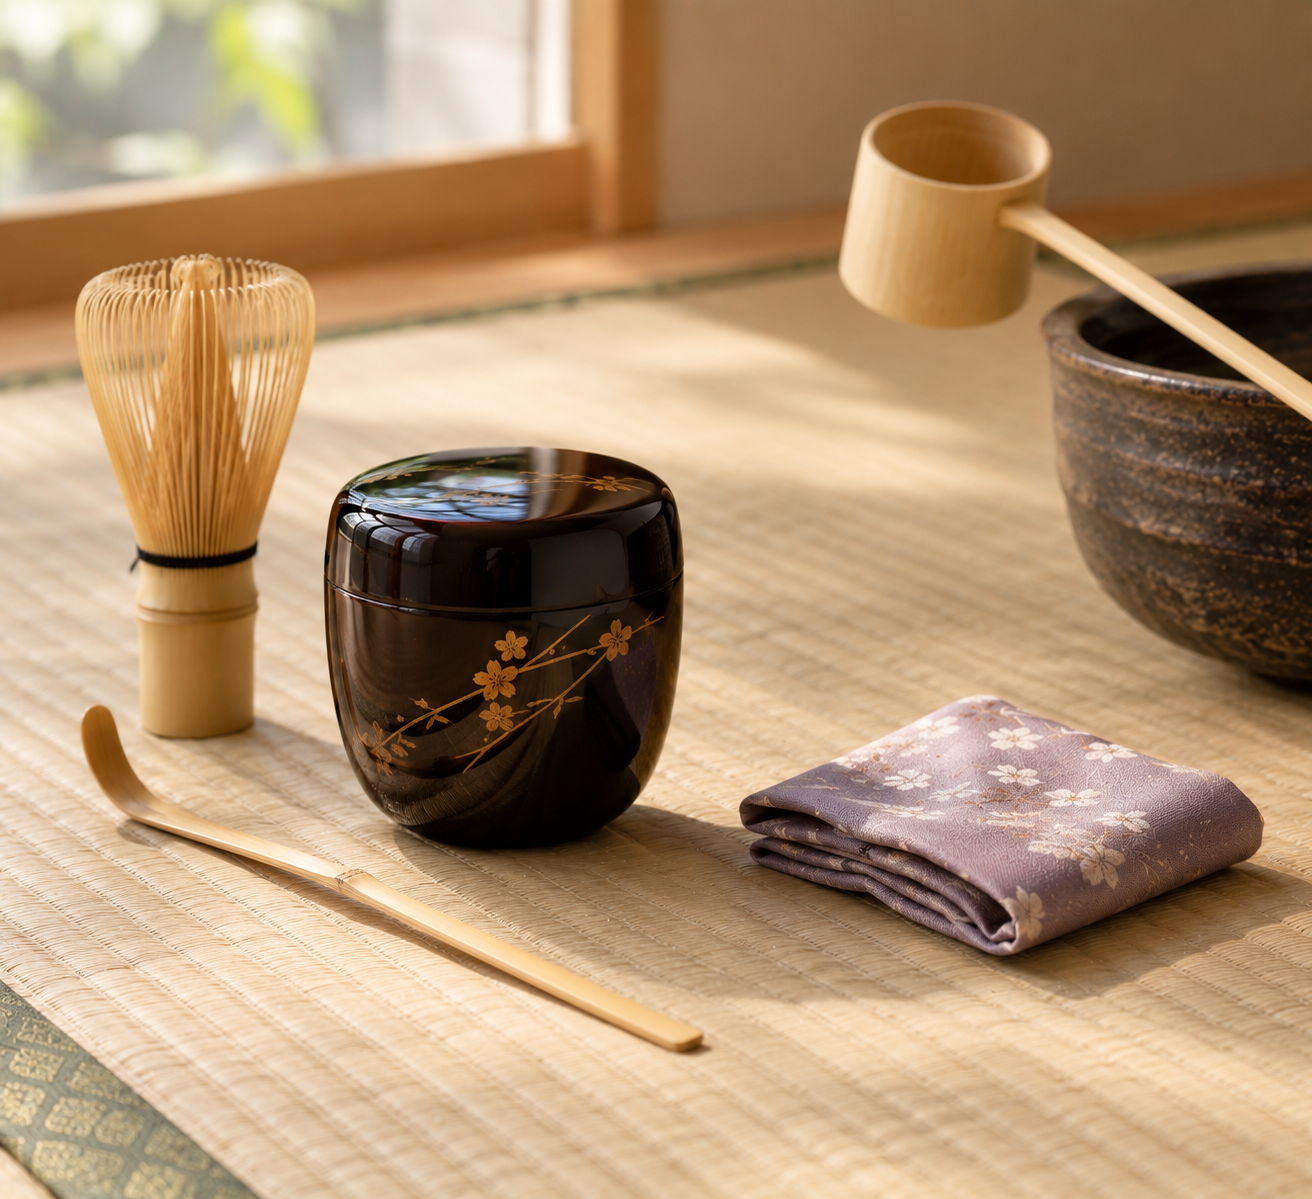
    Chasaku (bamboo scoop). A long, narrow bamboo scoop used to measure and transfer matcha from its caddy into the bowl – typically holding around two grams per scoop. These are often hand-carved, sometimes by tea masters themselves, and can carry real personal or artistic significance well beyond their simple function.

    Natsume. A lacquered wooden tea caddy used specifically for usucha (thin tea, the more casual and common style of matcha preparation). Named for its resemblance to the natsume (jujube) fruit, it’s typically finished in black or red urushi lacquer, often decorated with seasonal motifs that change with the time of year – tying back to the same seasonal sensibility that shows up in chawan and wagashi choices.

    Chaire. A ceramic tea caddy used exclusively for koicha (thick tea, a more concentrated and ceremonially formal preparation), distinct from the natsume both in material and in which style of tea it’s reserved for. Traditionally oblong with an ivory lid, a chaire is often stored in its own protective drawstring pouch when not in use.

    Hishaku. A long-handled bamboo ladle used to transfer hot water from the kettle (kama) to the tea bowl, and to scoop water for cooling. Its handling is one of the more codified parts of the ceremony – specific grips and motions are prescribed depending on what the ladle is doing at that moment.

    Fukusa. A folded silk cloth used to ritually purify the natsume, chasaku, and other utensils before and during the ceremony. It must stay dry throughout – it’s a purification tool, not a cleaning cloth for wiping up spills – and its color traditionally signals the practitioner’s gender (purple for men, orange or red for women, broadly speaking).

    Chakin. A damp linen cloth used to wipe the tea bowl itself between preparations. Where the fukusa purifies dry, the chakin is the tool that actually touches and cleans the bowl with moisture – the two serve related but distinct purification roles and aren’t interchangeable.

    Kensui. A wastewater vessel, made of clay, metal, or wood, into which used rinse water is poured after cleaning the bowl during the ceremony – essentially the practice’s built-in waste container, keeping used water contained and out of view rather than disposed of elsewhere mid-ceremony.

    Mizusashi. A lidded water container, made from ceramic, glass, metal, or wood, holding fresh cold water primarily used to refill the kettle as needed throughout the ceremony.

    Futaoki. A small rest for the kettle’s lid and the hishaku ladle when they’re not actively in use, typically made of bamboo, ceramic, or porcelain – a small detail, but one more example of the ceremony having a designated place for literally everything involved in the process.

    Why So Many Separate Tools

    The pattern across nearly all of these is separation of function and purity: a distinct tool for measuring, a distinct tool for purifying, a distinct tool for handling water, a distinct tool for waste. Nothing does double duty. That’s less about needing that many tools functionally and more about chanoyu treating the entire preparation sequence, not just the finished cup, as the meaningful part of the practice – each tool’s precise, singular role is part of what makes the process itself deliberate and unhurried rather than efficient.

    A Few Things People Ask Me

    Do I need any of these beyond a chawan and chasen to make matcha at home? No – a bowl and whisk are genuinely sufficient for casual home matcha. The rest of this list matters for understanding or practicing formal chanoyu, not for making a good everyday cup.

    What’s the actual difference between the fukusa and the chakin if they’re both cloths? The fukusa is dry and used for ceremonial purification of utensils like the natsume and chasaku; the chakin is damp and used specifically to wipe the tea bowl. They’re not interchangeable, and using one for the other’s job would be a real departure from proper practice.

    Is a chaire always more valuable or formal than a natsume? Generally, yes, in the sense that koicha (which the chaire is used for) is considered the more advanced, formal preparation compared to usucha – but that doesn’t make an individual natsume less well-crafted or valuable on its own terms; the two serve genuinely different tea styles rather than existing on a strict hierarchy.

    Where would I actually start if I wanted to build toward owning some of these pieces? A chasen and chawan first, since those are the tools any regular matcha drinker actually uses. Nio Teas’ matcha tools covers that starting point well, and a natsume-style tea caddy on Amazon is a reasonable next piece if you want something a step beyond the basics without committing to a full ceremonial set.

    Where I Landed

    What struck me most, once I understood what each piece actually did, was how little of it was decorative. Every tool in a full tea ceremony set is solving one specific problem – measuring, purifying, transporting water, containing waste – and none of them overlap in function the way household items so often do. It’s a genuinely efficient system dressed up as an elaborate one, which is a different thing than I expected walking into it.