Category: Japanese Tea Guides

  • Sencha vs. Gyokuro: What’s Actually Different, and Which One You Want

    Sencha vs. Gyokuro: What’s Actually Different, and Which One You Want

    Disclosure: This post contains affiliate links. If you buy through one of them, I may earn a small commission at no extra cost to you.

    I used to assume gyokuro was just “fancier sencha” – a nicer version of the same tea you’d pay more for on a special occasion, the way a reserve wine is still basically the same wine. It isn’t, really. The two are grown differently, taste genuinely different from each other, and even need to be brewed at different temperatures to taste right. Treating gyokuro like expensive sencha is actually the fastest way to waste a good batch of it.

    Both are Japanese green teas, both come from the same tea plant, and both get steamed rather than pan-fired the way most Chinese green tea is. Past that, they diverge more than their similar-sounding names suggest.

    The Problem You’re Actually Trying to Solve

    Most explanations of sencha vs. gyokuro focus entirely on price and prestige – gyokuro costs more, therefore it’s “better” – without explaining the actual mechanism behind why they taste different or how that should change the way you brew each one. Brewing gyokuro the way you’d brew sencha (hotter water, shorter attempts at judging it by feel) is a common way to end up disappointed by a tea that’s genuinely excellent when handled correctly.

    Who This Article Is NOT For

    • If you’re deciding between green tea and matcha rather than between two steeped green teas, that’s a different comparison – my other guides on this site cover matcha specifically.
    • If you want a lower-caffeine option than either of these, gyokuro in particular runs high on caffeine, so my guide to genmaicha will serve you better.
    • If you’re brand new to Japanese green tea and want a forgiving starting point, sencha is that starting point far more than gyokuro is – gyokuro rewards precision in a way that isn’t very forgiving for a first attempt.

    The Actual Difference: Shading

    The single biggest difference between sencha and gyokuro isn’t the leaf itself – it’s whether the tea plant was shaded before harvest, and for how long.

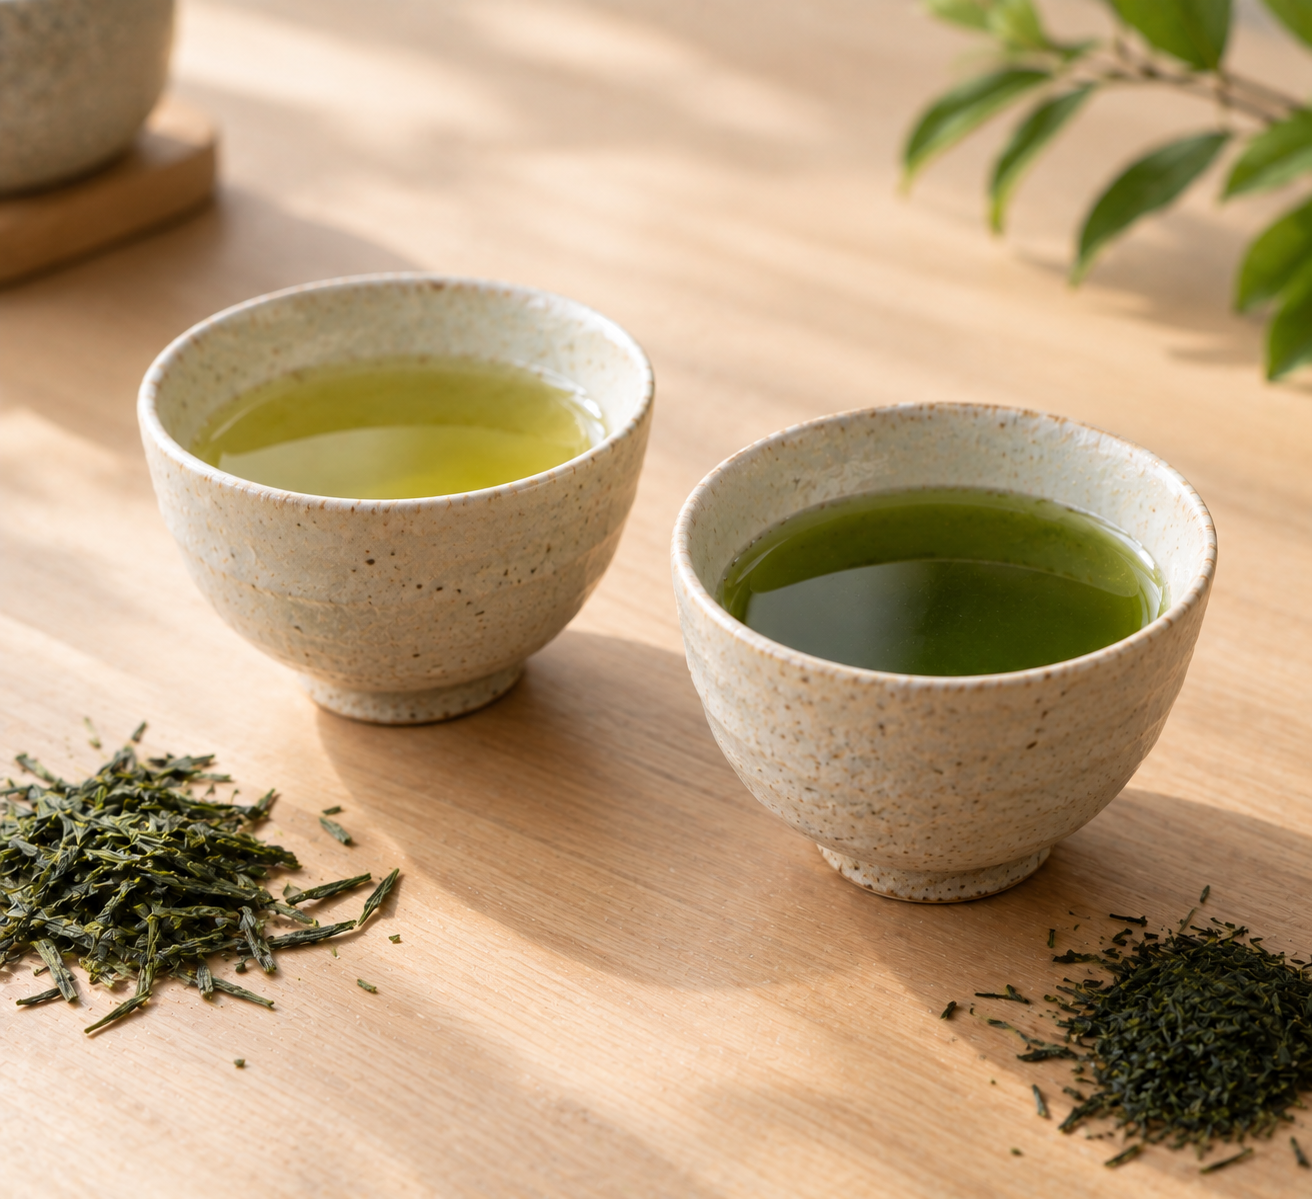
    Gyokuro is shaded for three weeks or more before picking, blocking sunlight from the plant. This does something specific chemically: it suppresses the plant’s production of bitter catechins while allowing L-theanine (the amino acid responsible for umami and sweetness) to build up instead. That’s the entire reason gyokuro tastes the way it does – deeply savory, almost seaweed-like, with very little of the astringency you’d get from an unshaded leaf.

    Sencha is typically grown without shading at all, though a small number of premium sencha varieties get a brief 7-10 day shading period – nowhere close to gyokuro’s three-plus weeks. Without extended shading, sencha develops more catechins and a brighter, more vegetal, slightly citrusy flavor rather than gyokuro’s dense umami.

    This is also, not coincidentally, why gyokuro has historically been the more prestigious of the two – it was reserved for Japan’s imperial court at one point, and the extra weeks of shaded cultivation plus more careful harvesting genuinely does make it more labor-intensive to produce.

    Flavor, Caffeine, and Price Compared

    SenchaGyokuro
    CultivationUnshaded (or briefly shaded, 7-10 days)Shaded 3+ weeks before harvest
    FlavorGrassy, vegetal, slightly citrusyIntense umami, savory, seaweed-like
    Caffeine per cup~40mg120-140mg
    PriceEveryday/moderatePremium
    Best forDaily drinking, first-time green tea drinkersSpecial-occasion, quiet focused drinking

    The caffeine gap is worth pausing on because it surprises people – gyokuro isn’t just “more intense in flavor,” it genuinely carries close to double or triple the caffeine of sencha per cup, a direct result of the same shading process that builds its umami. If you’re reaching for gyokuro assuming it’s a gentler afternoon tea because it’s “premium” and delicate-tasting, the caffeine content says otherwise.

    How to Brew Each One Correctly

    This is where treating gyokuro like fancy sencha actually goes wrong.

    Sencha brews hot and fast. Fukamushi (deep-steamed) sencha does well around 60°C (140°F) for about 45 seconds; drier, standard sencha can take closer to 70°C (160°F) for around a minute. Either way, sencha is meant to be a quick infusion – lingering water contact at high heat is what turns it bitter.

    Gyokuro is the opposite in almost every respect. Use notably cooler water – 50-60°C (122-140°F) – a small amount of it relative to the leaf (roughly 3g of leaf to just 30-50ml of water for a single serving), and let it steep for a full 90 seconds to 2 minutes on the first infusion. This isn’t a stylistic choice; at that temperature range, theanine dissolves readily while catechin extraction is significantly suppressed, which is the actual mechanism behind gyokuro’s umami-forward taste. Push the temperature above 70°C and you start pulling more bitter compounds out, which works directly against what makes gyokuro worth drinking in the first place.

    Gyokuro is also genuinely good for multiple infusions – a second steep at 60-70°C for 30-60 seconds, and a third at 70-80°C for about 30 seconds, each one drawing out a slightly different character as the water gets hotter and the leaf’s easier compounds are already spent.

    If you don’t already have a tea thermometer on Amazon for getting gyokuro’s temperature right consistently, it’s a worthwhile small purchase – eyeballing “cooler than sencha” tends to undershoot or overshoot more than people expect. And if you want to compare the two teas side by side yourself, Nio Teas carries both sencha and gyokuro from the same catalog.

    A Few Things People Ask Me

    Is gyokuro just a fancier version of sencha, or a genuinely different tea? Genuinely different, not just a price tier – the shading process changes its chemistry, not just its reputation, and that shows up directly in both flavor and caffeine content.

    Which one should a beginner start with? Sencha, without much hesitation. It’s more forgiving to brew, cheaper to experiment with, and its flavor profile is closer to what most people expect from “green tea” generally. Gyokuro is worth working up to once you’re comfortable with steeping temperatures and want something more intense.

    Why does gyokuro have so much more caffeine if it’s the more delicate-tasting tea? The shading that builds gyokuro’s umami and reduces its bitterness happens to also boost its caffeine content – the two aren’t related by taste, they’re both downstream of the same shading process, so “smoother tasting” doesn’t mean “lower caffeine” here the way it might with other teas.

    Can I use the same kyusu for both? Yes, the same teapot works for both, though my kyusu buying guide is worth a look if you’re brewing gyokuro often, since its small-volume, cooler-water brewing style suits a slightly different kyusu size than a typical sencha session.

    Where I Landed

    The real lesson here isn’t “gyokuro is better” or “sencha is better” – it’s that they’re built to do different things and brewing them the same way wastes whichever one you’re less careful with. Sencha rewards a quick, hot, low-effort approach; gyokuro rewards patience and a thermometer you actually trust. Once I stopped brewing gyokuro like an expensive sencha and started respecting the actual temperature range it needs, it stopped being the tea I occasionally over-brewed into bitterness and became the one I actually looked forward to on a slow afternoon.
  • Genmaicha: The Complete Guide to Japan’s “Popcorn Tea”

    Genmaicha: The Complete Guide to Japan’s “Popcorn Tea”

    Disclosure: This post contains affiliate links. If you buy through one of them, I may earn a small commission at no extra cost to you.

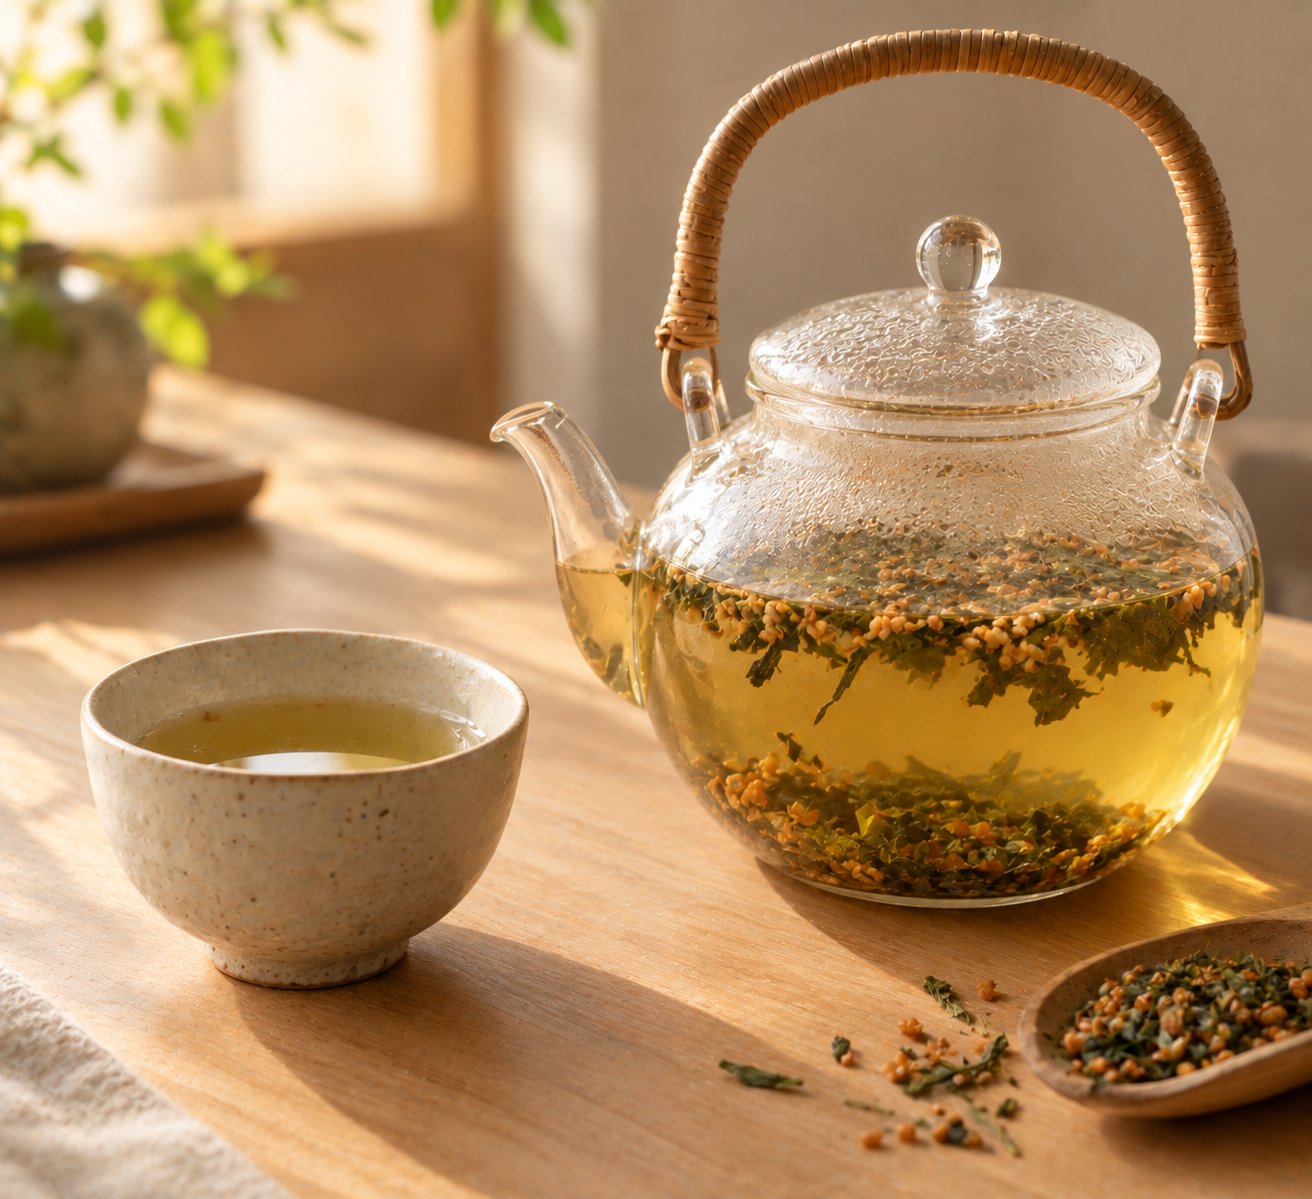
    The first time someone handed me a bag of genmaicha without explaining what it was, I genuinely thought a few kernels of popcorn had gotten mixed in with loose-leaf green tea by accident. They hadn’t. Genmaicha is green tea blended with roasted brown rice, and some of those rice grains actually pop during roasting the same way popcorn does, which is exactly where the nickname comes from.

    It’s one of the more approachable Japanese green teas for people who find sencha or gyokuro a bit too grassy or vegetal on their own, because the roasted rice rounds out that sharpness with something warmer and nuttier. It’s also, historically, the most working-class of Japan’s green teas, which is a more interesting backstory than most tea has.

    The Problem You’re Actually Trying to Solve

    Genmaicha gets recommended a lot as a “beginner-friendly” Japanese green tea, but very little of that advice explains what’s actually different about it – why it tastes the way it does, how its caffeine content compares to sencha or hojicha, or how to brew it so the rice flavor doesn’t overpower the tea (or vice versa). Most people end up either over-steeping it into something bitter, or just buying whatever bag says “genmaicha” without knowing there are meaningfully different versions of it.

    Who This Article Is NOT For

    • If you’re looking for a completely caffeine-free option, genmaicha isn’t it – it has moderate caffeine, more than hojicha but less than sencha, so my guide to hojicha brands might be closer to what you want if avoiding caffeine is the priority.
    • If you already know genmaicha well and want brewing gear rather than an explainer, my kyusu buying guide covers the teapot side of things.
    • If you’re specifically comparing matcha to green tea rather than genmaicha to other green teas, that’s a different comparison covered elsewhere on the site.

    What Genmaicha Actually Is

    Genmaicha on Amazon is steamed Japanese green tea – usually sencha or bancha – blended with roasted, hulled brown rice. During roasting, a portion of the rice grains pop, similar to popcorn, and those popped kernels are part of what people mean when they call this “popcorn tea.” The tea itself contributes the grassy, umami base you’d expect from Japanese green tea, while the rice adds a nutty, toasty sweetness and a lighter, more golden color to the finished cup than a straight sencha would have.

    Historically, genmaicha wasn’t originally about flavor at all – the rice was added as a cost-effective filler that stretched more expensive tea leaves further, which made it accessible to lower-income households and earned it the nickname “the people’s tea.” It was also used by people observing religious fasting periods or going long stretches between meals, since the roasted rice made a cup feel more substantial than tea alone. Today that class association has mostly faded, and genmaicha is enjoyed across the board, but the backstory is part of what makes it distinct from teas developed purely around flavor or ceremony.

    Matcha-iri genmaicha is the one variant worth knowing by name: it has powdered matcha added into the blend, which gives it a noticeably more vivid green color and a stronger, more rounded flavor than plain genmaicha. If you’ve had a genmaicha that tasted unusually rich and green rather than pale gold, it was probably this version.

    How Genmaicha Compares to Sencha and Hojicha

    These three often get lumped together as “everyday Japanese green teas,” but they’re made differently and taste distinctly different from each other.

    GenmaichaSenchaHojicha
    What it isSteamed green tea + roasted brown riceSteamed, rolled green tea leavesRoasted green tea leaves and stems
    FlavorToasty, nutty, mildly sweetGrassy, vegetal, umami-forwardNutty, caramelized, warm
    CaffeineModerateHigherLow
    Best time to drinkAfternoonMorningEvening

    The caffeine difference comes down to processing and ratio: sencha is straight tea leaf, so it carries the most caffeine of the three. Hojicha is roasted at high heat, which measurably reduces both bitterness and caffeine. Genmaicha sits in the middle mostly because the rice dilutes the ratio of actual tea leaf in each serving, not because the tea itself is a lower-caffeine varietal.

    How to Brew Genmaicha Properly

    Genmaicha is more forgiving than sencha or gyokuro, but it still has a sweet spot. The general target is 80°C (176°F) for most standard genmaicha blends, with some adjustment depending on what base tea it’s built on:

    • Premium or gyokuro-based genmaicha: 75-78°C – these use a more delicate base tea that turns bitter faster at higher heat
    • Standard sencha-based genmaicha (the most common kind): 80°C
    • Bancha-based genmaicha: 85-90°C – bancha is a coarser, later-harvest leaf that can handle more heat without turning bitter

    If you don’t own a tea thermometer on Amazon, the cooling transfer method works well here: pour boiling water between two cups or a cup and your teapot, waiting about 30 seconds between each transfer. Each pour drops the temperature by roughly 8-10°C, so two or three transfers gets you into genmaicha’s ideal range without any equipment. Let it steep briefly rather than walking away from it – genmaicha at high heat turns bitter quickly, and the rice flavor is more pleasant when the tea itself hasn’t gone over-extracted.

    A Few Things People Ask Me

    Does genmaicha taste like rice, or like tea? Both, in a blended way rather than one overpowering the other – the base is recognizably green tea, umami and slightly grassy, but the roasted rice adds a warm, nutty sweetness underneath it that softens the sharper edges you’d get from plain sencha.

    Is genmaicha good for people who find green tea too bitter or grassy? Genuinely, yes – it’s one of the more commonly recommended “starter” Japanese green teas for exactly this reason. The rice’s mild sweetness balances the vegetal quality that puts some people off sencha or gyokuro on their own.

    Can I re-steep genmaicha the way you can with sencha? You can get a second infusion out of most genmaicha, though the rice flavor tends to fade faster than the tea’s own flavor across multiple steeps, so the second cup will taste noticeably more like plain green tea and less like the rice-forward blend you got on the first pour.

    Is matcha-iri genmaicha worth seeking out over regular genmaicha? If you like a stronger, greener, more full-bodied cup, yes – it’s a genuinely different drinking experience from plain genmaicha, not just a marketing variation. Nio Teas’ genmaicha is where I’d start if you want to compare the plain and matcha-iri versions side by side. Worth trying at least once to see which style you actually prefer.

    Where I Landed

    What sold me on genmaicha, once I understood the backstory, was realizing it was never designed to impress anyone – it was tea made more affordable and more filling for people who needed both. That practical, unglamorous origin is oddly part of the appeal now: it’s an easy, forgiving, everyday cup in a way ceremonial-grade matcha or a fussy gyokuro just isn’t trying to be. If sencha has ever felt like a bit too much on its own, genmaicha is worth keeping in the cupboard as the version that meets you halfway.

  • How to Care for a Chasen (Matcha Whisk) So It Actually Lasts

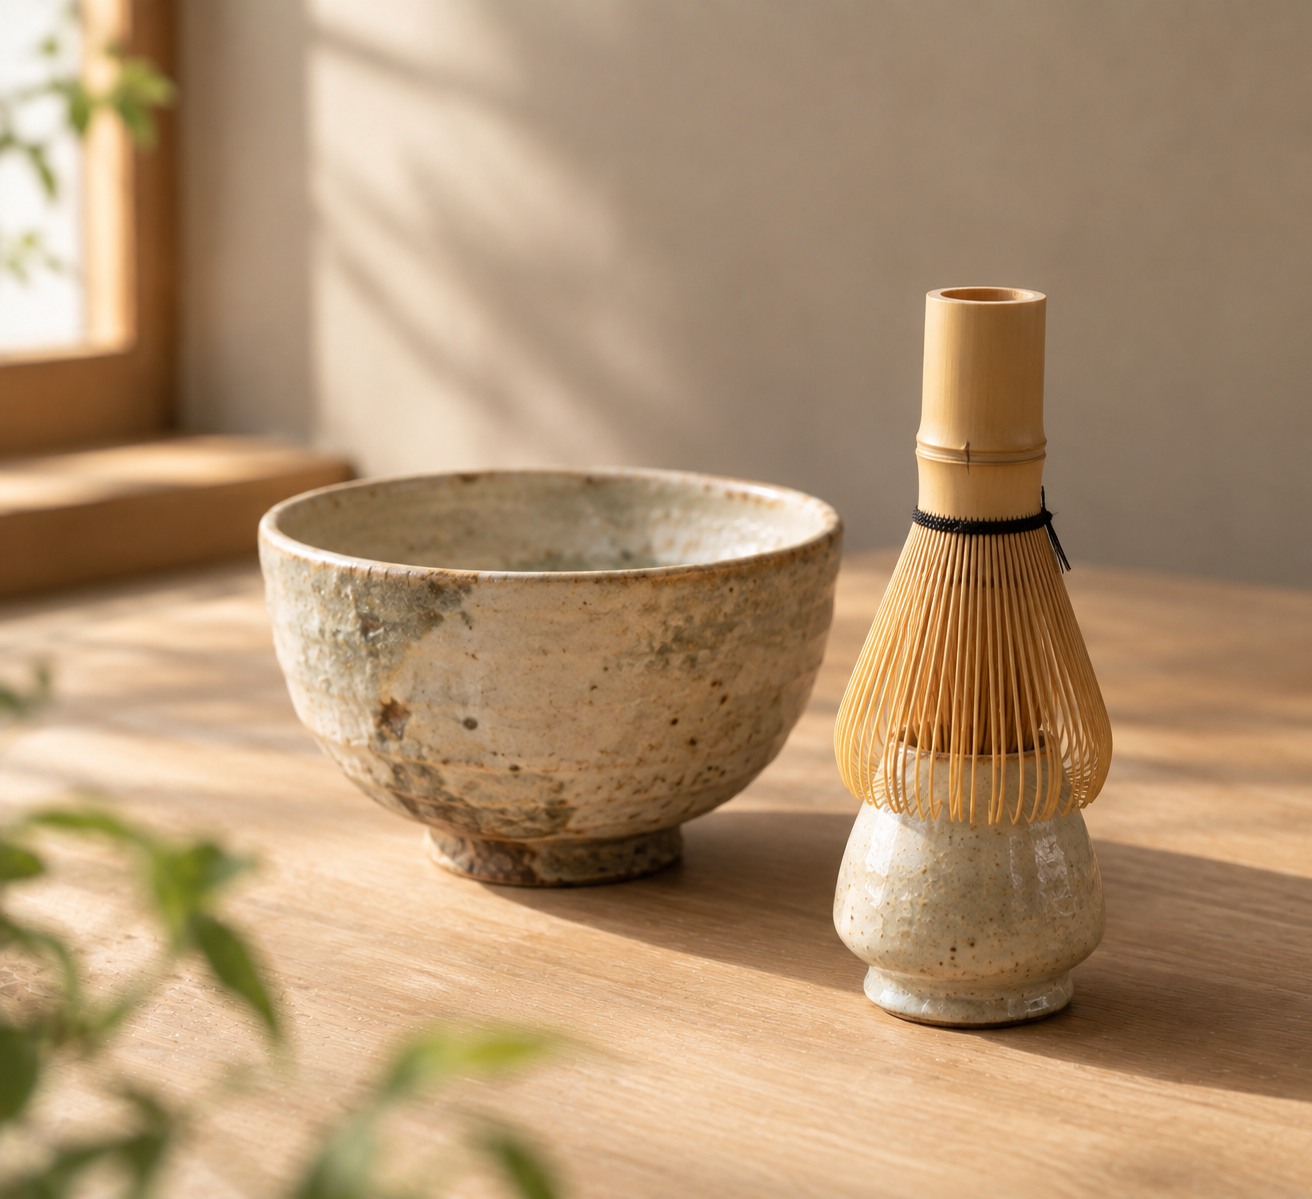
    How to Care for a Chasen (Matcha Whisk) So It Actually Lasts

    Disclosure: This post contains affiliate links. If you buy through one of them, I may earn a small commission at no extra cost to you.

    I killed my first chasen in about three weeks. I’d rinse it, shake off the water, and drop it back into its little plastic case – the same one it shipped in – thinking that counted as “putting it away properly.” What I didn’t know was that the case was the problem: bamboo left damp in an enclosed space doesn’t dry, it molds, and by the time I noticed the musty smell and the faint dark spotting on the tines, the whisk was already done.

    A chasen isn’t a low-maintenance tool the way a lot of teaware is. It’s untreated bamboo split into anywhere from 16 to well over 100 fine tines, and it needs a specific, small routine after every single use to hold its shape and stay usable for more than a few weeks.

    The Problem You’re Actually Trying to Solve

    Two things kill a chasen early, and neither is really about how much you use it. The first is improper drying – putting a wet whisk back into an enclosed case or leaving it lying flat on a towel, both of which trap moisture against the bamboo and encourage mold. The second is technique – pressing the tines hard against the bottom or sides of the bowl while whisking, which stresses and eventually snaps them, rather than working the whisk in a light motion just above the bowl’s surface.

    Most of what follows is really about avoiding those two failure points, plus knowing honestly when a chasen has reached the end of its life rather than trying to nurse a truly broken one along.

    Who This Article Is NOT For

    • If you’re looking for how to actually whisk matcha (technique for making the drink itself, not caring for the tool), my guide to making a matcha latte at home covers the whisking motion for that specific drink.
    • If you haven’t bought a chasen yet and want buying advice rather than care instructions, my matcha whisk buying guide is the right place to start.
    • If you’re using a metal or plastic milk-frother-style whisk rather than a traditional bamboo chasen, none of the mold/drying concerns here really apply to you the same way.

    The Daily Routine That Actually Matters

    Soak it before you use it, not just after. Dip the chasen in water for one to two minutes before whisking. This isn’t just a ritual step – it rehydrates the bamboo fibers, making the tines more flexible and considerably less likely to snap during use. A dry chasen straight out of storage is at its most brittle.

    Rinse immediately after use, with water only. No soap, no detergent – just rinse under running water right after whisking to clear out any matcha residue before it dries into the tines. Soap residue trapped in bamboo fibers is its own long-term problem, and it’s genuinely unnecessary here since matcha rinses out cleanly with water alone.

    Never store it in its case while damp. This is the mistake that got my first one. The case that a chasen ships in is meant for transport, not storage – it has no airflow, and a wet whisk sealed inside it is a small mold incubator. Air circulation is the entire point of proper drying, and an enclosed case removes it completely.

    Dry it upright on a whisk stand (kusenaoshi), not lying flat. A whisk stand holds the chasen in its splayed, curved shape while air reaches all the tines evenly. Left lying flat on a towel or draining board, the tines get flattened on one side as they dry, which permanently distorts their shape over time even if mold never becomes an issue.

    Whisking Technique That Extends Its Life

    How you actually whisk affects lifespan as much as how you clean and dry it. The tines are doing their job when the whisk moves in a light “W” or “M” motion just above the bottom of the bowl – not scraping or pressing hard against the ceramic. Pressing down hard to try to break up clumps faster is the single fastest way to snap tines, and it’s usually a sign the matcha wasn’t sifted or the water wasn’t hot enough to begin with, rather than a problem the whisk itself can fix by being pushed harder.

    How Long a Chasen Actually Lasts

    This varies more than most people expect, and it comes down almost entirely to frequency of use and technique rather than the price you paid. With daily use, a chasen typically lasts somewhere in the two-to-four-month range; used a few times a week rather than daily, six months to a year is realistic. Bamboo quality plays a role too – whisks made from higher-grade bamboo (Nara-region bamboo is often cited as a benchmark) tend to hold their shape and resist wear longer than lower-grade alternatives, and finer-tine whisks (80-120 tines), while better at producing foam, are also more delicate and need slightly gentler handling than coarser 16-64 tine versions.

    Signs It’s Actually Time to Replace It

    • Multiple broken or missing tines, especially if it’s now visibly affecting how well it froths matcha
    • Tines that stay flattened or splayed even after a full soak and dry cycle, rather than springing back into their curved shape
    • A musty smell or any dark spotting on the bamboo, which almost always means mold has already set in
    • Thin, uneven foam despite using proper technique and a matcha you know whisks up well – at that point it’s the tool, not the method

    None of these are things to push through. A chasen with mold isn’t salvageable, and a whisk with broken tines will only get worse and start affecting your matcha’s texture, not just the tool’s appearance.

    A Few Things People Ask Me

    Can I revive a chasen that’s dried out stiff after sitting unused for a while? A long soak – several minutes rather than the usual one to two – before use will restore some flexibility if the bamboo itself is still sound. If it’s cracking or the tines feel brittle rather than just stiff, that’s closer to end-of-life than something a soak fixes.

    Is it okay to use my chasen for anything besides matcha and water? No – it’s built specifically for whisking matcha into water, and using it in milk-based drinks or with other ingredients isn’t something it’s designed for and will shorten its life considerably faster than normal matcha use.

    Do I need a separate whisk stand, or can I just prop it against something? A proper kusenaoshi is worth having specifically because it holds the tines in their correct splayed shape while drying, which propping against a cup or bowl edge won’t do consistently. It’s a small, inexpensive accessory relative to what it protects.

    What’s a reasonable chasen to keep on hand as a backup? Since even a well-cared-for chasen has a real lifespan, it’s worth having a second one ready rather than being stuck without one when the first finally breaks. Nio Teas’ chasen on their site is a reasonable option if you want to buy from the same place I’ve sourced other matcha tools from.

    Where I Landed

    The whole care routine boils down to one idea: bamboo needs to fully dry between uses, and it needs to be handled gently while wet, since that’s when it’s most flexible and most vulnerable at the same time. Once I started drying mine upright on a stand instead of tossing it back in its case, the difference in how long it lasted was immediate and obvious – not a subtle improvement, just a whisk that actually made it past the three-week mark for the first time.

  • The Matcha Dessert Guide: Ice Cream, Cheesecake, and Pudding Worth Making at Home

    The Matcha Dessert Guide: Ice Cream, Cheesecake, and Pudding Worth Making at Home

    Disclosure: This post contains affiliate links. If you buy through one of them, I may earn a small commission at no extra cost to you.

    The first time I tried making matcha ice cream at home, I ended up with something closer to green Play-Doh than dessert – grainy, bitter in the wrong way, with flecks of unmixed powder throughout. It took a few failed batches before I understood that matcha desserts aren’t just “add matcha powder to an existing recipe.” The powder behaves differently depending on whether it’s going into a cream base, a custard, or a no-bake filling, and the failure points are different every time.

    What follows are four matcha desserts I’ve actually made more than once, each one picked because it represents a different technique – whipped, set with gelatine, cooked custard – so between them you’ll have a template for handling matcha in almost any dessert context.

    The Problem You’re Actually Trying to Solve

    Most matcha dessert recipes online either use too little matcha (so you get a pale, barely-there flavor that doesn’t justify the effort) or dump in matcha without addressing how it clumps in fat and dairy specifically, which is a different problem than clumping in water. Matcha disperses into hot liquid reasonably well, but dropped straight into cold cream or soft cheese, it sits in little green flecks no amount of stirring alone will break up.

    The other recurring issue is grade. A lot of home bakers reach for whatever matcha they already have in the cupboard – often a ceremonial-grade tin bought for drinking – without realizing that culinary-grade matcha is actually the better (and cheaper) choice for baking and desserts, since it’s made to hold its color and flavor under heat, sugar, and fat in a way delicate ceremonial-grade matcha isn’t optimized for.

    Who This Article Is NOT For

    • If you want to drink matcha rather than eat it, a matcha latte or iced matcha is the simpler route – my guide to making a matcha latte at home covers that instead.
    • If you’re after matcha baked goods like cookies or cake rather than chilled desserts, my matcha baking guide is the better fit – the techniques here are specific to no-bake and custard-style desserts.
    • If you don’t own an electric mixer or whisk attachment, the no-churn ice cream and cheesecake recipes below will be genuinely difficult to make properly by hand.

    The One Technique That Fixes Most Matcha Dessert Problems

    Before the recipes: there’s a single move that solves the clumping issue across almost every dessert format, and it’s the same principle whether you’re making ice cream, cheesecake, or pudding. Sift the matcha first, then whisk it into a small amount of the fat or liquid you’re using – a few tablespoons of cream, not the whole batch – until it’s fully smooth with zero visible flecks, and only then fold that smooth matcha mixture into the rest of the recipe. Trying to sprinkle matcha directly into a full bowl of whipped cream or cheese filling is what causes the green-flecked, unevenly-flavored result most people run into on their first attempt.

    Four Matcha Desserts Worth Making

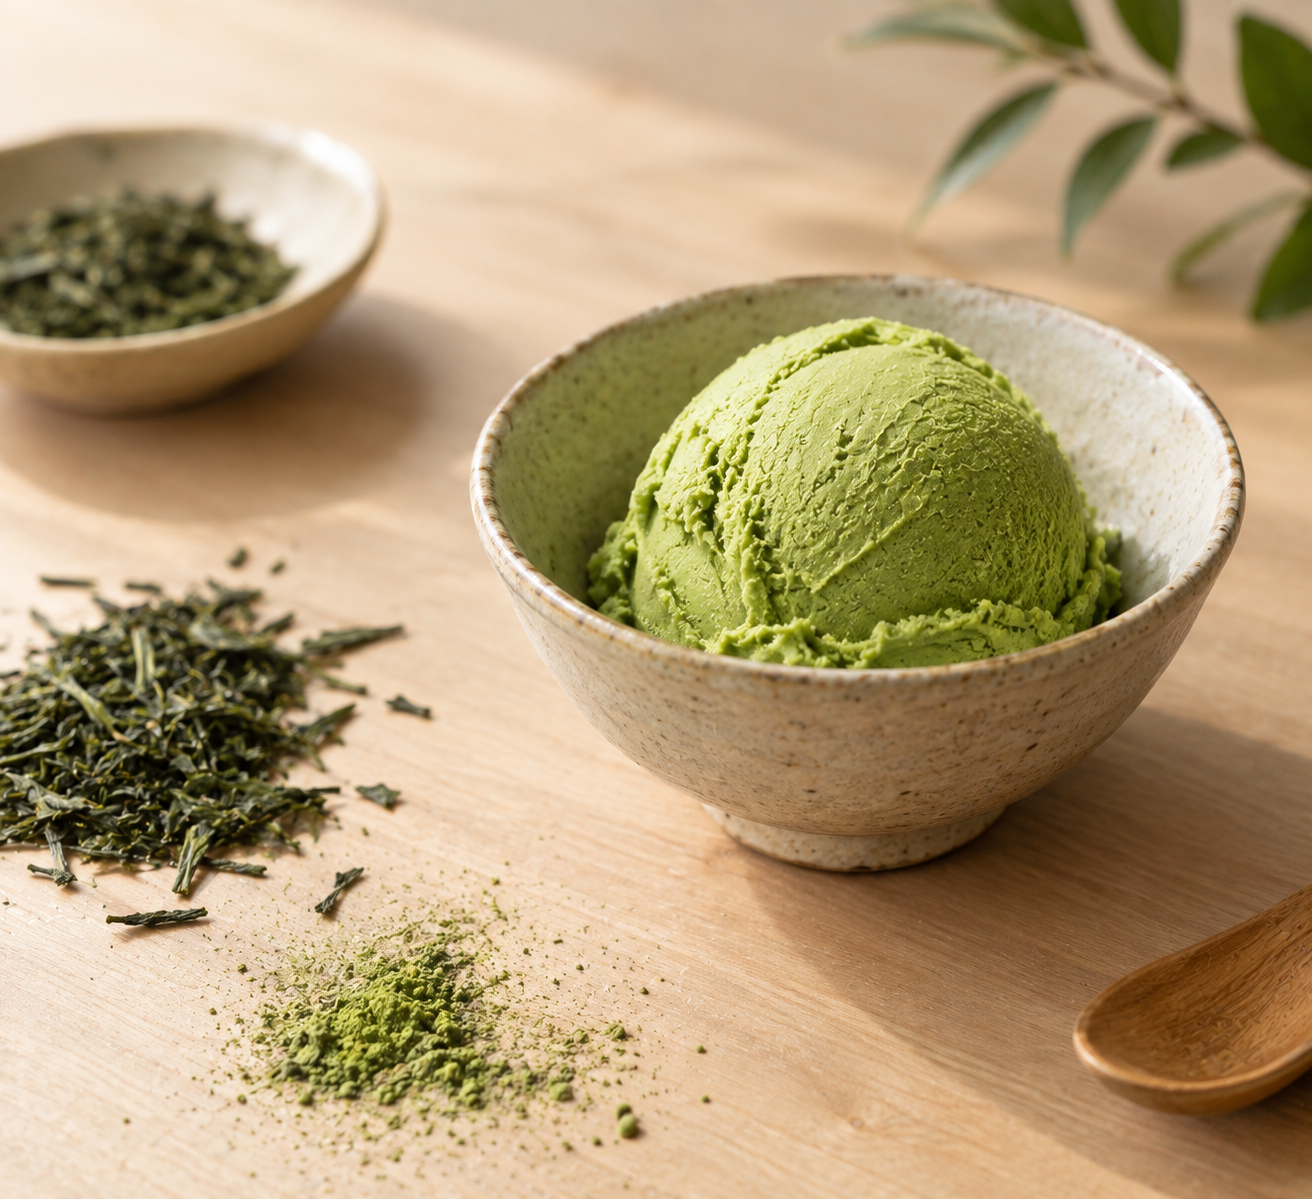
    1. No-Churn Matcha Ice Cream

    This is the easiest of the four because it needs no ice cream maker, no eggs, and no cooking – just an electric mixer and a freezer.

    Ingredients:

    • 600 ml whipping cream
    • 4 tbsp culinary-grade matcha powder
    • 1 tbsp vanilla extract
    • 300 ml sweetened condensed milk

    Method: Combine the whipping cream, matcha, and vanilla in a bowl and whip with an electric mixer until firm peaks form – the matcha disperses directly into the cream as it whips, since the friction and volume of whipping breaks up clumps far more effectively than stirring cold cream by hand. Gradually drizzle in the condensed milk while gently folding with a spatula until fully combined, taking care not to deflate the whipped cream. Pour into a loaf tin, cover, and freeze for at least 6 hours, ideally overnight. Because this version has no commercial stabilizers, it melts faster than store-bought ice cream and is best eaten within about two weeks before it turns icy.

    2. No-Bake Matcha Cheesecake

    A rare cheesecake (set with gelatine rather than baked) that’s forgiving for anyone nervous about baking a traditional cheesecake without cracking the top.

    Ingredients (6-inch springform):

    • 75g graham crackers or plain biscuits, crushed
    • 40g melted butter
    • 200g full-fat cream cheese, softened
    • 150g plain yogurt
    • 60g powdered sugar
    • 175ml heavy whipping cream
    • 2 tbsp matcha powder, sifted
    • 1 tsp unflavored gelatine
    • 1 tbsp cold water

    Method: Mix the crushed biscuits with melted butter and press into a lined springform pan; refrigerate while you make the filling. Bloom the gelatine by sprinkling it over the cold water and letting it sit for 10 minutes. Whisk the softened cream cheese smooth, then beat in the yogurt and sugar. Separately, sift the matcha into about a third of the whipping cream and whip until completely smooth before adding the rest of the cream and whipping to firm peaks – this is the sift-and-whip-small-batch-first move that keeps the matcha from clumping in the fat. Fold the matcha cream into the cheese mixture, melt the bloomed gelatine gently, and stir it through the filling. Pour over the chilled base and refrigerate for at least 8 hours before releasing the springform ring.

    3. Matcha Pudding

    A cooked custard-style pudding that’s closer to a Japanese milk pudding than a Western pudding cup, and the one recipe here where you actually want the matcha cooked rather than folded in raw.

    Ingredients (serves 4):

    • 500 ml milk
    • 65g sugar
    • A pinch of salt
    • 2 tbsp cornstarch
    • 3 tbsp matcha powder
    • 1 whole egg
    • 2 egg yolks
    • 2 tbsp unsalted butter
    • Sweetened whipped cream, for topping

    Method: In a pot, combine the milk, sugar, salt, cornstarch, and matcha, and heat over medium, whisking constantly, until it comes to a boil – the continuous whisking during this stage does the same job the sift-and-whip step does elsewhere, breaking the matcha into the liquid before it has a chance to clump. In a separate bowl, whisk the whole egg and yolks together, then gradually stream in the hot matcha-milk mixture while stirring constantly to temper the eggs without scrambling them. Return everything to the pot and cook over medium heat, stirring, until it thickens and returns to a boil, about two minutes. Strain through a fine sieve to catch any remaining lumps, stir in the butter until melted, then divide into four dishes and refrigerate for several hours. Top with whipped cream and a light dusting of matcha before serving.

    4. Matcha Mochi Ice Cream

    The most involved of the four, but the one that gets the most attention if you’re making dessert for guests – matcha ice cream wrapped in a thin mochi shell.

    Ingredients:

    • Matcha ice cream (from recipe #1 above), pre-scooped into small balls and frozen solid
    • 100g glutinous rice flour (mochiko)
    • 25g sugar
    • 150 ml water
    • Cornstarch or potato starch, for dusting

    Method: Scoop the matcha ice cream into small balls, place on a parchment-lined tray, and freeze solid for at least 2 hours – this step cannot be rushed, since soft ice cream will melt through the mochi wrapper before you finish assembling. Whisk the glutinous rice flour, sugar, and water together in a microwave-safe bowl until smooth, then microwave in 30-second bursts, stirring between each, until the mixture turns translucent and sticky, about 2-3 minutes total. Turn the hot mochi dough out onto a well-dusted work surface and let it cool just enough to handle. Divide into small portions, flatten each into a disc, place a frozen ice cream ball in the center, and quickly gather and pinch the edges closed, dusting your hands with starch as needed to keep the dough from sticking. Return the wrapped mochi to the freezer immediately and let them re-firm for at least an hour before serving.

    A Few Things People Ask Me

    Do I need ceremonial-grade matcha for desserts, or is culinary-grade fine? Culinary-grade is actually the better choice here, not just the cheaper one – it’s blended to hold its flavor and color through heat, sugar, and fat, whereas ceremonial-grade matcha’s more delicate flavor tends to get muted once it’s mixed into cream or baked. Save the ceremonial-grade tin for drinking.

    Why does my matcha dessert taste more bitter than sweet, even with sugar in the recipe? This usually means either too much matcha for the amount of fat/sugar in the recipe, or matcha that’s been sitting open too long and has started to taste stale and more astringent. Matcha that’s freshly opened and properly stored keeps a rounder, less harsh bitterness that balances against sugar much better than matcha that’s oxidized.

    Can I make any of these ahead for a party? The no-churn ice cream and the cheesecake both hold up well made a day or two ahead – if anything, the cheesecake benefits from a longer chill. The pudding is best within 2-3 days. The mochi ice cream is the most time-sensitive; make it the day before at the latest, since the mochi shell dries out and toughens the longer it sits in the freezer.

    What’s the easiest one to start with if I’ve never made a matcha dessert before? The no-churn ice cream, by a wide margin – no eggs, no cooking, no gelatine to bloom, just whip, fold, and freeze. If you want culinary-grade matcha specifically suited to desserts and baking on Amazon, that’s the one worth keeping stocked for all four of these.

    Where I Landed

    The thing that took me the longest to internalize is that matcha desserts aren’t really about the recipe – the ratios above are all fairly standard for ice cream, cheesecake, and pudding on their own. The actual skill is in how and when the matcha gets introduced: sifted into a small amount of fat before it meets the rest of the batch, or whisked continuously into a hot liquid before it has the chance to seize into clumps. Once that clicked for me, matcha desserts stopped being a gamble and started being just another ingredient I knew how to work with – which, four recipes in, is about the best outcome you can ask from a single kitchen lesson.

  • The Matcha Cocktail Guide: Five Recipes Worth Actually Making

    The Matcha Cocktail Guide: Five Recipes Worth Actually Making

    Disclosure: This post contains affiliate links. If you buy through one of them, I may earn a small commission at no extra cost to you. This article includes recipes containing alcohol; please drink responsibly and only if you are of legal drinking age in your location.

    I resisted matcha cocktails for a long time. My assumption was that they’d taste like someone dumped a health smoothie into a gin and tonic – grassy, a little sad, trying too hard to be “wellness.” Then a bartender in Kyoto made me a version of a whiskey highball with a proper ceremonial-grade matcha and I had to sit with that for a minute. The bitterness wasn’t a flaw to mask. It was doing the same job the bitters in an Old Fashioned do – cutting through the sweetness and giving the drink somewhere to land.

    That’s really the whole case for matcha in cocktails. It’s not a novelty color additive. Used at the right grade and dissolved properly, it brings a vegetal, umami-forward bitterness that plays well against citrus, ginger, and brown spirits in particular.

    The Problem You’re Actually Trying to Solve

    Most people who search for matcha cocktail recipes have had one of two experiences: either they’ve seen a bright green drink on Instagram and want to replicate the look, or they’ve tried making one themselves and ended up with clumpy powder floating on top of their drink instead of dissolving into it. Both problems trace back to the same root cause – treating matcha like a garnish instead of an ingredient that needs to be properly incorporated before it goes anywhere near ice or carbonation.

    The other quiet problem is grade mismatch. A lot of recipes floating around online call for “matcha powder” without specifying that culinary-grade matcha behaves completely differently from ceremonial-grade in a cocktail shaker, and using the wrong one either wastes good tea or makes a mediocre drink taste worse than it should.

    Who This Article Is NOT For

    • If you want a non-alcoholic matcha drink, this isn’t the right guide – a matcha latte or iced matcha will serve you better than a “mocktail” version of these recipes, since the alcohol here is doing real flavor work, not just adding a buzz.
    • If you’re looking for a matcha latte recipe rather than a cocktail, my guide to making a matcha latte at home covers that separately.
    • If you don’t have a bar cart or aren’t interested in shaking/stirring cocktails, three of these five recipes are effectively unmakeable without at least a cocktail shaker and a fine strainer.

    What Actually Makes Matcha Work in a Cocktail

    Three things determine whether a matcha cocktail tastes intentional or like a mistake.

    Grade matters more than people think. Ceremonial-grade matcha is going to give you a smoother, less bitter cup than culinary-grade, which is milled from later, coarser tea leaf harvests and is meant to stand up to milk, sugar, and baking. For cocktails, I’ve found culinary-grade matcha actually works better than you’d expect in citrus-forward drinks like a margarita, where its slightly stronger, more assertive bitterness holds its own against lime and triple sec. For something more spirit-forward like a whiskey highball, a mid-tier ceremonial matcha gives a rounder, less aggressive flavor that doesn’t fight with the whiskey.

    Dissolving technique is not optional. Matcha powder does not dissolve in cold liquid or alcohol on its own – it clumps. The move that actually works is whisking or shaking the matcha with a small amount of warm (not boiling) water first to form a smooth, lump-free paste or slurry, then adding that slurry to the rest of the drink. Some of the recipes below call for a “matcha simple syrup” instead, which solves the same problem by dissolving the matcha into syrup while it’s still warm from the stove.

    Pairing logic follows matcha’s actual flavor profile. Matcha’s vegetal, slightly astringent, umami character pairs naturally with a few flavor families: bright citrus (lime, lemon), warm ginger, mint, and clean base spirits like gin, vodka, and blanco tequila. It gets more complicated with brown spirits like whiskey and bourbon, but the combination can work when the matcha is used sparingly enough that it doesn’t compete with the barrel notes.

    Five Matcha Cocktails Worth Making

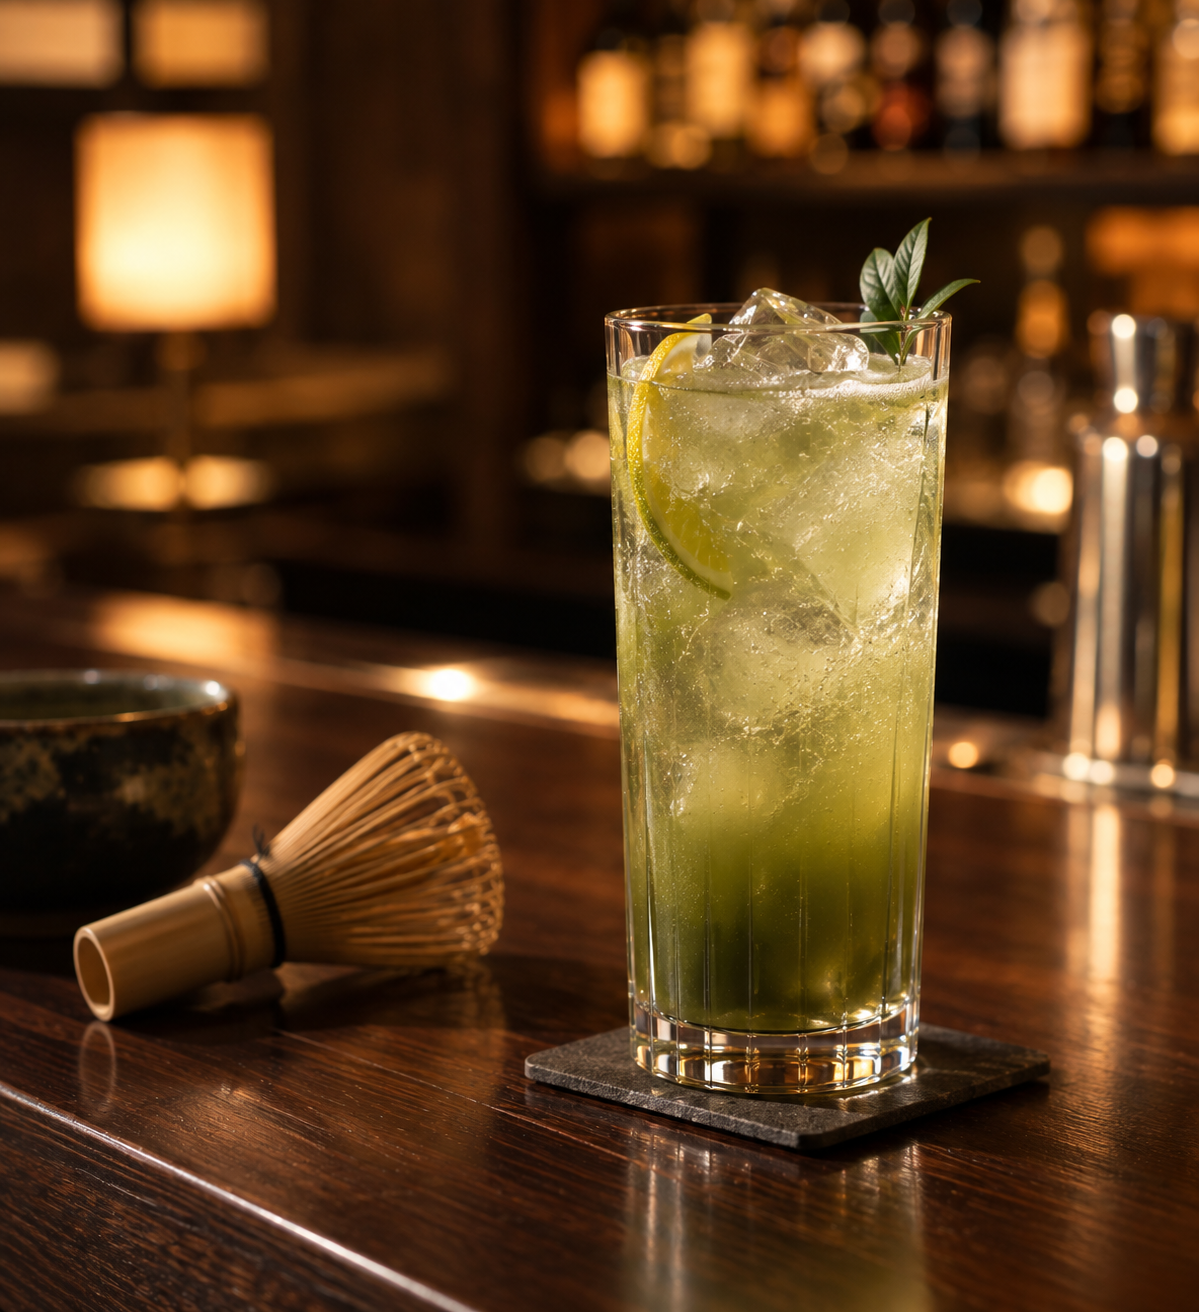
    1. Matcha Gin Fizz

    A gin fizz is already built around the idea of something bitter-bright cutting through citrus and soda, which makes it one of the easiest entry points into matcha cocktails.

    Ingredients:

    • 2 oz gin
    • 1/2 tsp culinary-grade matcha
    • 3/4 oz fresh lemon juice
    • 1/2 oz simple syrup
    • Soda water, to top
    • Ice

    Method: Whisk the matcha with about a tablespoon of warm water until it’s a smooth, clump-free paste. Add the paste, gin, lemon juice, and simple syrup to a shaker with ice and shake hard for about 15 seconds. Strain into a highball glass over fresh ice and top with soda water. The matcha settles into a soft green haze rather than sitting on top, which is the visual sign you’ve dissolved it properly.

    2. Tokyo Mule (Matcha Version)

    This is a matcha riff on the classic Moscow Mule, swapping some of the ginger beer’s sharpness for matcha’s vegetal depth while keeping the drink’s fundamental structure intact.

    Ingredients:

    • 2 oz vodka
    • 1/2 tsp matcha, made into a slurry with 1 tbsp warm water
    • 1/2 oz fresh lime juice
    • Ginger beer, to top
    • Lime wheel and mint sprig, for garnish

    Method: Combine the vodka, matcha slurry, and lime juice in a copper mug or highball glass with ice. Stir gently, then top with ginger beer and stir once more, just enough to combine without killing the carbonation. Garnish with a lime wheel and a mint sprig. The ginger beer’s spice and matcha’s bitterness end up doing very similar jobs in this drink, so it reads as more harmonious than you’d expect from the ingredient list.

    3. Matcha Whiskey Highball

    This is the drink that changed my mind about matcha cocktails in the first place, and it’s the one I’d point a whiskey drinker toward first.

    Ingredients:

    • 2 oz Japanese whiskey (or a smooth blended whiskey)
    • 1/4 tsp ceremonial-grade matcha
    • 1/4 oz simple syrup
    • Soda water, to top
    • Ice

    Method: Whisk the matcha into the simple syrup while it’s still slightly warm, until fully smooth – this keeps the matcha amount low enough that it doesn’t fight the whiskey’s own flavor. Fill a highball glass with ice, add the whiskey and matcha syrup, stir a few times, then top slowly with soda water and give it one final gentle stir. Keep the matcha quantity restrained here; this is a drink where a little goes further than you’d think, and doubling the matcha just makes it taste muddy rather than more flavorful.

    4. Matcha Margarita

    Matcha and lime were always going to work together, and tequila’s slight vegetal quality (particularly in a good blanco) doesn’t fight the tea the way some other spirits do.

    Ingredients:

    • 2 oz blanco tequila
    • 1/2 oz triple sec
    • 3/4 oz fresh lime juice
    • 1/2 tsp culinary-grade matcha
    • 1/2 oz agave syrup or simple syrup
    • Salt, for the rim (optional)

    Method: Whisk the matcha with a small amount of warm water into a smooth paste. Combine the tequila, triple sec, lime juice, matcha paste, and syrup in a shaker with ice, and shake vigorously for 15-20 seconds. Strain into a salt-rimmed rocks glass over fresh ice. Culinary-grade matcha is the right call here specifically because its slightly rougher bitterness stands up to the citrus and triple sec instead of getting lost in them.

    5. Matcha Mint Julep

    A julep is built on the tension between sweetness and mint’s sharp freshness, and matcha slides into that tension as a third bitter-vegetal voice rather than competing with either side.

    Ingredients:

    • 2 oz bourbon
    • 1/4 tsp matcha, made into a slurry with warm water
    • 1/2 oz simple syrup
    • 8-10 fresh mint leaves
    • Crushed ice

    Method: Gently press the mint leaves in the bottom of a julep cup or rocks glass with the simple syrup – just enough to release the oils, not so much that you tear the leaves into shreds. Add the bourbon and matcha slurry, then fill the glass with crushed ice and stir until the outside of the glass frosts over. Top with a final small mound of crushed ice and a fresh mint sprig. Bourbon’s caramel and vanilla notes and matcha’s grassy bitterness sound like they shouldn’t work together, but the mint acts as a bridge between them.

    A Few Things People Ask Me

    Which of these is the easiest to start with? The Matcha Gin Fizz or the Tokyo Mule. Both use citrus or ginger beer to carry most of the flavor, so a small error in your matcha slurry is much more forgiving than it would be in the whiskey highball or julep, where the matcha has less to hide behind.

    Can I make the matcha component ahead of time for a party? A matcha simple syrup keeps in the fridge for about a week in a sealed container, and it’s the most party-friendly option of the group – you can pre-batch several drinks’ worth and just add spirits and mixers to order. A plain matcha-water slurry doesn’t hold up nearly as well and is best made fresh right before shaking.

    Does the caffeine in matcha cocktails add up if I’m having a few? A quarter to half a teaspoon of matcha per drink is a modest caffeine dose – noticeably less than a full cup of matcha tea – but if you’re having several matcha cocktails over an evening, that does add up on top of the alcohol itself, so it’s worth pacing the same way you would with any caffeinated mixer like cola or coffee liqueur.

    What’s the best matcha grade to keep on hand just for cocktails? A mid-tier culinary-grade matcha is the most versatile choice if you only want to buy one tin – it’s more affordable than ceremonial grade and holds up better in citrus-forward drinks, while still working fine in the whiskey highball if you scale the amount down slightly. If you’re also using matcha for baking, my guide to baking with matcha covers grade selection from that angle too.

    Where I Landed

    The lesson that stuck with me most from all of this is that matcha isn’t a color you add to a cocktail – it’s a bitterness you’re borrowing, the same way you’d borrow bitters or amaro. Once I started thinking about it that way, choosing which drinks to try it in got a lot more obvious: anything that already leans on a bitter or sharp counterpoint (citrus, ginger, mint) is a safer bet than trying to force it into something purely sweet. The whiskey highball remains my favorite of the five, mostly because it’s the one where the matcha genuinely surprised me – not by transforming the drink, but by fitting into it like it had always belonged there. If you want a single reliable tin to start with, Nio Teas’ ceremonial-grade matcha is what I used for the highball recipe above, and it holds up well across both the citrus-forward and spirit-forward drinks in this guide.

  • Ichibancha vs Nibancha: Why Matcha Harvest Timing Matters More Than You’d Think

    Ichibancha vs Nibancha: Why Matcha Harvest Timing Matters More Than You’d Think

    Disclosure: This post contains affiliate links. If you buy through one of them, I may earn a small commission at no extra cost to you.

    I used to assume “ceremonial grade” was the only label worth paying attention to on a matcha tin, until I compared two tins from the same brand, same region, same grade name, and found one noticeably sweeter and rounder than the other. The difference turned out to have nothing to do with grade at all. It came down to when the leaves were actually picked, months apart on the same growing calendar, and that single variable changed the flavor more than anything else on either label — more than the region, more than the price, more than the word “ceremonial” printed on both tins alike.

    The Problem You’re Actually Trying to Solve

    You’ve searched for ichibancha versus nibancha because you’ve noticed harvest terminology on matcha packaging, or you’re trying to understand why two matchas with similar grade claims can still taste so different, and want to know what these Japanese harvest terms actually mean for what ends up in your cup.

    Who This Article Is NOT For

    Let’s save you some scrolling if this isn’t quite your situation.

    • If you want to understand grade terminology (ceremonial vs. culinary) rather than harvest timing specifically, my how to tell matcha grades apart guide covers that separate, related topic.
    • If you’re buying matcha specifically for baking, later-harvest matcha is often the more practical, cost-effective choice for that use case anyway, so the distinctions here matter less for your purchase.

    If you’re past that, here’s where the actual explanation starts.

    The Japanese Tea Harvest Calendar

    Japanese tea plants aren’t picked continuously through the growing season. They’re harvested in distinct flushes, each with a name and a genuinely different flavor profile.

    HarvestJapanese TermTypical TimingCharacter
    First flushIchibanchaLate April – late MaySweetest, highest umami, most delicate
    Second flushNibanchaMid-June – early JulyMore astringent, brisker, more affordable
    Third flushSanbanchaLate July – early AugustMost bitter, coarsest, lowest grade use
    Autumn/winterShuto banchaLate September – OctoberRarely used for matcha; mostly other tea products

    Why the Chemistry Actually Changes Between Harvests

    This isn’t just a scheduling difference, it’s a genuinely different chemical outcome, and understanding why makes the flavor gap make complete sense.

    Ichibancha benefits from six months of dormancy. Tea plants accumulate amino acids, particularly L-theanine, the compound responsible for matcha’s sweetness and umami, throughout the winter while the plant is dormant. That stockpile gets concentrated into the very first leaves that emerge in spring, which is why first-flush matcha carries such a pronounced sweet, savory depth. Some sources cite ichibancha containing roughly three times the theanine of nibancha from the same plant, a substantial gap, not a marginal one, and it’s the single biggest reason a well-made first-flush bowl tastes fundamentally different rather than just marginally better.

    Nibancha grows fast under strong summer light, and light drives a different chemical process entirely. Light exposure is the key trigger for catechin production in tea plants, catechins being the polyphenols responsible for bitterness and astringency. Because nibancha leaves grow quickly under longer summer days and more intense sunlight, they shift the plant’s chemical balance toward catechins and away from the amino acid accumulation ichibancha benefits from. The result is a brisker, more assertive, less naturally sweet leaf, picked roughly six to eight weeks after the first flush finishes.

    Sanbancha compounds both effects further. By the third flush, leaves are more mature, have had even less time to build amino acid reserves relative to their growth, and have been exposed to the most cumulative sunlight of the season, producing the most bitter, coarsest result of the three. This is the leaf most likely to end up in the lowest tier of culinary matcha or bulk food-service products, where its assertiveness gets buried under other ingredients anyway.

    Reading Harvest Language on a Label

    Not every brand states harvest timing explicitly, but when they do, here’s what the terms actually signal:

    “First harvest” or “ichibancha” or “first flush” — genuinely the spring leaf, shaded the longest, picked once per season. This is the leaf behind virtually all top-tier ceremonial matcha.

    “Second harvest” or “nibancha” — summer regrowth, more available and more affordable, and genuinely well-suited to lattes and baking, where its brisker character reads as freshness rather than a flaw.

    Vague or absent harvest language — worth treating with a bit more skepticism, particularly on a tin claiming “ceremonial grade” at a suspiciously low price. A legitimate first-flush product is expensive to produce, and a brand confident in that sourcing usually says so.

    Matching Harvest to Actual Use

    For drinking matcha straight, usucha or koicha style: ichibancha, without much debate. This is exactly the use case first-flush matcha’s sweetness and umami were meant to showcase, and a later harvest will taste noticeably flatter and more bitter prepared the same simple way.

    For lattes: nibancha is a genuinely sensible, not just budget-driven, choice. Its brisker character actually reads as fresher and more assertive once milk and sweetener are involved, and you’re not paying a premium for subtlety that dairy is going to mute anyway.

    For baking: later harvests, nibancha or even sanbancha-derived culinary matcha, are the practical, cost-effective choice, since baking similarly buries the delicate qualities that make first flush worth its price tag.

    Where to Find First-Flush Matcha

    Shop first-flush ceremonial-grade matcha on Amazon →

    A Few Things People Ask Me

    Is nibancha “bad” matcha, or just different? Genuinely just different, not inferior in an absolute sense. It’s simply matched to different applications than ichibancha, and treating it as a lesser product rather than a differently suited one leads to either overpaying for lattes or being disappointed by a straight cup made from the wrong harvest.

    Does shincha mean the same thing as ichibancha? Essentially yes, they refer to the same leaf, just with different emphasis. Ichibancha means “first-picked tea” in the context of the season’s harvest sequence, while shincha means “new tea,” highlighting freshness rather than harvest order specifically.

    Can I taste the harvest difference myself, or is it too subtle without training? It’s genuinely one of the more noticeable distinctions in matcha, not a subtle one requiring a trained palate. A side-by-side of genuine ichibancha and nibancha from the same brand and region makes the sweetness and umami gap obvious even to a first-time taster.

    Why don’t more brands state harvest timing clearly if it matters this much? Partly because grade terminology (ceremonial, premium, culinary) has become the more dominant marketing language in Western markets, even though it’s less standardized and arguably less informative than harvest timing. A brand that states both is generally giving you more useful information than one relying on grade language alone.

    Does a plant’s age affect how harvest timing plays out, separate from the flush itself? Yes — newer tea fields, typically in their third or fourth year, are often given lighter harvests to let the plant establish itself, with full commercial-scale picking usually starting around year four or five. A young plant’s ichibancha may not yet reach the same character as an established bush’s first flush, which is a separate variable from harvest timing itself but worth knowing if a brand specifically markets young-plant tea.

    Is there any harvest that falls between nibancha and sanbancha in quality that I should know about? Not really as a distinct named category — the calendar generally runs ichibancha, nibancha, sanbancha in that order of both timing and declining quality, though some regions with longer growing seasons occasionally squeeze in an additional autumn harvest, generally used for lower-grade bancha rather than matcha specifically.

    Where I Landed

    The tin comparison that started this whole realization for me wasn’t really about one product being defective, it was about not understanding that “ceremonial grade” alone doesn’t fully specify what I was buying. Harvest timing is arguably the more fundamental variable, the one that actually explains why two similarly labeled matchas can taste so different, and it’s worth checking for specifically rather than relying on grade language alone.

    Once you know to look for it, harvest timing becomes one of the fastest ways to size up whether a tin is actually worth its price, faster even than color or texture checks, since a brand willing to state ichibancha specifically is telling you something concrete, not just repeating a marketing word every competitor uses too.

    If you’re shopping with this in mind, my matcha powder brands comparison covers several brands where harvest and sourcing details held up well against real scrutiny.

  • Matcha and Hojicha Together: The Layered Latte and Beyond

    Matcha and Hojicha Together: The Layered Latte and Beyond

    Disclosure: This post contains affiliate links. If you buy through one of them, I may earn a small commission at no extra cost to you.

    Matcha and hojicha come from the exact same plant, processed in completely opposite directions, unroasted and vividly green versus roasted into something toasty and reddish-brown, and putting them in the same glass turns out to be far more interesting than picking one or the other. Instead of competing, they layer: matcha’s grassy sharpness on one end, hojicha’s caramel-like roundness on the other, with milk holding the middle together, and the visual contrast alone makes it one of the more genuinely striking drinks you can put together at home.

    The Problem You’re Actually Trying to Solve

    You’ve searched for matcha and hojicha blend ideas because you’ve seen the layered version, the one with three distinct colored stripes in a glass, or you already love both teas separately and want to know how to actually combine them without one flavor completely overwhelming the other.

    Who This Article Is NOT For

    Let’s save you some scrolling if this isn’t quite your situation.

    • If you want matcha recipes specifically without hojicha involved, my how to make a matcha latte guide covers that on its own.
    • If you want to understand hojicha as its own category before combining it with anything, my best hojicha brands guide is the better starting point.

    If you’re past that, here’s where the actual guide starts.

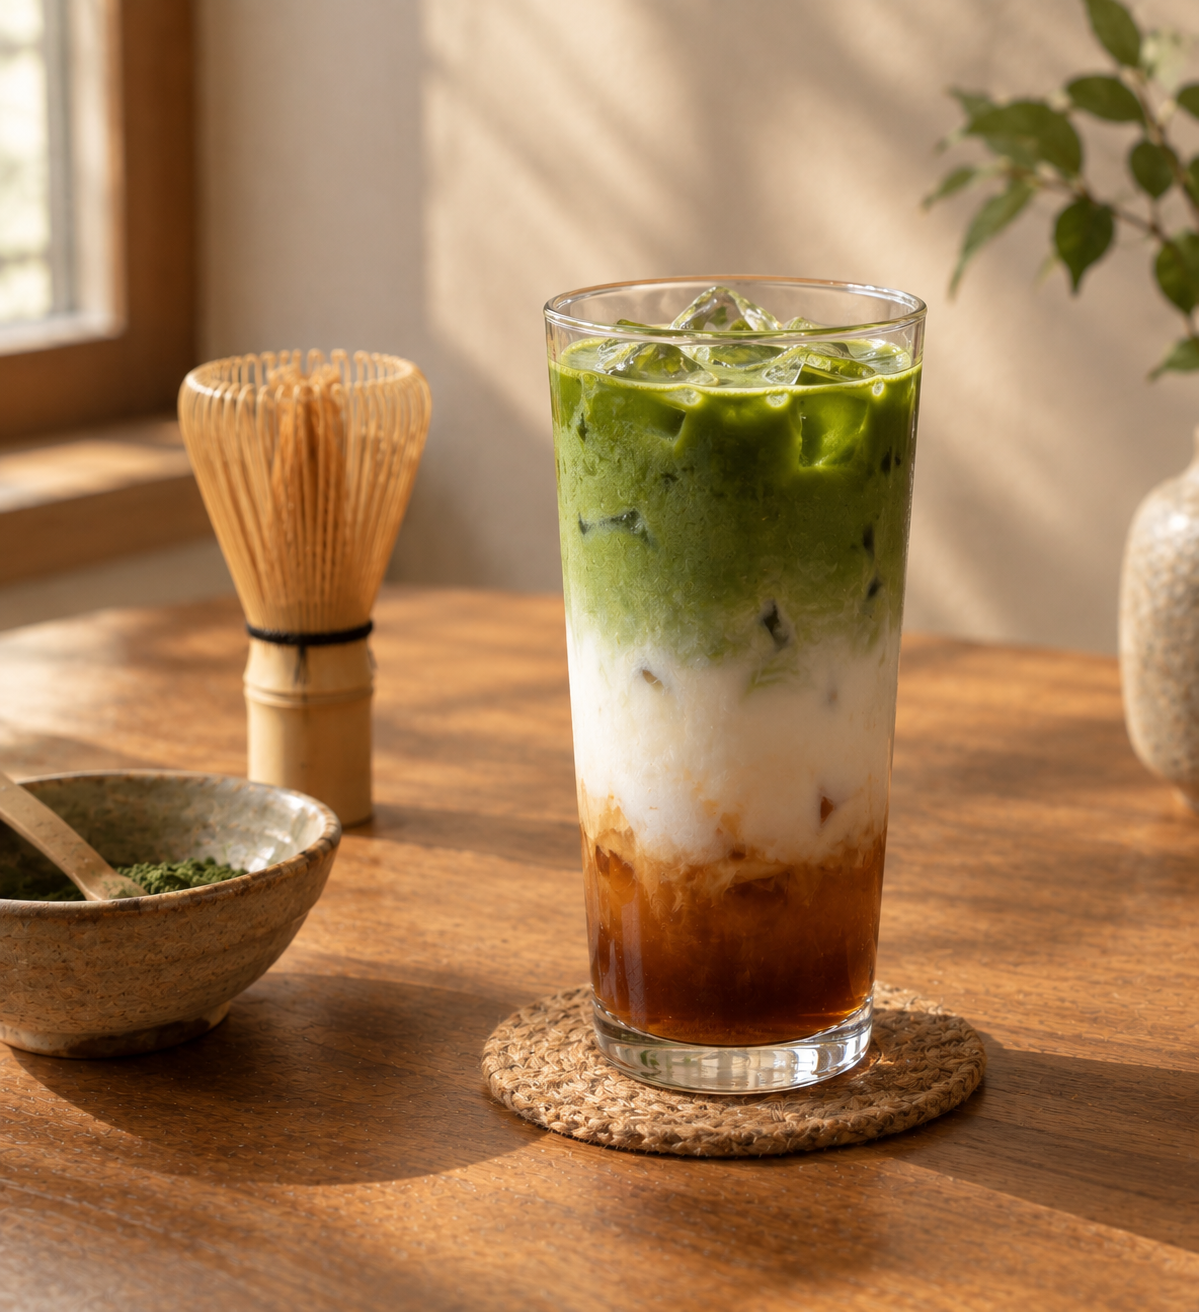
    The Classic Layered Matcha-Hojicha Latte

    This is the version most people picture, three visually distinct layers, hojicha at the bottom, milk in the middle, matcha floating on top, that you stir together right before drinking.

    The method:

    1. Sift 1 teaspoon of matcha into a bowl, whisk with about 40ml of cold water until smooth.
    2. Separately, sift 2 teaspoons of hojicha powder into another bowl, whisk with about 80ml of cold water until smooth.
    3. Fill a tall glass with ice.
    4. Pour the hojicha mixture in first, forming the bottom layer.
    5. Slowly pour milk over the back of a spoon to create a middle layer without disturbing the hojicha below.
    6. Gently pour the matcha mixture on top last, letting it float rather than sink.

    Using cold water for both bases, rather than hot, keeps the layers more visually distinct and prevents the ice from melting too quickly and blurring the separation.

    Matcha-Hojicha with Caramel

    A slightly more indulgent variation adds a caramel element, which bridges the two teas nicely since caramel’s sweetness echoes hojicha’s naturally roasted, almost caramel-like character while still letting matcha’s brighter top note come through.

    The method: Prepare the matcha and hojicha bases separately as above, drizzle caramel syrup along the inside of the glass before adding ice, then layer milk and both tea bases the same way. The caramel clinging to the glass walls adds visual interest along with the flavor.

    Brown Sugar as the Bridge Flavor

    Brown sugar is a particularly good sweetener choice specifically because it doesn’t compete with either tea’s flavor the way white sugar or a neutral syrup can. Its own caramel-forward character sits naturally between matcha’s vegetal brightness and hojicha’s roasted depth, reinforcing both rather than masking either.

    The method: Dissolve brown sugar into warm milk before combining with your whisked matcha and hojicha bases, rather than adding it dry, which can leave undissolved grit at the bottom of the glass.

    Beyond Lattes: Other Ways to Combine Them

    Hot chocolate hybrid. Hojicha blends particularly well into hot chocolate, since its roasted character complements cocoa the way a really good dark roast coffee complements chocolate desserts. Adding a smaller amount of matcha on top as a garnish layer, rather than mixing it fully in, keeps its brightness from getting lost against the cocoa.

    Baked goods with both. A marbled effect in cookies or a loaf cake, swirling a matcha-tinted batter and a hojicha-tinted batter together before baking, gives you both flavors in alternating bites rather than a single blended one, similar in spirit to a chocolate-vanilla marble cake.

    Fruit pairings. Hojicha pairs particularly well with strawberry specifically, its roasted, nutty character contrasting nicely against fresh fruit sweetness, and this combination works as a base for a matcha-hojicha version too, strawberry and hojicha on the bottom, matcha floated on top for color contrast as much as flavor.

    Getting the Ratio Right Between the Two

    Because hojicha’s flavor is naturally more assertive and roasted while matcha is more delicate and vegetal, most successful blends lean slightly hojicha-forward, roughly a 2-to-1 ratio of hojicha to matcha by volume, rather than an even split. An even 50-50 split tends to let hojicha dominate anyway, so intentionally leaning into that ratio rather than fighting it usually produces a more balanced-tasting result than a technically equal measurement would.

    What You’ll Need

    Shop hojicha powder for lattes on Amazon →

    Shop culinary-grade matcha for lattes on Amazon →

    A Few Things People Ask Me

    Does combining matcha and hojicha change the caffeine content compared to either alone? Yes, modestly — since matcha carries meaningfully more caffeine per gram than roasted hojicha, a blended drink lands somewhere between the two, generally closer to a standalone hojicha than a standalone matcha given the ratio most recipes use.

    Can I make a hot version of the layered latte, or does it only work iced? The visual layering effect specifically depends on ice and gentle pouring technique, so a hot version won’t maintain distinct layers the same way. A hot version still tastes great combined, just fully stirred together rather than presented as separate stripes.

    Is there a “wrong” order to layer the ingredients? For the classic version, hojicha on the bottom, milk in the middle, matcha on top, is the standard because it plays with density and color contrast effectively. Reversing it technically still tastes the same but loses some of the visual appeal that makes this version popular in the first place.

    Do I need two separate whisks, or can I use the same one for both teas? A single whisk works fine as long as you rinse it between the matcha and hojicha bases, since any leftover residue from one can slightly muddy the color and flavor of the other, especially matcha’s more delicate green if hojicha residue carries over first.

    Which milk works best for holding the layers apart visually? A slightly thicker milk, whole dairy or a barista-formulated oat milk, holds a cleaner layer than a thinner milk like skim or standard almond, since viscosity affects how well the layers resist mixing on contact. Pouring slowly over the back of a spoon matters more than the milk choice itself, but a thicker milk gives you a bit more forgiveness if your pour isn’t perfectly gentle.

    Can this be made without dairy or any milk at all, just the two teas together? Yes, though without milk in the middle the layering effect mostly disappears, since matcha and hojicha bases are similar enough in density to blend together on contact. If you want the flavor combination without the visual layering, simply whisking both bases together directly works fine.

    Where I Landed

    The appeal of combining matcha and hojicha isn’t really about one being better than the other, it’s that they highlight each other by contrast. Matcha’s brightness makes hojicha’s roastiness read as even warmer, and hojicha’s depth makes matcha’s vegetal edge taste sharper and more distinct than it does on its own. That’s a genuinely different experience than either tea delivers solo, and it’s worth trying at least once even if you already have a clear favorite between the two.

    Once you’ve made the classic layered version, the rest of this list, the caramel variation, the hot chocolate hybrid, the fruit pairings, are all easy to riff on from there using the same basic technique of whisking each base separately before combining them. If you want to go deeper on either tea individually before combining them, a good culinary-grade matcha and a well-roasted hojicha are worth having on hand as your baseline starting points.

  • The History Behind Your Kyusu: Tokoname and Banko Ware

    The History Behind Your Kyusu: Tokoname and Banko Ware

    Disclosure: This post contains affiliate links. If you buy through one of them, I may earn a small commission at no extra cost to you.

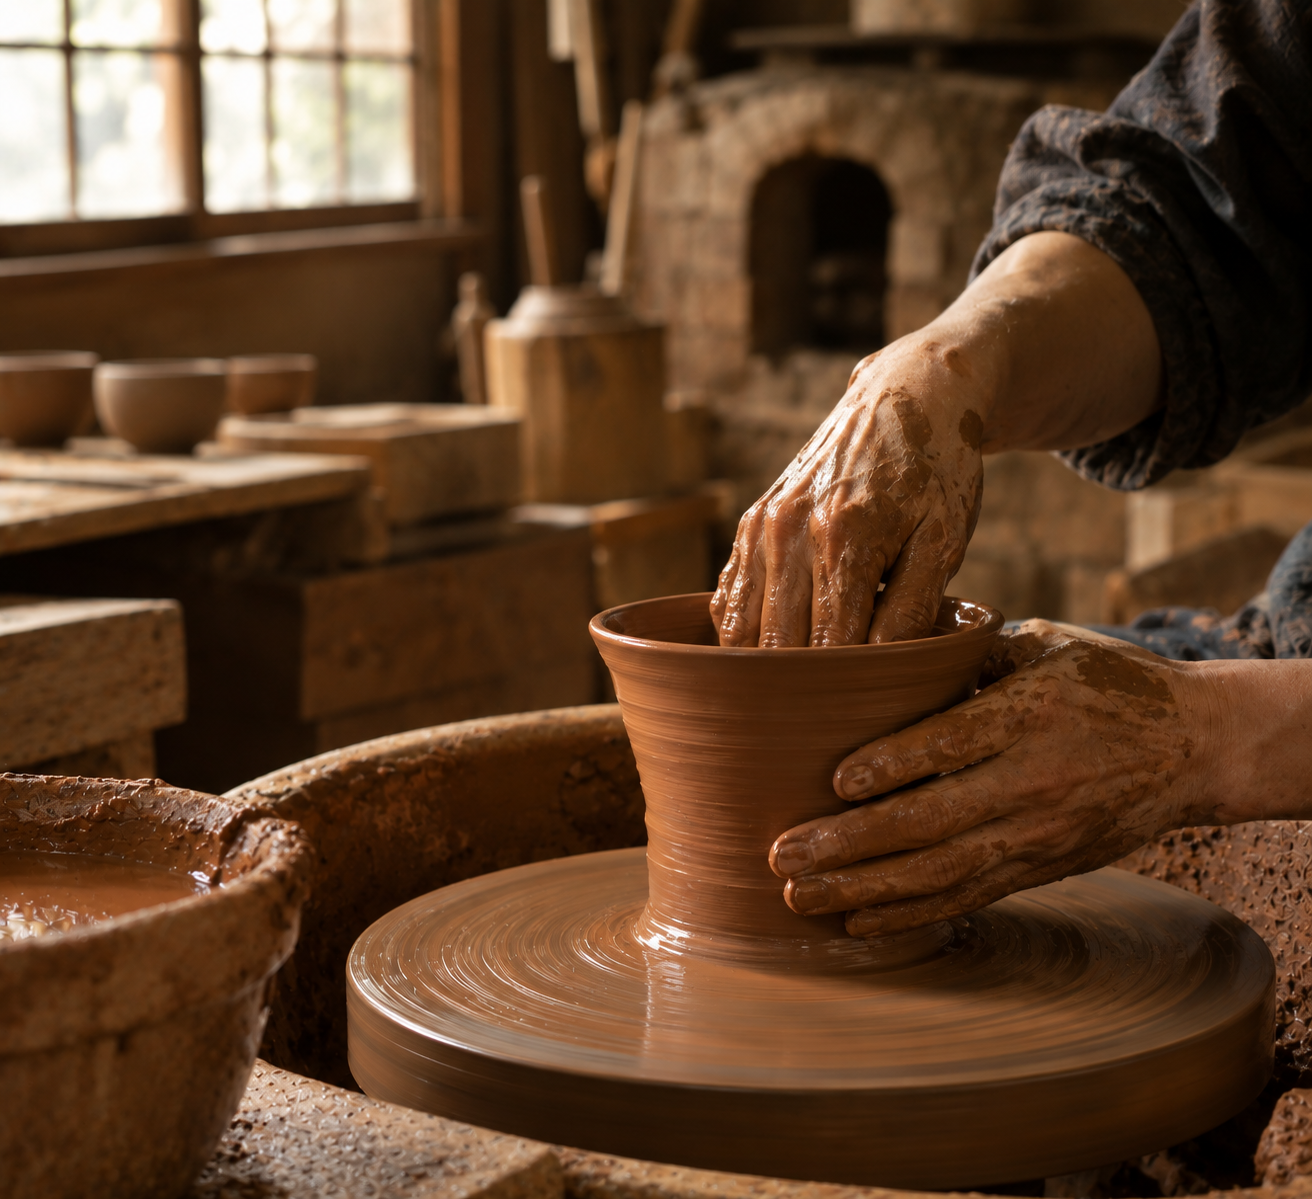
    Every time I pick up my Tokoname kyusu, I’m using a shape and clay tradition that predates the printing press, refined by a specific chain of potters whose names are actually recorded, not lost to vague “ancient craft” marketing language. Knowing that history doesn’t change how the pot brews tea, but it changes how you hold it, and it’s worth actually knowing rather than treating “traditional Japanese teapot” as an unexamined phrase on a product listing that could just as easily be describing something made last month.

    The Problem You’re Actually Trying to Solve

    You’ve searched for the history behind kyusu pottery because you own one, are about to buy one, or you’ve simply noticed “Tokoname” or “Banko” on product listings and want to understand what those names actually represent beyond a vague sense of authenticity.

    Who This Article Is NOT For

    Let’s save you some scrolling if this isn’t quite your situation.

    • If you want current brand and product recommendations rather than history, my Japanese kyusu brands compared guide covers that ground directly.
    • If you’re deciding what to actually buy rather than learning the background, my kyusu buying guide is the more practical resource.

    If you’re past that, here’s where the actual history starts.

    Tokoname: Nearly a Thousand Years Before the Teapot Arrived

    Tokoname’s pottery tradition traces back to the late Heian period, the end of the 12th century, making it one of Japan’s Six Ancient Kilns, a group of historic pottery centers, alongside Seto, Shigaraki, Echizen, Tamba, and Bizen, that have operated continuously since medieval times. For its first several centuries, Tokoname had nothing to do with tea at all. Potters produced large storage jars, cooking vessels, and eventually, by the Kamakura period, the region hosted an extraordinary concentration of kilns, reportedly over 3,000 at its historical peak, all working the region’s distinctive iron-rich clay dug from the Chita Peninsula’s hills.

    The shift toward what Tokoname is known for today didn’t happen until the early 19th century, deep into the Edo period. A potter named Sugie Jumon began crafting Chinese-style teapots from the local red clay, timed almost perfectly with a cultural shift: sencha, steeped loose leaf tea, was gaining popularity among the merchant class as a less formal alternative to the powdered matcha associated with traditional tea ceremony. Tokoname’s iron-rich clay turned out to genuinely soften tea’s astringency, a real chemical property, not just a nice legend, and that discovery cemented the region’s shift toward teapot production. By the Meiji era, Tokoname had become Japan’s premier teapot production center, and in 1961, Tokoname ware received official designation as a Traditional Japanese Craft, a formal recognition protecting the techniques passed down through its potting families.

    Banko: A Merchant’s Wish for Something Eternal

    Banko ware’s origin story is more personal and more precisely dated. Around 1736 to 1740, a wealthy merchant named Nunami Rozan, deeply devoted to tea ceremony since childhood, built his own kiln in what’s now Asahi, Mie Prefecture. Rozan stamped his creations with the seal “Banko Fueki,” meaning “eternal and unchanging,” expressing his wish that his work would be passed down through generations. That stamp is quite literally where the name Banko comes from.

    The story doesn’t run in a straight line from there. Production ceased entirely after Rozan’s death, and Banko ware might have simply ended as a historical footnote if two antique dealer brothers, Mori Yusetsu and Mori Senshu, hadn’t revived it roughly thirty years later in the late Edo period, using wooden-mold techniques called “Kata-Banko” to bring the style back. The tradition found its lasting home not in Rozan’s original location but in nearby Yokkaichi, where, in 1853, a local landowner named Yamanaka Chuzaemon began teaching flood-affected villagers pottery techniques as a form of economic relief, spending twenty years perfecting mass-production methods for what became known as Yokkaichi Banko ware. What started as disaster recovery became a defining regional industry, now specifically associated with distinctive purple-toned shidei clay teapots.

    The Craft Continues Through Named Makers, Not Just Anonymous Tradition

    One detail worth knowing: both traditions carry their history forward through actual named artisans, not an anonymous, faceless “traditional craft” label. Tokoname has produced recognized masters, including at least one recipient of Japan’s Living National Treasure designation for ceramics, a formal government honor reserved for practitioners preserving genuinely significant traditional techniques. Banko ware similarly carries forward through specific workshops, some now on their third or fourth generation of the same family continuing a craft that itself was interrupted and revived generations before them. When a modern kyusu brand names a specific kiln or maker rather than simply printing “Tokoname” or “Banko” as a generic label, that specificity is meaningful — it connects a piece you can actually buy today to a living, traceable lineage rather than a vague regional association.

    Why This History Actually Matters When You’re Drinking Tea

    Tokoname’s story explains its red-clay character. The centuries of iron-rich clay work that preceded teapot production gave Tokoname potters an unusually deep understanding of that specific clay’s properties, which is part of why the tannin-softening effect feels so refined rather than accidental. This wasn’t a material discovered for tea; it was a material perfected for centuries before tea gave it a new purpose.

    Banko’s story explains its association with resilience and reinvention. A tradition that was essentially reborn twice, once by antique dealers reviving a dead kiln, once by a landowner teaching flood victims a trade, carries a genuinely different cultural weight than a tradition that simply continued unbroken. Banko ware’s more purple-toned clay and reputation for heat resistance and umami enhancement both trace back to techniques developed across that discontinuous, rebuilt history.

    Both traditions predate their most famous product by centuries. Neither Tokoname nor Banko began as “teapot towns.” Both were general ceramics centers for hundreds of years before a specific cultural shift, sencha’s rise in Tokoname’s case, one devoted merchant’s passion project in Banko’s, redirected an already-mature craft toward the specific object we now associate with each name.

    Owning a Piece of Either Tradition

    Shop Tokoname and Banko kyusu teapots on Amazon →

    A Few Things People Ask Me

    Is one tradition genuinely older than the other? Yes, considerably — Tokoname’s pottery roots stretch back roughly 900 years to the late Heian period, while Banko ware dates to the mid-18th century, making it a few centuries younger, though still a genuinely historic craft in its own right.

    Does a kyusu’s price reflect which tradition it comes from? Not directly by tradition alone — price within each tradition varies enormously based on the individual maker’s reputation and whether a piece is hand-thrown versus mold-assisted, more than by Tokoname versus Banko as categories.

    Are there other historic kyusu-producing regions beyond these two? Yes, though Tokoname and Banko are the two most commonly encountered in Western retail specifically. Other regions produce teaware within Japan’s broader ceramic tradition, but these two dominate the kyusu category most buyers outside Japan actually encounter.

    Why did sencha’s popularity specifically drive kyusu development in both traditions? Matcha, prepared with a whisk directly in a bowl, never needed a teapot at all. Sencha, being steeped loose leaf, created genuine demand for a vessel designed specifically around infusion and filtering, which is precisely the gap both Tokoname and Banko potters stepped in to fill once the merchant class embraced the less formal tea style.

    Did Tokoname or Banko ware ever serve purposes completely unrelated to tea? Yes, extensively. Tokoname’s earlier centuries produced storage jars, and later, in the Meiji era, large quantities of industrial ceramic pipes for Tokyo and Osaka’s developing sewage systems, even architectural tiles used on Frank Lloyd Wright’s Imperial Hotel in Tokyo. Both traditions were genuinely utilitarian industries long before, and even alongside, their reputation for fine teaware.

    Does the “Living National Treasure” designation apply to entire regions or to individual people? It’s an individual honor, awarded by the Japanese government to specific master craftspeople recognized for preserving culturally significant techniques, not a blanket designation covering an entire pottery region. A Tokoname piece from a Living National Treasure-designated maker carries a different level of recognition than a standard piece from the same region.

    Where I Landed

    What strikes me most about both stories is how much accident and interruption shaped traditions that now feel inevitable and timeless on a product page. Tokoname spent 700 years making storage jars before a single potter’s decision redirected centuries of clay expertise toward tea. Banko ware nearly vanished entirely, twice, before flood relief and antique dealers’ curiosity brought it back.

    Neither craft was preordained to become synonymous with tea. Both are the result of specific people, Sugie Jumon experimenting with Chinese-style teapots, Nunami Rozan chasing a personal obsession with tea ceremony, Yamanaka Chuzaemon trying to help flood victims survive, making decisions that had nothing to do with guaranteeing a legacy and everything to do with solving a problem or pursuing a passion in front of them at the time.

    None of that changes how either clay performs in your cup, but it’s worth knowing the next time you see “Tokoname” or “Banko” printed on a listing, treated as a simple authenticity stamp, that the actual history behind those two words is a lot messier, and a lot more interesting, than the marketing usually lets on.

  • What’s Actually in a Nio Teas Sampler

    What’s Actually in a Nio Teas Sampler

    Disclosure: This post contains affiliate links, including to Nio Teas. If you buy through one of them, I may earn a small commission at no extra cost to you.

    “Sampler” can mean almost anything depending on the seller, a handful of random leftover teas, or a genuinely curated tasting journey. Nio Teas’ samplers lean firmly toward the latter, and knowing exactly what arrives, how much of it, and what you’ll actually need to prepare it makes the difference between a confident first order and an underwhelming surprise.

    The Problem You’re Actually Trying to Solve

    You’ve searched for what’s actually in a Nio Teas sampler because you’re deciding whether to order one and want specifics, portion sizes, tea counts, what equipment you’ll need, rather than vague marketing language about “trying new teas.”

    Who This Article Is NOT For

    Let’s save you some scrolling if this isn’t quite your situation.

    • If you already know which specific tea you want, a sampler isn’t built for you — go straight to that product instead.
    • If you want a broader review of Nio Teas as a brand, my Nio Teas review covers the wider catalog beyond just the samplers.

    If you’re past that, here’s where the actual breakdown starts.

    The Loose Leaf Green Tea Sampler

    Shop Nio Teas’ loose leaf sampler →

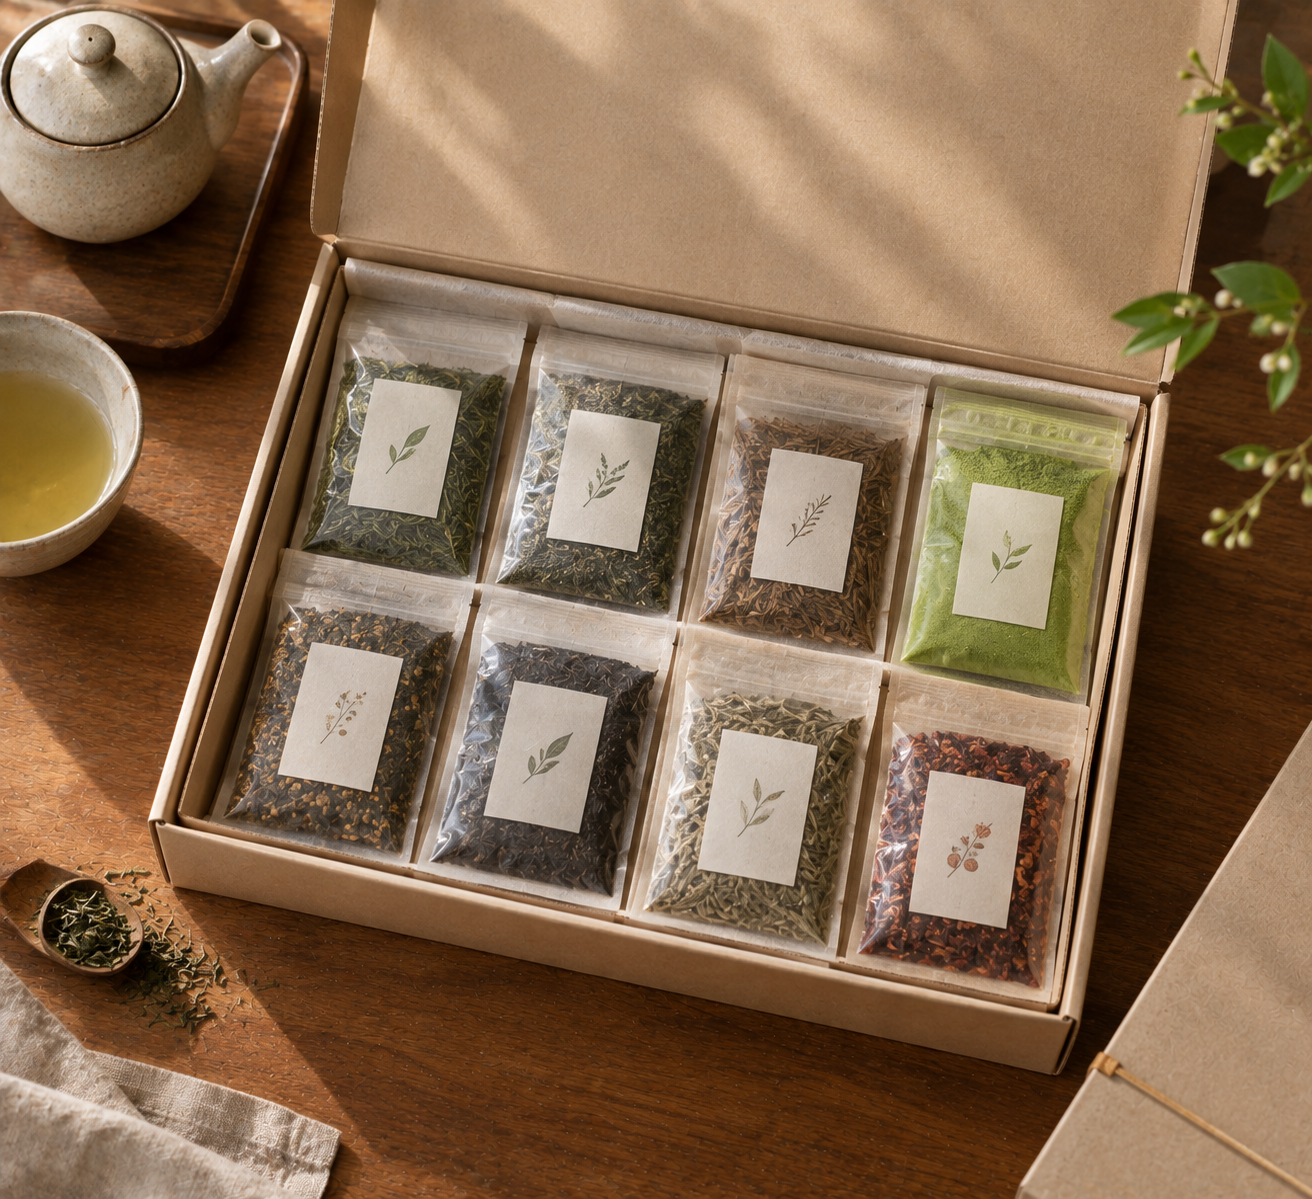
    Each sample pack in this sampler contains 5 grams of loose leaf tea, enough for one full tasting session, meaning 3 to 4 cups from a kyusu, since loose leaf can be re-infused multiple times as its flavor evolves with each steep. The sampler draws from across Nio Teas’ broader sencha, gyokuro, and other green tea categories, giving you exposure to different styles rather than a single tea type repeated in different packaging.

    What you’ll need to prepare it: A kyusu, the clay teapot with a built-in filter that gives the leaves room to open up and release flavor properly. If you don’t already own one, this is worth factoring into your first order, since the sampler tea itself won’t perform the same way steeped in a plain mug with a basic infuser.

    The Matcha Sampler

    Shop Nio Teas’ matcha sampler →

    This is where Nio Teas’ sourcing story really shows up in the numbers. The matcha sampler comes in multiple sizes, a 7-pack and a larger 21-pack among them, each individual packet containing 2 grams, enough for one full bowl or two smaller cups. The full 21-pack lets you work through a genuinely wide range: named matcha varieties like Chanoka Silver (bold, savory, thick umami), Chanoka Okumidori (smoother, less bitter), Nakai Superior (smooth, thick texture), Matcha Seisui (grassier, latte-suited), Matcha Washimine (creamy, suited to koicha), and several more, spanning different cultivars and regions across Japan.

    What you’ll need to prepare it: A chawan (matcha bowl) and chasen (bamboo whisk) at minimum. A chashaku helps with consistent measuring but isn’t strictly required if you’re comfortable eyeballing roughly 2 grams per packet.

    Why the range matters: Matcha genuinely varies by cultivar and region the way wine varies by grape and vineyard, and a sampler this size is really the only practical way to taste that range without buying a dozen full-size tins individually.

    How Much Tea You’re Actually Getting

    SamplerPacket SizeWhat It MakesTypical Variety Count
    Loose leaf sampler5g per pack3–4 cups per pack (re-infused)Varies by selection
    Matcha sampler (7-pack)2g per pack7–14 bowls/cups total7 different matchas
    Matcha sampler (21-pack)2g per pack21–42 bowls/cups total21 different matchas

    Is a Sampler the Right First Order, or Should You Just Buy a Full Tin

    A sampler makes sense if: you’re genuinely undecided, want to taste a spread before committing, or you’re buying as a low-pressure gift for someone whose specific preferences you don’t yet know.

    A full-size tin makes more sense if: you already know you love a specific cultivar or style, since a sampler’s per-gram cost is generally higher than a full-size tin, and you’d rather have a larger, reusable quantity of something you’re confident you’ll enjoy repeatedly.

    A Few Things People Ask Me

    Is the tea in a sampler the same quality as Nio Teas’ full-size products, or a lesser version specifically for samplers? Based on how the sampler is described, it draws directly from the same catalog and sourcing as full-size purchases, not a separate lower tier — the smaller packet size is purely about portion, not a quality downgrade.

    Can I reorder a specific tea I liked from the sampler afterward? Yes, sampler packets are generally drawn from teas also sold individually in full size, so once you’ve identified a favorite, you can look it up and order a larger quantity directly.

    Do I need different equipment for the loose leaf sampler versus the matcha sampler? Yes, they’re genuinely different preparation methods — a kyusu for steeping the loose leaf packets, and a chawan plus chasen for whisking the matcha packets. If you’re ordering both samplers, budget for both sets of tools rather than assuming one setup covers everything.

    Is the matcha sampler worth it if I’m mostly interested in matcha for lattes rather than drinking it straight? Somewhat, though the sampler is built around exploring different cultivars and regions, a use case that shows off best when tasted straight rather than diluted into a latte. If lattes are your primary interest, a single reliable culinary-grade tin may serve you better than a sampler designed for tasting nuance.

    Where I Landed

    The sampler format genuinely earns its place here rather than feeling like a marketing gimmick, mostly because Nio Teas backs it with real specificity: named cultivars, clear portion sizes, and teas drawn from the same catalog as their full-size products. If you’re genuinely unsure what you like yet, that’s worth more than guessing at a single full tin and hoping it’s the right one.

    Once you’ve worked through a sampler and found your favorites, reordering full-size is the natural next step, and there’s plenty more to explore in the rest of the catalog beyond what the sampler introduced you to.

  • Choosing Protective Packaging for a Matcha Gift

    Choosing Protective Packaging for a Matcha Gift

    Disclosure: This post contains affiliate links. If you buy through one of them, I may earn a small commission at no extra cost to you.

    Gifting matcha adds a wrinkle that buying it for yourself doesn’t: you’re not the one deciding how carefully it gets handled between now and the moment someone actually opens it, and you often don’t know how long it’ll sit unopened once it arrives. A beautiful presentation that fails to actually protect the tea inside is a gift that looks great in a photo and tastes disappointing by the time it’s used, which defeats the entire point of giving someone something genuinely good in the first place.

    The Problem You’re Actually Trying to Solve

    You’ve searched for protective matcha packaging because you’re choosing or building a gift and want it to look genuinely thoughtful while also actually keeping the tea fresh until the recipient gets around to using it, which for a gift is often longer than it would take you to work through a tin yourself.

    Who This Article Is NOT For

    Let’s save you some scrolling if this isn’t quite your situation.

    • If you’re storing matcha for your own daily use rather than gifting, my matcha storage guide covers that more directly.
    • If you’re deciding what tea or teaware to gift rather than how it’s packaged, my Japanese tea gift guide covers that broader decision.

    If you’re past that, here’s where the actual guide starts.

    Tin vs. Pouch, for Gifting Specifically

    Metal tins are the stronger default for a gift specifically, not just for everyday storage. They’re fully opaque, genuinely airtight when they use a gasket or double-lid design, and physically protect the contents from the kind of handling a gift might see in shipping or sitting in a bag. They also read as more premium on unboxing, which matters more for a gift than for tea you’re buying purely for yourself, and they’re reusable afterward, which pouches generally aren’t.

    Pouches can perform nearly as well when they use proper multi-layer barrier film with a reliable resealable closure, and they’re often more affordable, which matters if you’re including matcha as part of a larger gift set rather than the sole item. The tradeoff is that a lower-quality pouch is easier to damage or leave imperfectly resealed than a tin, which is a bigger risk for a gift you won’t personally handle again after giving it — you’re trusting the recipient to reseal it correctly every time, which isn’t a given for someone new to matcha.

    What to avoid entirely: clear glass or plastic packaging, however attractive it looks through a gift box window. Light exposure is one of matcha’s biggest enemies, and transparent packaging defeats a meaningful part of what protective packaging is for, regardless of how good it looks unwrapped. If a seller is using clear packaging specifically to show off the vivid green color, that same light exposure is quietly working against the product the whole time it sits on a shelf before the gift is even given.

    What Actually Signals Quality Protective Packaging

    A genuine airtight seal, whether a gasket lid on a tin or a proper zip-and-fold closure on a pouch, not just a snap-on lid that looks sealed but lets air through. If you’re buying rather than packaging matcha yourself, check product descriptions specifically for words like “airtight” or “gasket” rather than assuming any tin qualifies.

    Full opacity, not just a dark tint. Some packaging uses tinted rather than fully opaque material, which blocks less light than it appears to. A tin or foil-lined pouch is more reliable here than colored glass or plastic.

    A double-lid or inner-seal design, common on higher-quality tins, which adds a second layer of protection beyond the outer lid alone, particularly useful for a gift that might be opened and reclosed a few times by a curious recipient before being used regularly.

    Reasonable portion sizing for a gift specifically. A 30 to 40 gram tin is a common, sensible gift size, large enough to feel substantial but small enough that the recipient can reasonably work through it before quality declines, rather than a bulk size that outlives its own freshness before it’s finished.

    Building a Protective Gift Set, Not Just a Tin

    If you’re assembling a fuller gift rather than sending matcha alone, the packaging question extends to what surrounds the tin too. A gift box with a properly fitted insert keeps the tin from shifting and taking impact damage in transit, and pairing the tin with a chasen and chashaku gives the recipient everything they need to actually use the gift immediately rather than needing to source tools separately before their first cup.

    Where to Find Good Protective Tins

    Shop airtight matcha gift tins on Amazon →

    Shop matcha gift sets with tin and whisk on Amazon →

    A Few Things People Ask Me

    Is it worth repackaging matcha into a nicer gift tin if it originally came in a plain bag? Only if the replacement tin is genuinely airtight and opaque itself — transferring matcha into a decorative but poorly sealed container can do more harm than leaving it in a properly sealed original bag, however plain that bag looks.

    Does vacuum-sealed packaging offer a meaningful advantage over a standard airtight tin for gifting? It can extend freshness somewhat further, particularly useful if the gift might sit unopened for an extended period before the recipient starts using it, though a well-made standard airtight tin is sufficient for most gifting timelines under a few months.

    How do I know if a gift tin I’m buying is actually airtight, not just marketed that way? Look for a stated gasket or rubber seal in the product description, and check reviews specifically for mentions of the lid loosening or air getting in over time, since marketing language alone doesn’t always reflect real-world performance.

    Should I worry about the matcha degrading during shipping if I’m mailing a gift rather than handing it over in person? A genuinely airtight, opaque tin handles normal shipping timelines without meaningful degradation. The bigger risk with shipping is usually temperature extremes or rough handling denting a tin, not the packaging’s ability to block light and air specifically.

    Is it better to buy matcha already in gift-appropriate packaging, or buy plain matcha and package it myself? Buying from a seller whose standard packaging already meets the airtight, opaque criteria above is simpler and generally more reliable than repackaging yourself, since matching a proper seal at home is harder than it sounds. Reserve DIY repackaging for cases where you specifically want a personalized container and are confident it genuinely seals well.

    Do different matcha grades need different levels of packaging protection for a gift? Ceremonial grade, being the most delicate and expensive, benefits most from the highest level of protection, an airtight tin with a genuine gasket seal. Culinary grade is somewhat more forgiving and can hold up reasonably well in a good-quality resealable pouch, though the same general principles still apply.

    Where I Landed

    The instinct to prioritize how a gift looks unwrapped is natural, but for matcha specifically, protection and presentation aren’t actually in conflict, a genuinely good tin does both at once. Opaque, airtight, appropriately sized, that’s the checklist, and everything else, the ribbon, the box, the included teaware, is where you get to add the personal touch without compromising what’s actually protecting the tea inside.

    Getting this right also means the gift keeps delivering after the initial unboxing moment, which is really the whole point. A tin that looked beautiful for the five seconds it took to open but let the tea go dull within weeks is a worse gift than a simpler-looking one that still tastes vibrant months later.

    If you’re building out the rest of the gift alongside the packaging itself, my Japanese tea gift guide is a good next stop for matching the whole gift to the person you’re giving it to.