Category: Japanese Tea Guides

  • How to Brew Japanese Green Tea Without a Kyusu

    How to Brew Japanese Green Tea Without a Kyusu

    Disclosure: This post contains affiliate links. If you buy through one of them, I may earn a small commission at no extra cost to you.

    A kyusu is genuinely the best tool for brewing Japanese green tea, but it’s not the only one, and most people outside Japan who want to try sencha or gyokuro don’t own one yet and aren’t sure it’s worth buying before they know they’ll actually keep drinking it regularly. The good news is that a kyusu’s whole job – controlling temperature, giving the leaf room to unfurl, and separating leaf from liquid cleanly – can be approximated well enough with things most kitchens already have.

    None of the methods below will match a good kyusu exactly, but several of them get close enough that the difference matters far less than getting the temperature and timing right in the first place.

    The Problem You’re Actually Trying to Solve

    A lot of beginner advice for Japanese green tea assumes you already own a kyusu, which leaves people either buying one before they know if they’ll stick with the habit, or giving up on Japanese green tea because they don’t have “the right equipment.” The actual requirements are simpler than a dedicated teapot: correct water temperature, a way to give the leaf room to expand, and a clean way to separate leaf from liquid once it’s done steeping. Several household items handle that well enough to get you a genuinely good cup.

    Who This Article Is NOT For

    • If you’re ready to commit to Japanese green tea as a regular habit, my kyusu buying guide is worth reading before you invest – a proper kyusu genuinely does brew a better cup once you’re past the “just trying it out” stage.
    • If you’re brewing matcha rather than steeped loose-leaf tea, none of this applies – matcha is whisked, not steeped, and needs a chasen and bowl rather than any of the vessels below.
    • If you already have reliable access to a kyusu and are just looking for brewing parameters, my guide to brewing green tea temperature covers that more directly.

    The Core Principles, Regardless of Vessel

    Whatever you brew in, three things matter more than the vessel itself: matching water temperature to the specific tea (generally 60-80°C for most sencha, cooler for gyokuro), keeping steep time controlled rather than letting the leaf sit indefinitely, and cleanly separating the leaf from the liquid once it’s done so the tea doesn’t keep over-extracting in the cup. Every method below is really just a different way of solving those same three problems.

    Five Ways to Brew Without a Kyusu

    1. Mug With a Built-In or Clip-On Strainer

    The simplest option for a single cup. Add loose leaf directly to a mug fitted with a fine mesh strainer basket, pour water at the appropriate temperature over it, and steep for the recommended time before lifting the strainer out. It’s quick, easy to clean, and needs no special technique – the only real downside is that a strainer with too-large mesh holes can let smaller leaf particles through into your cup.

    2. A Heat-Safe Glass or Jar

    A simple glass or heat-safe jar works well for one or two servings, and it has a genuine advantage over an opaque mug: you can actually watch the color develop as the tea steeps, which makes it easier to judge doneness by eye once you’ve done it a few times. Just be careful with hot glass, and strain the leaves out through a fine mesh sieve when pouring into your cup.

    3. French Press

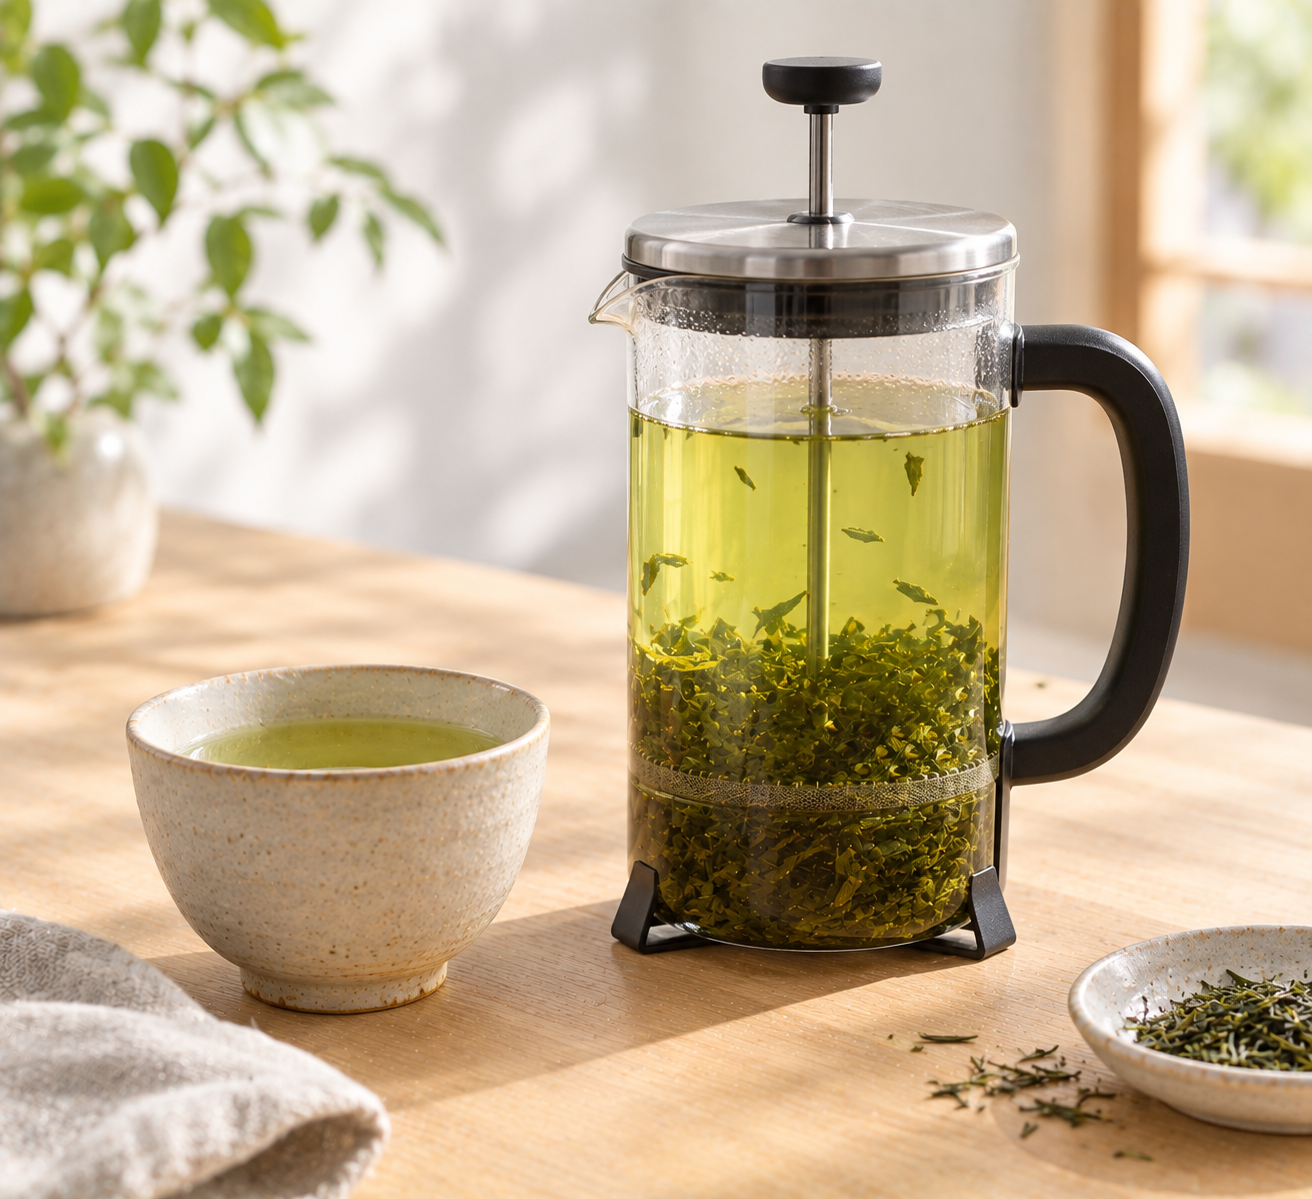
    A French press handles loose-leaf green tea surprisingly well, and it’s a good option if you’re making more than a single cup at once. Use roughly 2-3 grams of tea (about a teaspoon) per 200ml of water, and let boiled water cool for 3-4 minutes before pouring over the leaves if you don’t have a thermometer – this gets you into the right general temperature range for green tea without needing to measure exactly. Steep for 2-3 minutes, then press down slowly and pour immediately. The one real risk is leaving the tea sitting in contact with the leaves too long after pressing, since a French press’s mesh doesn’t fully separate the two the way a proper strainer does – pour it all out right after pressing rather than letting it sit in the carafe.

    4. A Small Saucepan

    Useful specifically when you’re making tea for more than one or two people at once. Add leaves directly to appropriately-cooled water in the saucepan, let it steep briefly, then pour carefully through a fine strainer into cups. It takes a bit more attention to pour cleanly without leaves ending up in the cup, but it scales up more easily than most of the other methods here.

    5. A Bowl and Spoon (In a Pinch)

    Genuinely a last-resort setup rather than something to reach for regularly, but worth knowing: loose leaf steeped directly in a bowl of appropriately cooled water, then strained by holding a spoon or your fingers against the rim while pouring, will produce drinkable tea when nothing else is available. Harder to control heat and filtration precisely, but it works when you’re traveling or in someone else’s kitchen without proper tea equipment.

    A Few Things People Ask Me

    Which of these methods comes closest to what a kyusu actually does? The French press is arguably the closest functional match, since it handles larger leaf volumes and separates leaf from liquid in one motion the way a kyusu’s built-in strainer does, just less precisely.

    Can I reuse the same leaves for a second steep with any of these methods? Yes, for most of them – a second infusion works with mug-and-strainer, glass, French press, or saucepan methods the same way it would with a kyusu, generally at a slightly higher temperature and shorter time than the first steep.

    Do I need different equipment for gyokuro specifically, given how sensitive it is to temperature? Not different equipment, just extra care with temperature and ratio, since gyokuro uses notably cooler water and less liquid relative to leaf than sencha does – any of the vessels above work, but gyokuro leaves less room for temperature error regardless of what you’re brewing it in.

    Is it worth buying an inexpensive tea infuser to start, before committing to a full kyusu setup? Yes, genuinely – a mesh tea infuser on Amazon is a low-cost way to get a cleaner strain than a bowl-and-spoon setup while you figure out whether Japanese green tea is a habit worth investing further in.

    Where I Landed

    The kyusu earns its reputation – it really does make brewing Japanese green tea easier and more consistent once you have one. But treating it as a hard requirement before you can even try sencha or gyokuro properly gets the order backwards. Get the temperature and timing right first, with whatever’s already in your kitchen, and let the tea itself tell you whether it’s worth the dedicated equipment. If you decide it is, Nio Teas’ kyusu selection is a reasonable next step once you’re past the experimentation stage.
  • Does Water Quality Actually Change How Japanese Tea Tastes?

    Does Water Quality Actually Change How Japanese Tea Tastes?

    Disclosure: This post contains affiliate links. If you buy through one of them, I may earn a small commission at no extra cost to you.

    I spent a frustrating stretch of time trying to fix a matcha that kept tasting flat and muted no matter what I adjusted – grade, temperature, whisking technique, all of it. The actual problem turned out to be my tap water. Once I switched to filtered water with the right mineral profile, the same matcha I’d been brewing for weeks suddenly tasted noticeably brighter and sweeter. Nothing about the tea had changed. The water had been quietly working against it the entire time.

    This isn’t a minor, precious detail that only serious tea people need to care about. Water makes up the overwhelming majority of what’s actually in your cup, and its mineral content genuinely changes how much of the tea’s own flavor makes it into that cup versus getting bound up and lost.

    The Problem You’re Actually Trying to Solve

    Most brewing advice fixates on temperature and steep time while treating water as a neutral, interchangeable backdrop – “just use water” – when in practice tap water varies enormously by region in mineral content and chlorine treatment, both of which measurably change how Japanese green tea and matcha taste. If you’ve followed every other piece of brewing advice correctly and your tea still tastes duller or flatter than it should, water is a genuinely underrated place to look.

    Who This Article Is NOT For

    • If you already use filtered or bottled low-mineral water and are happy with how your tea tastes, this is confirming what you’re already doing right rather than telling you something new to fix.
    • If you’re troubleshooting matcha clumping or bitterness from technique rather than water, my guide to making a matcha latte at home covers whisking and dissolving issues specifically.
    • If you’re brewing black tea or coffee rather than Japanese green tea, the specific mineral ranges below are calibrated to green tea’s more delicate flavor profile and don’t necessarily transfer directly.

    The Actual Mechanism

    Water hardness – the amount of dissolved calcium and magnesium in it – changes tea flavor through a fairly specific chemical process rather than just a vague “purity” effect. Calcium ions bind with the catechins and tannins in tea, forming complexes that make those compounds less available to your palate. The practical result is muted astringency and aroma, reduced sweetness and clarity, a cloudier appearance, and an overall flatter flavor – not a smoother, gentler version of the tea, but a genuinely suppressed one.

    This matters more for Japanese green tea specifically than for many other teas, because the qualities that make sencha, gyokuro, and matcha distinctive – theanine-driven umami, delicate aromatics – are exactly the compounds most easily muted by mineral-heavy water. A tea that leans on subtlety has less room to survive that suppression than a bolder, more robustly flavored black tea would.

    Ideal Water Hardness by Tea Type

    Different Japanese green teas have slightly different sensitivity to mineral content, generally tracking with how delicate and aromatics-dependent they are:

    • Japanese green tea generally: below 100 mg/L hardness
    • Sencha: 50-100 mg/L
    • Gyokuro (the most sensitive, given its umami-forward, aromatics-heavy profile – see my sencha vs. gyokuro comparison for why): ideally below 60 mg/L
    • Matcha: 50-80 mg/L

    The pattern across all of these: the more a tea depends on theanine and subtle aroma rather than bold, assertive flavor, the more it needs genuinely soft water to actually express that character rather than have it bound up and dulled by minerals.

    Chlorine Is a Separate Problem From Hardness

    Beyond mineral content, chlorine treatment in municipal tap water is its own issue entirely – it introduces a flavor similar to what you’d notice in pool water, and it clashes with green tea’s delicate flavor in a way that’s immediately noticeable once you know what to listen for. Iron and manganese, more common in well water, cause discoloration and unpleasant flavor of their own kind. Both of these are separate from the hardness/mineral discussion above, and both are usually addressed by the same solution: filtering before brewing.

    What Kind of Filter Actually Helps

    For most home tea drinkers, a countertop filter offers the best balance of cost, tea-relevant performance, and lifespan, typically treating several hundred gallons per cartridge before needing replacement. The goal for Japanese green tea is landing in a modest mineral range – broadly in the range of 1 to 4 grains per gallon – rather than either fully mineral-stripped water or unfiltered hard tap water at either extreme.

    A basic pitcher filter is a reasonable, low-commitment starting point if you’re not ready to invest in a dedicated countertop system, though not all pitcher filters perform equally – some remove chlorine effectively but do little for hardness, so it’s worth checking what a specific filter is actually rated to remove before assuming “filtered” automatically means “right for tea.”

    A Few Things People Ask Me

    Is bottled spring water a safe default if I don’t want to deal with a filter? It can work, but spring water mineral content varies a lot by brand, and some brands run harder than ideal for delicate Japanese green tea. If you go this route, it’s worth checking a specific brand’s mineral content rather than assuming all bottled water is equally soft.

    Does distilled or reverse-osmosis water make the best tea, since it has no minerals at all? Not necessarily – completely mineral-free water can actually make tea taste flat and lifeless in a different way, since some mineral presence helps carry flavor. The target is soft, low-mineral water, not zero-mineral water.

    How much does this actually matter compared to temperature and steep time? It’s genuinely comparable in impact, which is why it surprises people – you can nail every other variable and still get a disappointing cup if the water itself is working against the tea’s flavor from the start.

    What’s a reasonable water filter to start with for someone serious about Japanese tea? A countertop water filter on Amazon rated for both chlorine and hardness reduction is the more complete solution if you’re brewing Japanese green tea or matcha regularly enough to justify it over a basic pitcher. And once your water is sorted, Nio Teas’ matcha is a good test case for actually noticing the difference, since its more delicate flavor shows the water effect clearly.

    Where I Landed

    The thing that made this click for me was realizing water isn’t a neutral medium the tea sits in – it’s an active participant in what actually ends up in the cup, capable of either letting a good matcha or sencha express itself fully or quietly suppressing most of what makes it worth drinking in the first place. If you’ve been troubleshooting a disappointing cup by adjusting everything except your water, it’s worth checking that variable before assuming the tea itself, or your technique, is the problem. Sometimes the answer really is that simple, and that unglamorous.

  • A Season-by-Season Guide to Pairing Matcha With Wagashi

    A Season-by-Season Guide to Pairing Matcha With Wagashi

    Disclosure: This post contains affiliate links. If you buy through one of them, I may earn a small commission at no extra cost to you.

    For a long time I drank matcha and ate wagashi as two separate things that happened to show up at the same tea time, without really thinking about why they’re almost always served together in Japan rather than apart. It’s not just tradition for tradition’s sake – matcha’s bitterness and wagashi’s gentle sweetness are doing real work on each other, softening the tea’s sharper edges while the tea keeps the sweet from feeling cloying. And because wagashi itself changes with the seasons, that pairing looks different depending on the time of year.

    The Problem You’re Actually Trying to Solve

    Most explanations of matcha and wagashi either treat the pairing as a vague cultural fact (“they’re traditionally served together”) without explaining the actual flavor logic, or they cover wagashi as a static category without acknowledging that what counts as “the” wagashi to pair with matcha changes meaningfully across spring, summer, autumn, and winter. If you’re trying to build an actual seasonal tea routine rather than just picking whatever wagashi happens to be in stock, that distinction matters.

    Who This Article Is NOT For

    • If you want a general introduction to wagashi as a category rather than a seasonal pairing guide, my wagashi guide is the more foundational read.
    • If you’re specifically choosing which matcha brand or grade to buy rather than what to pair it with, my matcha powder brands comparison covers that separately.
    • If you can’t access fresh seasonal wagashi where you live and want substitutes rather than the traditional pairings themselves, most of what’s below assumes at least some access to Japanese confectionery, whether local, imported, or homemade.

    Why This Pairing Actually Works

    The logic isn’t just “sweet plus bitter is nice” – it’s more specific than that. Matcha carries deep umami along with a real astringency, especially with a stronger or more ceremonial-grade preparation. Wagashi’s gentle, refined sweetness – built from ingredients like red bean paste, rice flour, and agar rather than the concentrated sugar and fat of most Western desserts – softens that astringency without overwhelming it the way a rich, buttery dessert would. The tea, in turn, keeps the sweetness from feeling cloying or one-note. Neither element fully dominates the other, which is the entire point of the pairing rather than an accident of tradition.

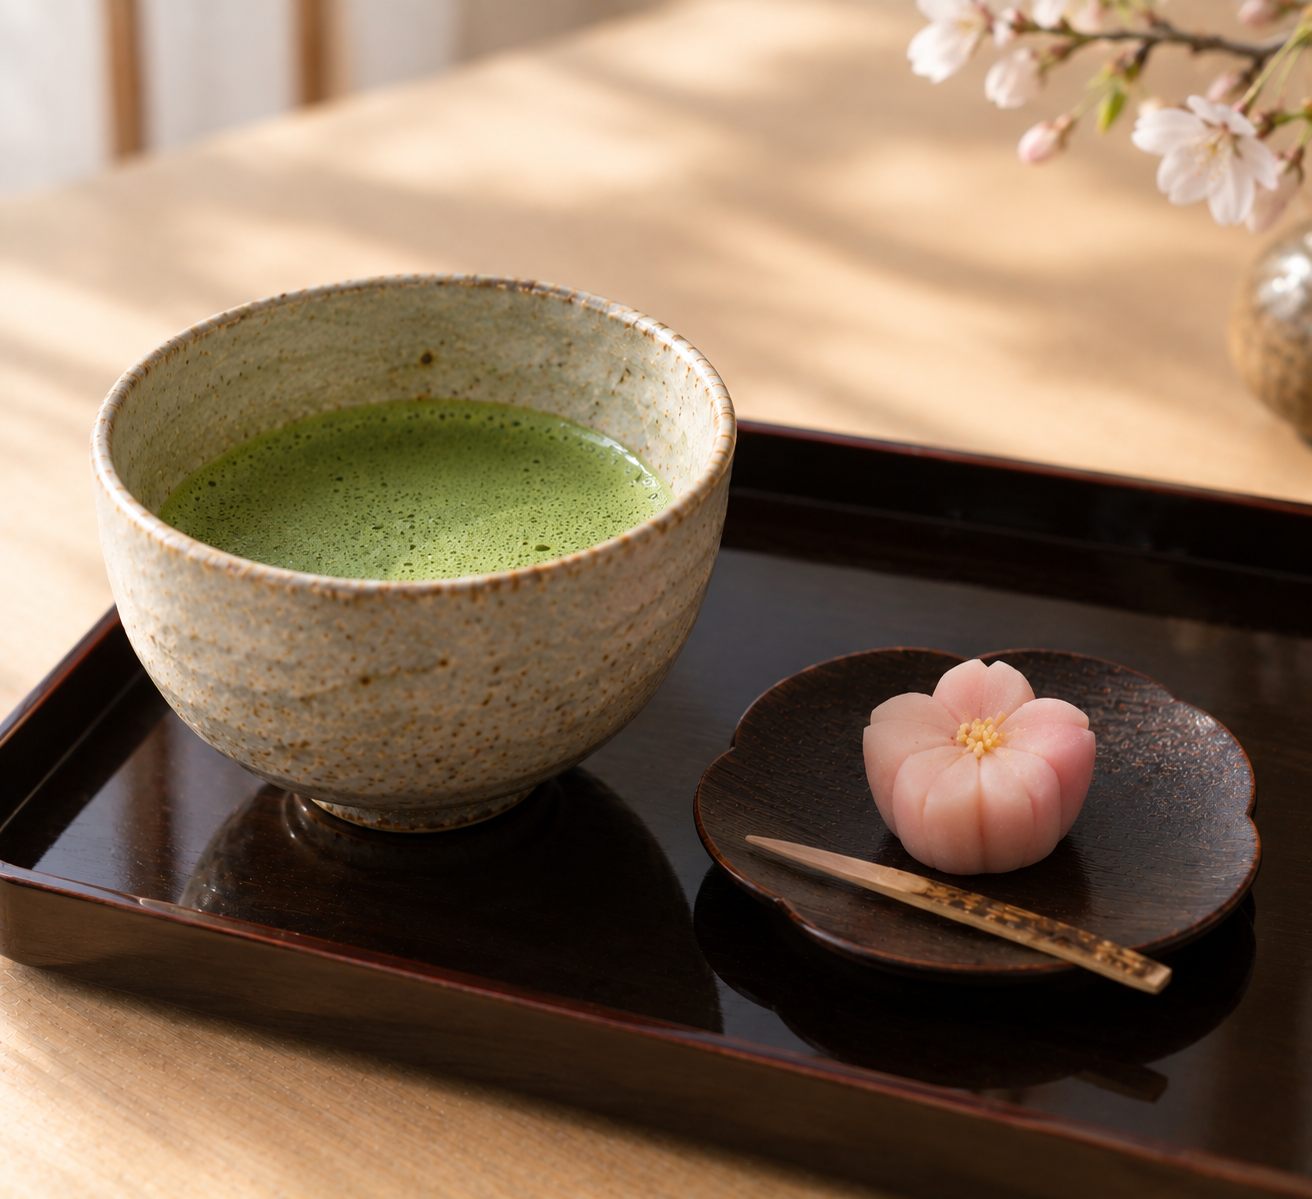
    Traditional nerikiri – wagashi hand-shaped into seasonal motifs, like a maple leaf in autumn or a cherry blossom in spring – is often held up as an ideal match for exactly this reason: its delicate sweetness and soft texture complement matcha’s intensity without a fight for dominance.

    Spring: Sakura Mochi and Hishimochi

    Spring wagashi leans heavily on cherry blossom themes and soft pink-white-green color palettes marking the change of season.

    Sakura mochi – a pink-tinted mochi wrapped around red bean filling, often wrapped again in a pickled cherry blossom leaf – is probably the most recognizable spring wagashi, and its salty-sweet edge from the pickled leaf plays especially well against matcha’s vegetal bitterness.

    Hishimochi, a diamond-shaped layered mochi in pink, white, and green, is more visual celebration than intense flavor experience, making it a lighter counterpart to a stronger matcha if you want the tea itself to carry more of the flavor weight.

    Summer: Mizu Yokan and Kudzukiri

    Summer wagashi shifts toward cooling, often chilled or jelly-like textures, since the goal is refreshment as much as sweetness.

    Mizu yokan, a lighter, more delicate version of standard yokan (a firm red bean jelly), is served chilled and pairs particularly well with a cooler-brewed matcha or even iced matcha, since both are leaning into the same seasonal need for something refreshing rather than warming.

    Kudzukiri, translucent arrowroot starch noodles typically served cold with a sweet syrup, brings a genuinely different texture to the pairing – almost more textural experience than intensely sweet, which keeps it from competing with matcha’s own flavor.

    Autumn: Kuri Manju and Tsukimi Dango

    Autumn wagashi turns toward chestnut, harvest themes, and the full moon.

    Kuri manju, a steamed bun filled with sweetened chestnut, is heartier and more filling than the lighter spring and summer options, and its warm, nutty sweetness pairs particularly well with a richer, more full-bodied matcha rather than a delicate, high-grade ceremonial one that might get lost against it.

    Tsukimi dango, round mochi balls traditionally eaten during moon-viewing celebrations, are simpler and less sweet, which makes them a good match if you want the matcha itself to be the more assertive flavor in the pairing.

    Winter: Kagami Mochi and New Year Sweets

    Winter wagashi is tied closely to New Year traditions rather than being a broad seasonal category the way the other three seasons are.

    Kagami mochi, ceremonial stacked mochi placed out during New Year celebrations for good fortune, is traditionally eaten afterward in a sweet red bean soup rather than paired directly with tea in the moment – but the same red bean sweetness that defines it works well alongside matcha whenever it’s actually served as a sweet on its own, following the same basic logic as the other seasonal pairings.

    A Few Things People Ask Me

    Does the pairing logic change based on matcha grade, or just wagashi type? Both matter, but if you’re only adjusting one side, adjusting matcha grade to match wagashi intensity is usually the more practical move – a delicate, high-grade ceremonial matcha suits lighter, subtler wagashi (tsukimi dango, hishimochi), while a more robust culinary-adjacent matcha holds up better against heartier options like kuri manju.

    Can I pair matcha with non-Japanese sweets using the same logic? To some extent, yes – the underlying principle (a refined, not-too-rich sweetness that doesn’t fight matcha’s bitterness) applies to some Western pastries too, though most Western desserts run richer and sweeter than wagashi, which can genuinely overwhelm matcha rather than balance it.

    Where can I actually source wagashi outside Japan? Specialty Japanese grocery stores and some Japanese bakeries carry at least mochi-based options regularly; more delicate seasonal items like fresh nerikiri are harder to find outside Japan and are sometimes worth making at home if you’re committed to trying the full seasonal range.

    What matcha would you recommend keeping on hand for pairing with wagashi generally? Nio Teas’ matcha is a reasonable mid-range option that works across most of the pairings above without needing to buy a different grade for every season. If you want to try making your own simple wagashi at home, a wagashi mold set on Amazon is a low-cost way to start shaping mochi-based sweets yourself.

    Where I Landed

    What changed how I think about this pairing wasn’t the tradition itself – it was realizing the seasonal rotation isn’t decorative, it’s functional. Wagashi’s texture and sweetness genuinely shift with the seasons in ways that either lighten or deepen how matcha reads against it, so the “right” wagashi for a cup of matcha really does depend on the time of year, not just personal taste. Once I started matching intensity – lighter sweets with delicate matcha, heartier sweets with more robust matcha – the pairing stopped being background tradition and started being something I actually thought about each season.

  • How to Care for Lacquerware and Cast Iron Teapots (Without Ruining Them)

    How to Care for Lacquerware and Cast Iron Teapots (Without Ruining Them)

    Disclosure: This post contains affiliate links. If you buy through one of them, I may earn a small commission at no extra cost to you.

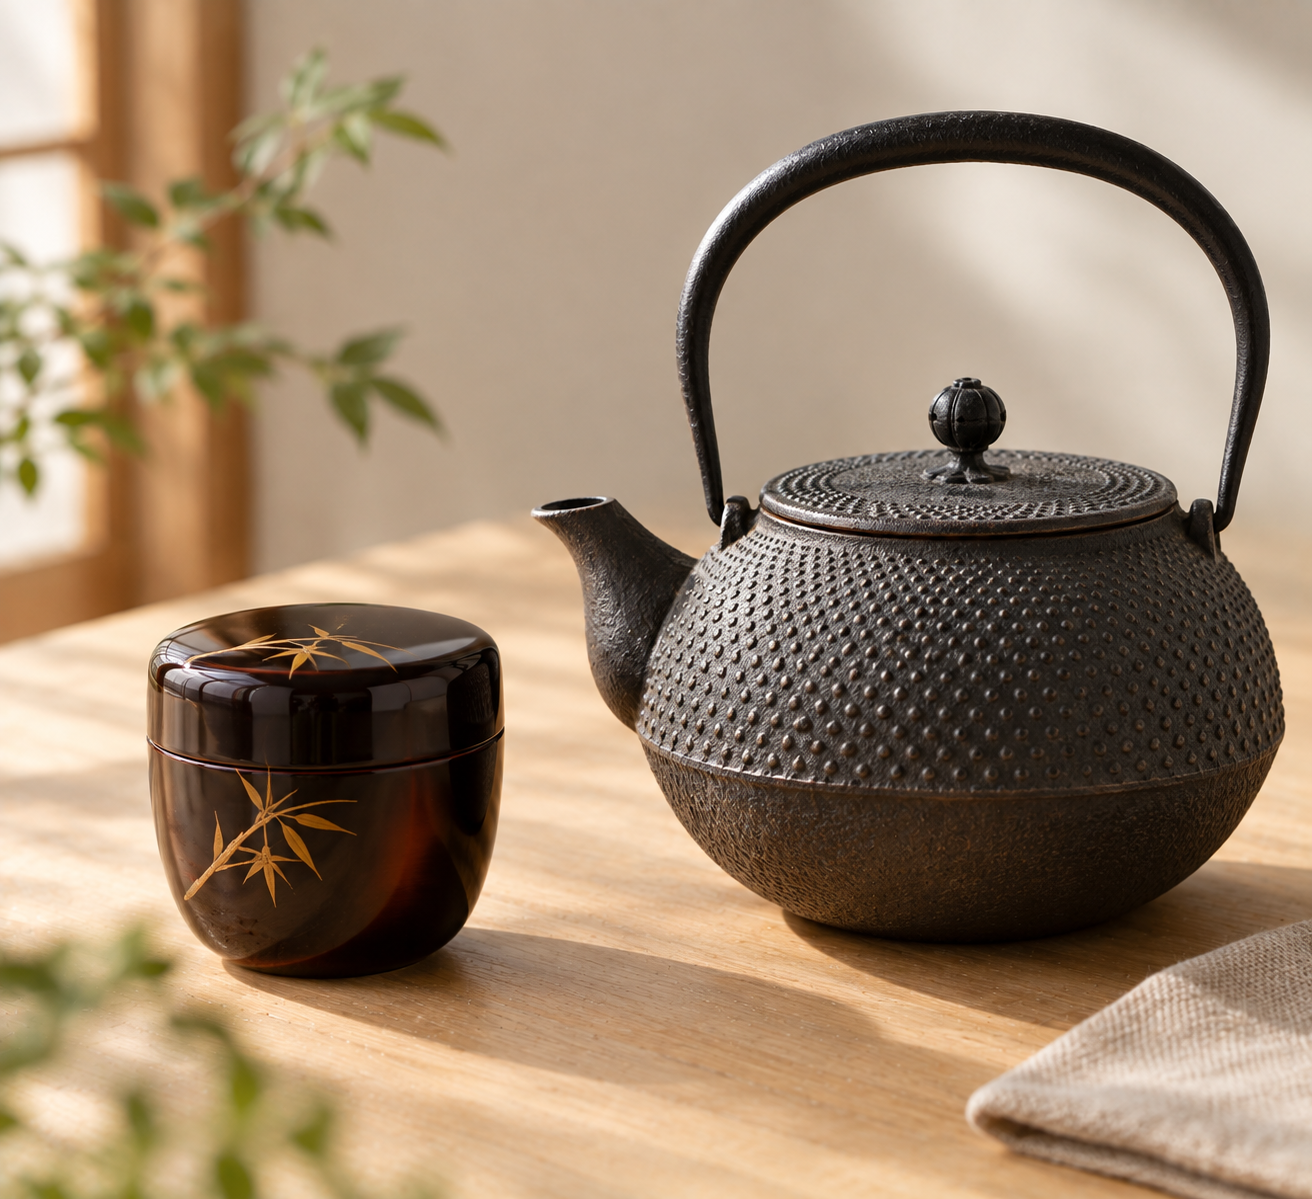
    I made two mistakes early on with Japanese teaware, and they were opposite mistakes. I left water sitting in a tetsubin overnight, thinking cast iron was tough enough not to care – it rusted. Then, worried about damaging a lacquered natsume I’d bought, I stored it in a sealed plastic bag “to protect it” – which turned out to be exactly the wrong move, since sealed damp storage is one of the things that actually damages lacquerware.

    Urushi lacquerware and tetsubin cast iron are both durable in their own right, but they fail in specific, predictable ways when handled like ordinary ceramic or stainless steel. Knowing what each one actually needs (and doesn’t need) is most of the battle.

    The Problem You’re Actually Trying to Solve

    Both of these materials get treated too cautiously in some ways and not carefully enough in others. People baby lacquerware by sealing it away rather than using it, when it’s actually meant for regular use and improves with handling. Meanwhile, people treat cast iron as basically indestructible, when moisture left sitting inside a tetsubin for even a single evening can start visible rust. The care routines for each are simple once you know them, but they’re not intuitive if you’re coming from caring for ordinary dishware.

    Who This Article Is NOT For

    • If you’re looking for chasen (bamboo whisk) care specifically, my chasen care guide covers that separately – bamboo has entirely different failure points than iron or lacquer.
    • If your tetsubin has a fully enameled interior (common on many modern, budget-friendly versions), the rust-prevention section below matters less to you, since enamel coating largely protects against the bare-iron rust issue.
    • If you’re buying your first kyusu rather than caring for lacquerware or cast iron you already own, my kyusu buying guide is the more relevant read.

    Caring for a Tetsubin (Cast Iron Teapot)

    Never leave water sitting inside it. This is the single most important rule, and the one I broke first. Empty the tetsubin while it’s still hot right after use – the residual heat helps dry the interior almost instantly, whereas water left to cool and sit inside is exactly what starts rust forming on bare cast iron.

    Skip the dish soap. Traditional (non-enameled) cast iron is porous, and soap strips away the seasoning that protects the interior surface. Clean with hot water only, using a soft brush – a bamboo sasara brush is the traditional tool – rather than reaching for detergent out of habit.

    Dry it actively, not just by air. After washing, place the tetsubin over low heat for a minute or two until all surface moisture has fully evaporated. Air-drying alone often isn’t thorough enough, especially inside the spout and lid areas where water likes to linger.

    If rust spots do appear, treat them right away. Small orange rust spots can be addressed by scrubbing gently with a stiff brush or fine sandpaper. A more traditional fix: boil green tea leaves inside the tetsubin – the tannins react with the exposed iron to form a protective black film over the rusted area.

    Store it dry, in an open, airy spot. Avoid leaving it in a damp sink, a closed cabinet with poor airflow, or anywhere humidity tends to build up. The combination of thorough drying after each use and airy storage is really the entire rust-prevention strategy.

    Caring for Urushi Lacquerware (Natsume and Beyond)

    Hand-wash only, and do it gently. Use lukewarm water, a soft sponge, and a neutral, non-abrasive soap – never steel wool or a stiff scouring pad, which will scratch through the lacquer finish. Rinse thoroughly and dry immediately with a soft cloth rather than letting it air-dry, since sitting wet is part of what damages the finish over time.

    Keep it away from the dishwasher and the microwave, unless the specific piece is explicitly labeled as safe for either – most traditional urushi lacquerware isn’t, and the heat and washing action in a dishwasher will damage the finish. The same caution applies to sudden contact with boiling-hot liquid; let things cool slightly before they touch lacquerware if the piece doesn’t specifically say it can handle high heat.

    Store it out of direct sunlight. UV exposure fades and degrades lacquer finish over time, so a shaded cabinet is the right home for it rather than an open shelf that gets direct sun for part of the day. If fading has already started, moving it out of light going forward is the first step – a professional restorer can advise from there if the piece is valuable enough to warrant it.

    Don’t seal it away damp, and don’t over-protect it either. Ironically, both extremes cause problems: sealing a piece into an airtight bag or box while it’s even slightly damp encourages mold, while treating lacquerware as too precious to actually use denies it the handling that genuine urushi is designed for – well-made lacquerware actually grows more lustrous and durable with regular use over years, not less. If you’re storing multiple pieces stacked together, separate them with soft cloth or thin paper to avoid pressure marks on the finish, and check on stored pieces occasionally for any sign of moisture or pest damage.

    A Few Things People Ask Me

    Can I use dish soap on my tetsubin if it’s really stuck with residue? For traditional bare cast iron, it’s better to avoid soap even then – hot water and a gentle brush, repeated if necessary, is the safer approach. If a tetsubin has an enameled interior, ordinary dish soap is generally fine, since the enamel isn’t porous the way bare iron is.

    Is it normal for a well-used tetsubin to develop a black coating inside over time? Yes – that’s the seasoning building up, similar to a cast iron skillet, and it’s a sign of good care rather than something to scrub away. It’s part of what protects the interior from rust in the first place.

    How do I know if my lacquerware piece is safe for the dishwasher or microwave? Only assume it is if the manufacturer or seller explicitly says so – traditional handmade urushi lacquerware almost never is, and treating it as dishwasher-safe by default is one of the more common ways people damage a piece they didn’t realize was more delicate than it looked.

    What’s a reasonable first cast iron teapot if I don’t already own one? A tetsubin on Amazon with an enameled interior is the more forgiving starting point if you’re worried about the rust-prevention routine above – it gives you most of the aesthetic and heat-retention benefits with a lower risk of a beginner mistake turning into visible rust.

    Where I Landed

    The pattern across both materials, once I actually understood it, was less about fragility and more about moisture and timing. Cast iron fails when water sits too long; lacquerware fails when it’s either mistreated with heat and abrasion or, just as often, oversealed away out of misplaced caution. Neither one needs to be treated like fine china sitting behind glass – they need specific, fairly simple habits, done consistently, and both genuinely reward regular use over being kept for best. If you’re building out a small collection of Japanese teaware pieces, Nio Teas’ teaware selection is worth a look alongside whatever tetsubin or lacquerware you already have.

  • Fukamushi Sencha: The Deep-Steamed Green Tea That Doesn’t Taste Bitter

    Fukamushi Sencha: The Deep-Steamed Green Tea That Doesn’t Taste Bitter

    Disclosure: This post contains affiliate links. If you buy through one of them, I may earn a small commission at no extra cost to you.

    I used to assume all sencha looked and tasted roughly the same – a pale yellow-green cup, grassy and a little sharp. Then I brewed a bag labeled “fukamushi” without knowing what it meant, and got something cloudy, dark green, and noticeably smoother than any sencha I’d had before. It looked almost like I’d made a mistake. I hadn’t – fukamushi is a real, deliberate style of sencha, and once you know what to look for, it’s easy to tell apart from the regular kind.

    Fukamushi sencha – “deep-steamed tea” – is simply sencha that’s been steamed for a longer period during processing. That one change in production time cascades into differences in flavor, appearance, and even how you should brew it.

    The Problem You’re Actually Trying to Solve

    A lot of people run into fukamushi sencha without realizing it’s a distinct category – they just notice their tea looks cloudier or tastes different from what they expected from “sencha” and assume something went wrong, either in the brewing or in the tea itself. Understanding that fukamushi is intentional, and brewing it slightly differently than standard sencha, solves both problems at once.

    Who This Article Is NOT For

    • If you’re deciding between sencha and gyokuro generally rather than between two styles of sencha specifically, my sencha vs. gyokuro comparison covers that broader comparison.
    • If you actively prefer a lighter, clearer, more classically “grassy” green tea, standard (asamushi) sencha will suit you better than fukamushi – this isn’t a strictly “better” version, just a different one.
    • If you’re brewing with a kyusu that has a wide-mesh strainer, fukamushi’s fine particles can clog it more than standard sencha would – worth knowing before you brew a pot and end up straining tea dust into your cup.

    What Actually Makes Fukamushi Different

    The entire distinction comes down to one variable: steaming time during processing. Standard sencha is steamed briefly to halt oxidation in the freshly picked leaf. Fukamushi sencha gets a notably longer steam – commonly in the range of one to three minutes rather than the shorter time used for regular sencha.

    That extra steaming time breaks down the leaf’s cell structure more thoroughly, which has a few knock-on effects:

    The leaf particles end up smaller. Extended steaming makes the leaf more fragile, so it breaks into finer pieces during the later rolling and drying stages. Fukamushi sencha often looks almost powdery compared to the more intact, needle-like leaves of standard sencha.

    The infusion turns cloudier and darker green. Because more of the leaf’s structure has broken down, more fine particulate ends up suspended in the brewed tea rather than settling to the bottom, giving fukamushi its characteristic cloudy, deep green cup – especially noticeable on a second steep. Standard sencha, by contrast, produces a clearer yellowish-green infusion.

    The flavor gets richer and less bitter. The extended steaming softens fukamushi’s flavor into something rounder and more vegetal-sweet, often described as having pronounced spinach-like notes, with less of the sharper astringency you’d get from a standard, more lightly steamed sencha.

    A Bit of History

    Fukamushicha isn’t an ancient traditional style – it’s a relatively modern development, emerging around 1960 in Shizuoka Prefecture. Several towns in the region (Kikugawa, Makinohara, Kakegawa, and Shimada among them) claim a role in its origin. The style was developed partly as a response to a period of low tea exports, with producers experimenting with longer steaming times to create a smoother, more immediately appealing product for a domestic market that wanted less bitterness in everyday tea. It worked well enough that fukamushicha now makes up a substantial share of Japan’s total sencha production.

    How to Brew Fukamushi Sencha

    Because the leaf particles are smaller and more fragile, fukamushi infuses faster than standard sencha at the same temperature – which means it needs a shorter steep time to avoid over-extracting into bitterness.

    • Standard sencha: 60°C (140°F), about 1 minute
    • Fukamushi sencha: 60°C (140°F), about 45 seconds

    Some guidance suggests fukamushi can also work well at a slightly wider range, around 70-90°C for roughly 30 seconds, depending on the specific tea – but the shorter steep relative to standard sencha holds either way. If you’re using a kyusu, pick one with a finer built-in mesh strainer if you drink a lot of fukamushi specifically, since its small particles pass through a coarser strainer more easily than standard sencha’s larger leaf pieces do – my kyusu buying guide covers strainer types in more detail.

    A Few Things People Ask Me

    Is fukamushi sencha lower quality because it looks cloudier? No – the cloudiness is a direct, expected result of the processing method, not a sign of poor quality or an over-brewed cup. A cloudy fukamushi infusion is doing exactly what it’s supposed to do.

    Which one should I buy if I’ve never had sencha before? Fukamushi is arguably the more forgiving starting point specifically because it’s less bitter and more approachable – it was originally developed to appeal to a broader domestic audience for exactly that reason.

    Can I brew fukamushi the same way I brew standard sencha? You can, but it’ll likely turn out slightly more bitter than intended, since fukamushi’s finer particles extract faster – cutting the steep time down by about 15 seconds relative to standard sencha is a simple adjustment that makes a real difference.

    Does fukamushi sencha have different caffeine content than regular sencha? Not meaningfully – the steaming time difference affects flavor, appearance, and particle size, not caffeine content, since both are made from the same type of leaf material rather than different leaf grades. If you want a tea thermometer on Amazon to keep both styles at the correct 60°C consistently, it’s a useful small purchase for anyone brewing multiple sencha styles regularly.

    Where I Landed

    What sold me on fukamushi, once I understood what it actually was, wasn’t really the history – it was realizing that “cloudier and darker” wasn’t a flaw I’d introduced by brewing it wrong, but the entire point of the style. If standard sencha has ever felt a touch too sharp or grassy for your taste, fukamushi is worth trying specifically because it was built to solve that exact complaint. Nio Teas carries fukamushi sencha alongside their standard sencha if you want to brew both side by side and actually taste the difference yourself.

  • Matcha vs. Hojicha: Which One Actually Has Less Caffeine?

    Matcha vs. Hojicha: Which One Actually Has Less Caffeine?

    Disclosure: This post contains affiliate links. If you buy through one of them, I may earn a small commission at no extra cost to you.

    Hojicha has a reputation as “the caffeine-free Japanese tea,” and I believed that for longer than I should have – right up until I looked at actual numbers and found out hojicha isn’t caffeine-free at all. It’s lower in caffeine than matcha, genuinely, but the gap and the reasons behind it are more specific than the simple “roasting removes caffeine” story that gets repeated constantly.

    If you’re choosing between the two specifically to manage caffeine intake – afternoon cup, evening habit, sensitivity to caffeine generally – it’s worth knowing what’s actually driving the difference rather than just trusting the reputation.

    The Problem You’re Actually Trying to Solve

    The common shorthand is “hojicha is roasted, so it’s low-caffeine, and matcha is the whole leaf, so it’s high-caffeine” – which is true in direction but skips over how much of hojicha’s lower caffeine actually comes from roasting versus other factors, and it doesn’t give you real numbers to actually plan around if you’re trying to manage your intake at a specific time of day.

    Who This Article Is NOT For

    • If you want the lowest-caffeine option available rather than a comparison between these two specifically, genuinely caffeine-free herbal options (not real tea at all) would serve that goal better than either matcha or hojicha.
    • If you’re comparing hojicha to sencha or genmaicha rather than matcha specifically, my genmaicha guide covers that three-way comparison in more depth.

    The Actual Numbers

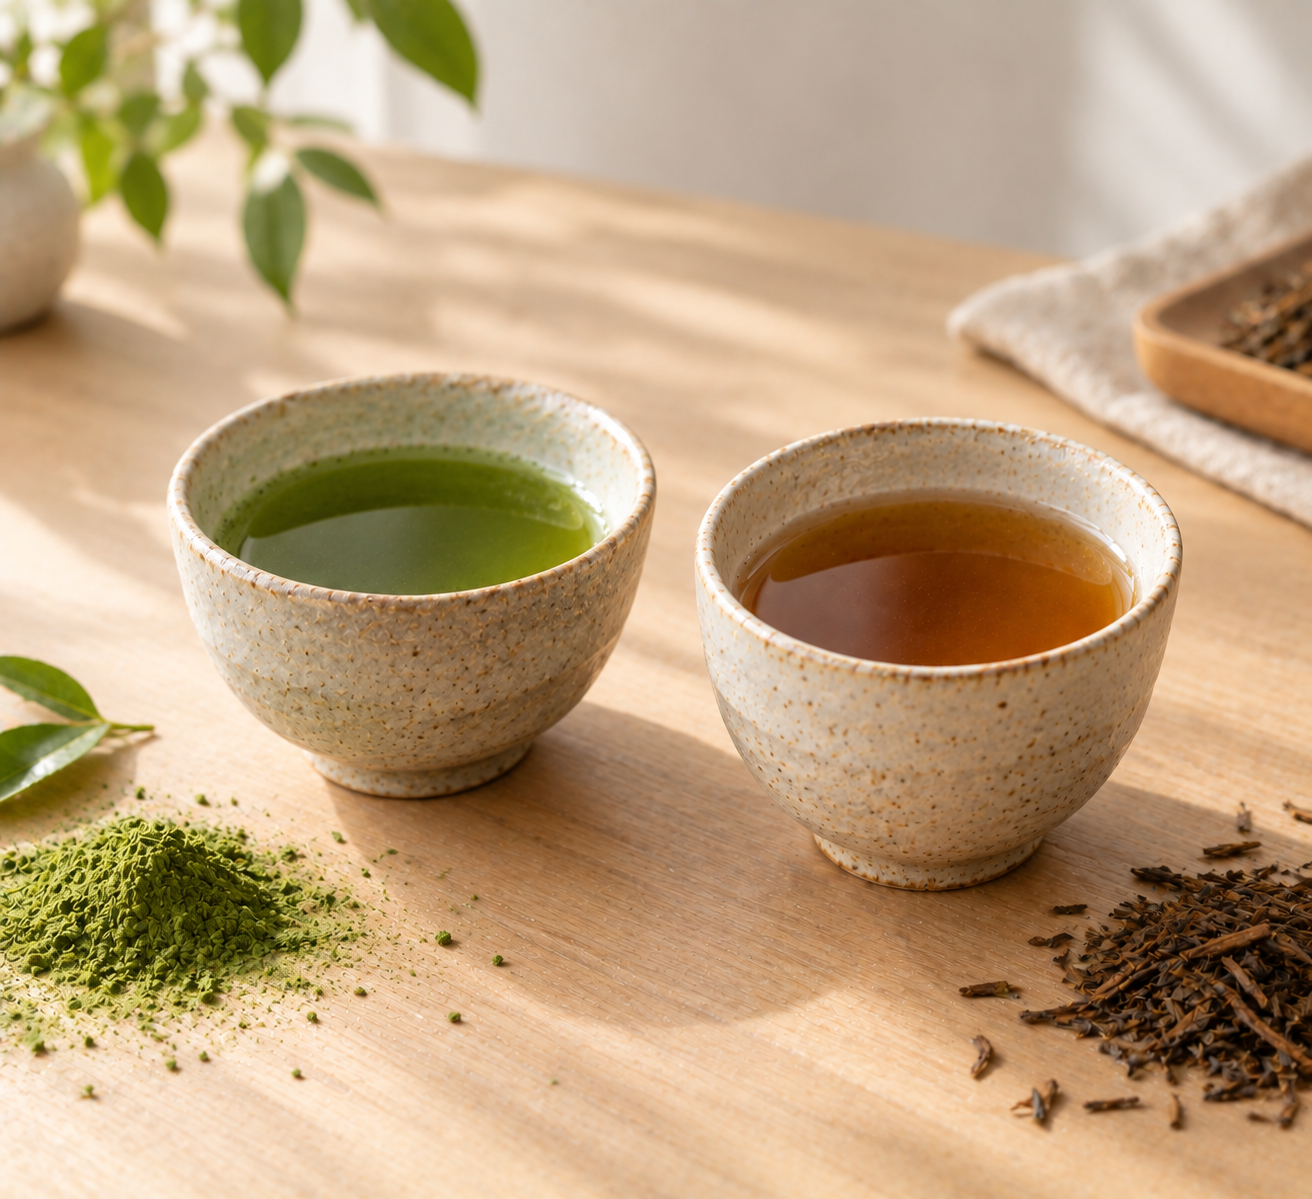
    Per typical serving, matcha runs meaningfully higher in caffeine than hojicha – roughly 48-80mg for matcha versus roughly 5-20mg for hojicha. That’s a real difference, generally putting hojicha somewhere between a third and a tenth of matcha’s caffeine content depending on the specific matcha grade and how the hojicha was made.

    For context, sencha sits in between at roughly 20-30mg, and genmaicha runs close to hojicha at roughly 10-15mg. Coffee, for comparison, is typically 80-100mg per cup – meaning a strong matcha can actually approach coffee’s caffeine level, while hojicha stays well below it across the board.

    Why Hojicha Actually Has Less Caffeine

    This is the part that gets oversimplified. Roasting does play a role, but it’s a smaller piece of the story than the “roasting burns off the caffeine” version people usually repeat suggests.

    Roasting genuinely reduces caffeine somewhat – some of the caffeine in the leaf does evaporate during the high-heat roasting process – but this alone doesn’t account for hojicha’s full drop in caffeine relative to unroasted green tea.

    The base leaf matters more than most people realize. Hojicha is very often made from bancha – a coarser, later-harvest tea leaf – which naturally contains somewhat less caffeine than younger, more tender leaf material to begin with. So part of hojicha’s lower caffeine isn’t from roasting at all; it’s baked into the leaf choice before roasting even happens.

    Leaf maturity affects how much actually dissolves into your cup. More mature, later-picked leaves (again, common in hojicha’s base material) tend to be tougher and higher in fiber, which means less of their total compound content – caffeine included – extracts into the water during brewing compared to younger, more tender leaf.

    Matcha, by contrast, is made from shade-grown young leaves, ground into a powder you consume whole rather than steeping and discarding – which is the core reason it runs so much higher in caffeine than any steeped tea, hojicha included. You’re not extracting a portion of the leaf’s compounds into water; you’re drinking the entire leaf, powder and all. If you want to keep both on hand and choose by time of day, a matcha and hojicha powder set on Amazon is a simple way to have both without ordering separately.

    Choosing Based on When You’re Drinking It

    Given the actual gap in caffeine, the practical guidance is fairly simple: matcha is a reasonable substitute for a morning coffee if you want sustained energy without coffee’s sharper spike, while hojicha’s low caffeine load makes it a genuinely good evening or after-dinner option that won’t meaningfully interfere with sleep the way even a modest cup of matcha or sencha might for a caffeine-sensitive person.

    If you’re caffeine-sensitive generally, treating hojicha as “basically caffeine-free” isn’t accurate enough to be safe – it does still carry a measurable dose, just a much smaller one than most other real teas.

    A Few Things People Ask Me

    Is hojicha actually caffeine-free, or does it just have very little? It has very little, not none – somewhere in the 5-20mg range per serving is still a real, measurable amount of caffeine, even though it’s a fraction of what matcha or coffee delivers.

    If I’m sensitive to caffeine, is hojicha safe to drink at night? For most people with normal caffeine sensitivity, yes, given how low its caffeine content runs – but if you’re genuinely caffeine-sensitive (not just averagely so), even hojicha’s small dose is worth being aware of rather than assuming it’s equivalent to a caffeine-free herbal tea.

    Does darker-roasted hojicha have even less caffeine than lighter roasts? Generally, yes, to a modest degree – more extensive roasting does continue to reduce caffeine somewhat further, though the base leaf and its maturity remain the bigger factor overall rather than roast level alone.

    If I want matcha’s flavor but less caffeine, is there a good compromise? Blending matcha into a hojicha latte is one practical way to get some matcha flavor while diluting the overall caffeine load relative to a straight matcha drink – my guide to matcha-hojicha lattes covers exactly that combination in more depth.

    Where I Landed

    The honest version of this comparison is less tidy than “hojicha is roasted, so it’s caffeine-free” – hojicha is genuinely lower in caffeine than matcha, but it gets there through a combination of leaf choice, leaf maturity, and roasting together, not roasting alone. Practically, that distinction doesn’t change much about which one to reach for – hojicha still wins clearly if a lower caffeine load is what you’re after – but it’s worth knowing you’re not drinking something caffeine-free, just meaningfully lower than the alternative. If you want to try both side by side, Nio Teas carries hojicha and matcha from the same catalog, which makes comparing them directly easier than sourcing from two different brands.

  • The Matcha Smoothie Guide: Recipes That Actually Taste Good, Not Just Green

    The Matcha Smoothie Guide: Recipes That Actually Taste Good, Not Just Green

    Disclosure: This post contains affiliate links. If you buy through one of them, I may earn a small commission at no extra cost to you.

    My early attempts at matcha smoothies all had the same problem: I’d dump a spoonful of matcha into the blender with everything else and end up with a smoothie that tasted mostly of bitterness, with little green flecks unevenly distributed throughout. It took a few tries to realize that matcha in a smoothie behaves a bit differently than matcha whisked into hot water – the fruit, ice, and other ingredients change how it dissolves and how its bitterness reads against everything else.

    Once I adjusted for that, matcha smoothies became one of my more reliable ways to actually use up a tin of matcha regularly, rather than one that sits in the cupboard between the occasional traditional cup.

    The Problem You’re Actually Trying to Solve

    Most matcha smoothie recipes either use too little matcha, so you can barely taste it and you’re mostly just paying for green food coloring, or too much without balancing it against the other ingredients, resulting in something aggressively bitter. There’s also a common assumption that any matcha will work equally well in a smoothie, when grade actually makes a real difference to how the finished drink tastes.

    Who This Article Is NOT For

    • If you want a hot matcha drink rather than a cold blended one, my guide to making a matcha latte at home covers that separately.
    • If you’re looking for matcha desserts rather than a drinkable smoothie, my matcha dessert guide covers ice cream, cheesecake, and pudding instead.
    • If you’re avoiding fruit sugars entirely and want a purely savory or unsweetened matcha drink, most of these recipes lean toward naturally sweet fruit bases and won’t suit that goal.

    Getting the Matcha Right Before You Blend

    Grade matters here more than people expect. More expensive ceremonial-grade matcha tends to taste smoother and more mellow in a smoothie, while cheaper culinary-grade matcha comes through more bitter. Since a smoothie already has fruit, milk, and sometimes sweetener working to balance the matcha, either grade can work – but if you’ve had a matcha smoothie that tasted unpleasantly sharp, it’s worth trying a smoother, more mellow matcha before assuming smoothies just aren’t for you.

    Start with less than you think you need. One teaspoon is a reasonable starting point for a single smoothie; increase in quarter-teaspoon increments from there if you want a stronger matcha presence. Brands vary a surprising amount in intensity, so what tastes right from one tin might be overpowering or underwhelming from another – taste-test rather than assuming a fixed amount will always be correct.

    Add matcha directly to the blender rather than pre-mixing it. Unlike whisking matcha into hot water, a smoothie’s blender does the work of breaking up clumps for you, as long as the matcha goes in with enough liquid around it rather than getting trapped against frozen fruit or ice at the bottom.

    Two Matcha Smoothies Worth Making

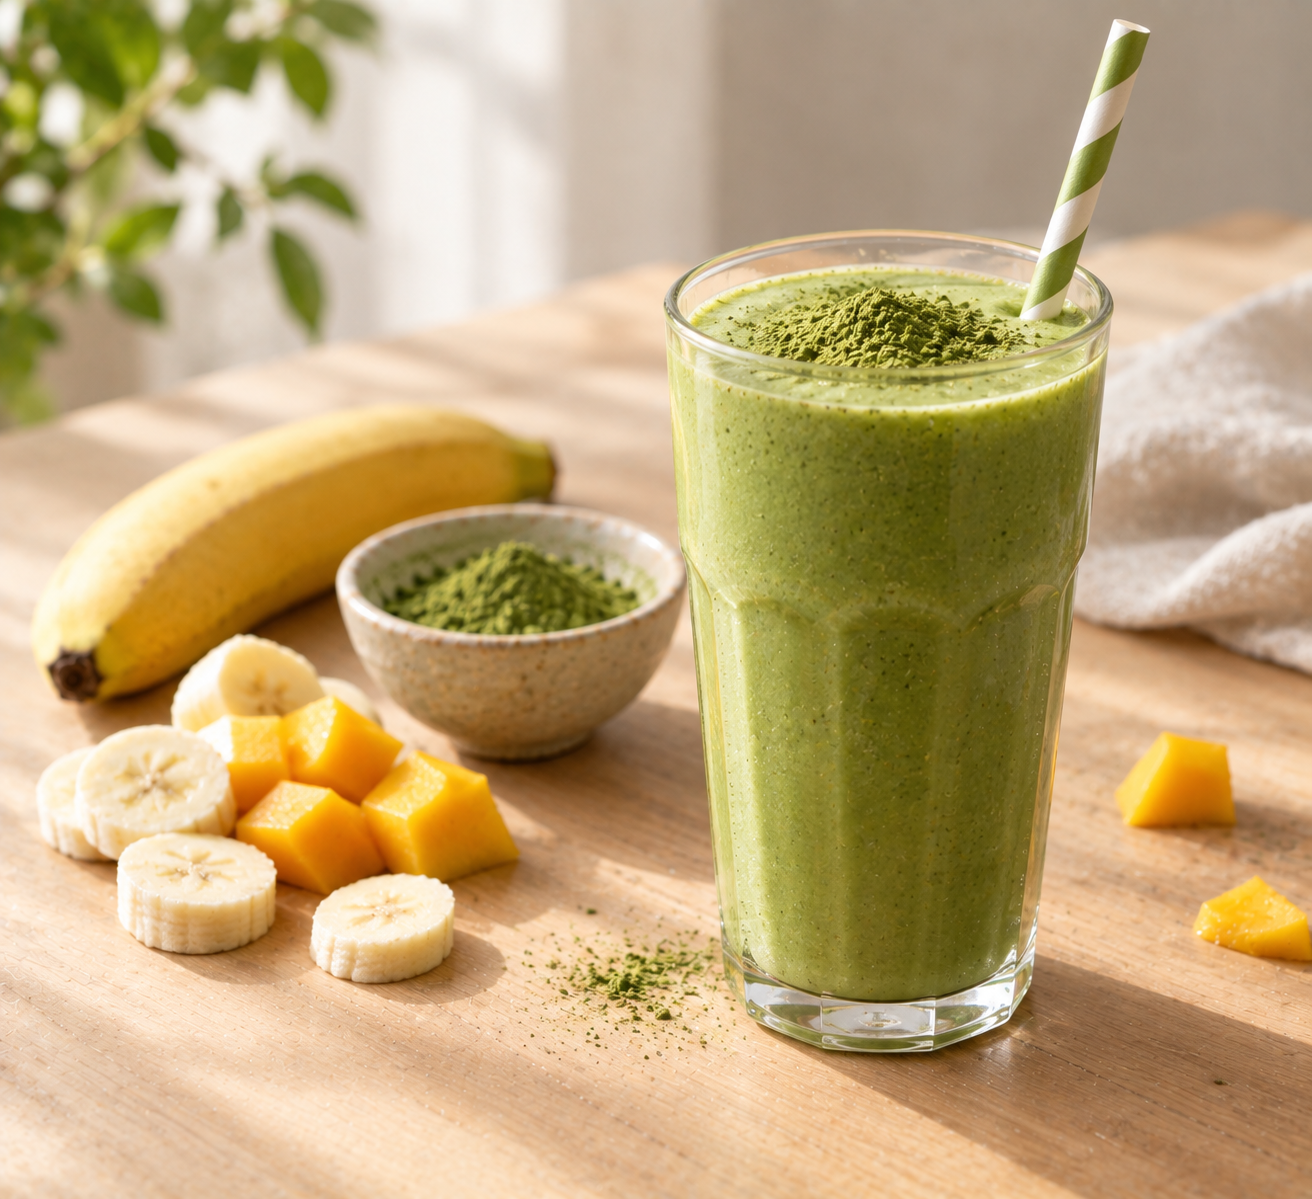
    1. Classic Banana Matcha Smoothie

    The most forgiving version to start with – just four main ingredients, no exotic produce required.

    Ingredients:

    • 2 frozen bananas
    • 1 cup unsweetened almond milk (plus more as needed)
    • 1 tsp matcha powder, adjustable to taste
    • 1/4 tsp vanilla extract
    • A few handfuls of ice
    • Honey or maple syrup, optional

    Method: Add the frozen bananas, almond milk, matcha, and vanilla to a blender and blend until smooth, adding more milk if it’s struggling to fully combine. Add the ice and blend again until you reach your preferred thickness. Taste before serving, and add honey or maple syrup if you want more sweetness balancing the matcha’s bitterness.

    2. Matcha Mango Spinach Smoothie

    A brighter, more tropical option that also sneaks in a serving of greens without tasting like it.

    Ingredients (serves 2):

    • 2 cups frozen mango chunks
    • 1/2 cup frozen spinach
    • 2 tbsp chia seeds
    • 1 tbsp matcha powder
    • 2 cups oat milk
    • 1 tsp vanilla extract, optional
    • 2 tsp maple syrup, optional

    Method: Combine the mango, spinach, chia seeds, matcha, oat milk, and vanilla (plus maple syrup if using) in a blender. Blend on high for about a minute, until fully smooth and creamy. If it’s too thick, add more milk gradually; if it’s too thin, add a bit more frozen fruit. Serve immediately – like most smoothies, this one is best drunk fresh rather than stored, though it will keep sealed in the fridge for up to 24 hours if needed (give it a good shake before drinking).

    Both recipes are easy to adapt: swap the almond or oat milk for soy or dairy milk depending on preference, or substitute pineapple or banana for the mango in the second recipe if that’s what you have on hand. Kale works in place of spinach too, though it’s slightly more assertive in flavor.

    A Few Things People Ask Me

    Can I make a matcha smoothie ahead of time for the next morning? You can prep the frozen ingredients (fruit, spinach, chia seeds, and matcha) in a freezer bag the night before, then just add milk and blend in the morning – this is a genuinely useful shortcut if you’re trying to make matcha smoothies a regular habit rather than an occasional project. The finished blended smoothie itself, though, is best drunk fresh rather than made a full day ahead.

    Why does my matcha smoothie taste more bitter than the recipes suggest it should? Usually either too much matcha for the amount of fruit and liquid, or a culinary-grade matcha with a naturally sharper flavor than what the recipe was tested with. Start with less matcha than the recipe calls for, taste, and add more gradually rather than committing to the full amount upfront.

    Does blending matcha destroy any of its benefits the way boiling water might? No – blending is mechanical, not high-heat, so it doesn’t degrade matcha the way genuinely hot water can affect some of its more delicate compounds. A smoothie is actually a fairly gentle way to consume matcha in that specific sense.

    What matcha should I keep on hand specifically for smoothies? Since smoothies have a lot of other flavors to compete with, culinary-grade matcha on Amazon is a perfectly reasonable and more affordable choice here rather than reaching for your best ceremonial-grade tin – save that one for occasions where matcha is the only flavor in the cup.

    Where I Landed

    The real shift for me was realizing a matcha smoothie isn’t really “a smoothie with matcha added” so much as a balancing act between matcha’s bitterness and whatever fruit, milk, and sweetener you’re building around it. Once I stopped treating the matcha amount as fixed and started tasting and adjusting as I went, matcha smoothies stopped being the thing I occasionally forced myself to finish and became one of the more regular ways I actually get through a tin of matcha before it goes stale. If you want to try a specific brand rather than guessing from the grocery store shelf, Nio Teas’ matcha is what I’ve used in both recipes above.

  • Kintsugi: Why the Japanese Fix Broken Pottery With Gold Instead of Hiding the Crack

    Kintsugi: Why the Japanese Fix Broken Pottery With Gold Instead of Hiding the Crack

    Disclosure: This post contains affiliate links. If you buy through one of them, I may earn a small commission at no extra cost to you.

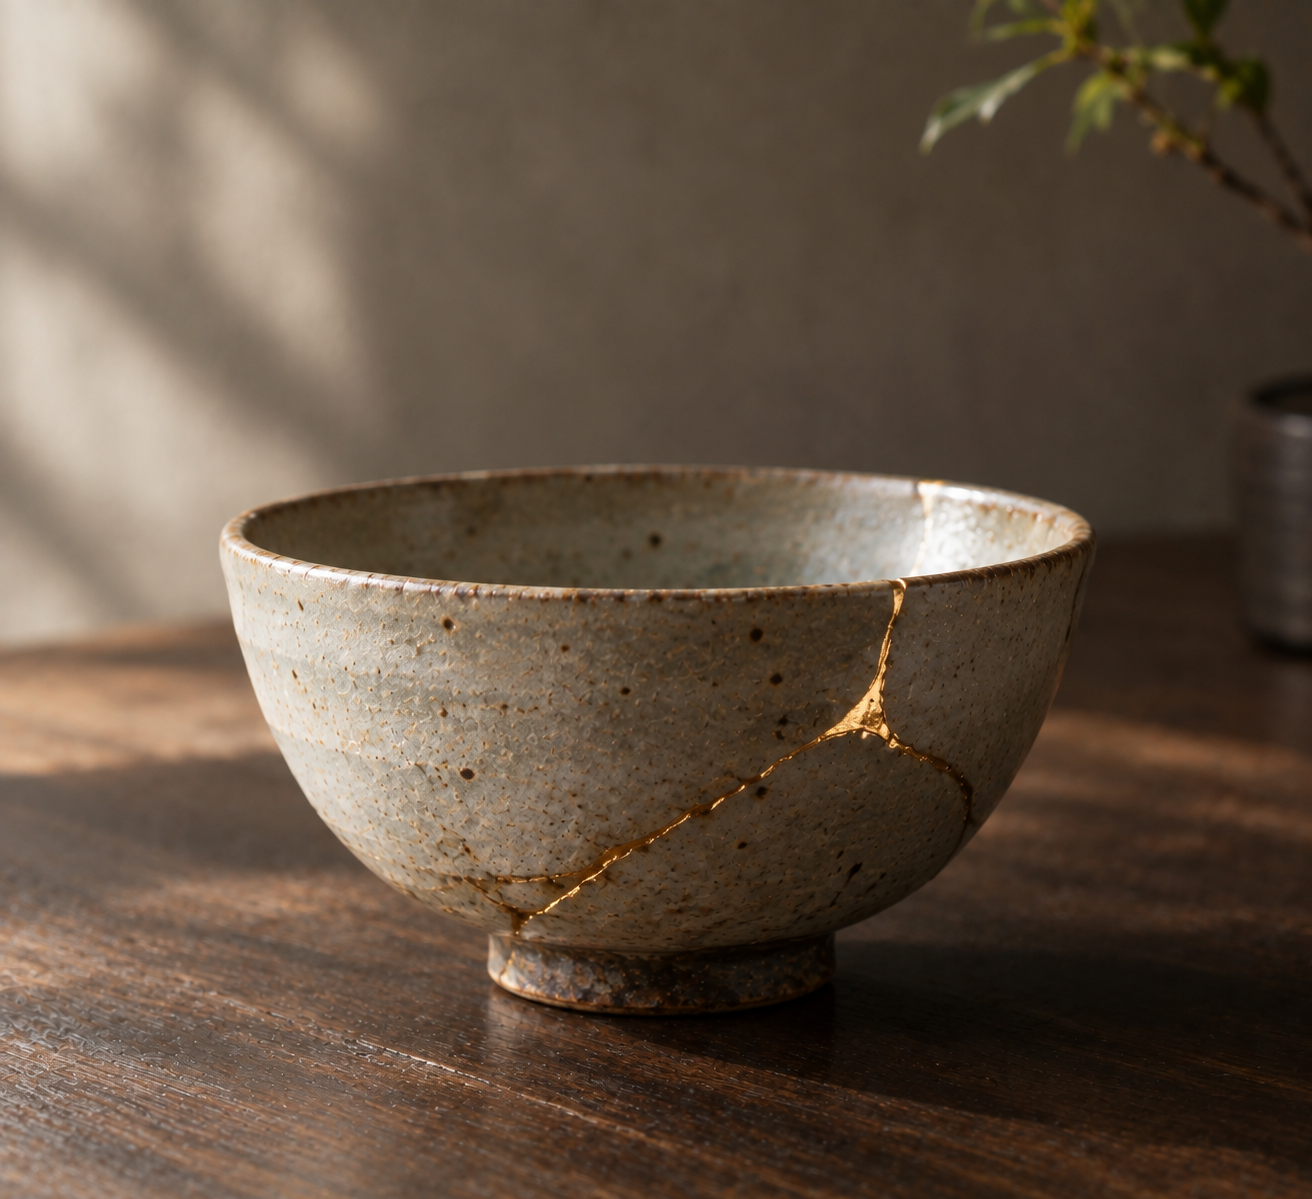
    I chipped a chawan I genuinely loved a while back – a small, ugly crack right along the rim, exactly where you’d rest your lip drinking from it. My first instinct was to feel like the bowl was ruined. It took learning about kintsugi to realize that in a different tradition, that crack wouldn’t be treated as damage to disguise. It would be highlighted, in gold, as part of the bowl’s story going forward.

    Kintsugi – literally “golden joinery” – is the Japanese practice of repairing broken pottery with lacquer dusted or mixed with powdered gold, silver, or platinum. It’s not a trick to make a repair invisible. It does the opposite: it makes the repair the most visually striking part of the piece.

    The Problem You’re Actually Trying to Solve

    Kintsugi gets referenced a lot in a loose, motivational-poster way – “your scars are beautiful,” “brokenness makes you stronger” – without much explanation of what the actual craft involves, or the real difference between traditional kintsugi and the gold-glue DIY kits sold under the same name. If you’ve broken a piece of teaware you actually care about and are wondering whether kintsugi is something you could realistically do yourself, that distinction matters more than the philosophy does.

    Who This Article Is NOT For

    • If you’re looking for a quick, cheap way to just glue a broken mug back together without any interest in the craft or philosophy behind it, regular ceramic adhesive will do that faster and for less money than either traditional or kit-based kintsugi.
    • If you’re shopping for a chawan and haven’t broken one yet, my matcha whisk buying guide, which also covers choosing a bowl, is the more relevant read before this one.
    • If you want to actually learn hands-on lacquer technique rather than just understand what kintsugi is and how it’s done, this is a general explainer, not a step-by-step tutorial – the traditional process genuinely benefits from in-person instruction.

    Where Kintsugi Actually Comes From

    The most commonly told origin story dates to the late 15th century: the shōgun Ashikaga Yoshimasa reportedly sent a damaged Chinese tea bowl back to China for repair, and it came back mended with ugly, purely functional metal staples. Dissatisfied, Japanese craftsmen are said to have developed a more visually considered repair method of their own – which became kintsugi.

    There’s a competing, and arguably more interesting, account too: some historical pieces with visible staple repairs – like the famous “bakōhan” bowl, whose staples resemble a locust – were actually prized specifically for that visible damage, treated as a kind of accidental Zen beauty. Either way, the underlying idea predates the polished, luxury-object version of kintsugi you’ll see marketed today: breakage and repair were treated as part of an object’s history rather than something to erase.

    How Traditional Kintsugi Actually Works

    The material at the center of real kintsugi is urushi, Japanese lacquer, used in several forms depending on the stage of repair – ki-urushi (pure lacquer), bengara urushi (mixed with iron-red pigment), mugi urushi (mixed with wheat flour as an adhesive filler for cracks), and sabi urushi (mixed with clay for filling larger gaps). Metallic powder – traditionally real gold, silver, or platinum – is dusted onto the final lacquer layer while it’s still tacky, which is what creates the signature golden seam.

    The part that surprises people most is the timeline. After the lacquer is applied, the piece has to cure in a humidity-controlled space called a furo, kept at roughly 90% humidity, for anywhere from two days to two weeks depending on the repair. This isn’t optional or something you can rush with a hair dryer – urushi cures through a humidity-dependent chemical process, not simple drying, so an authentic repair is measured in days and weeks, not an afternoon.

    Kintsugi Kits vs. the Real Thing

    Modern kintsugi kits, widely sold online, use a fundamentally different approach: two-part epoxy or fast-curing industrial adhesive instead of urushi, kneadable chemical putty instead of natural wood and clay powders, and bronze or mica-based “gold-look” pigment instead of real gold or silver powder.

    This matters for more than just authenticity. Epoxy-based kits finish the repair as soon as the adhesive sets, while traditional urushi lacquer begins a longer sequential process that bonds differently with the ceramic. And critically, the bronze or mica pigments in budget kits are generally not food-safe – if you’re repairing something you intend to actually eat or drink from again, that’s worth verifying before use, since it’s a real difference and not just a purist’s quibble.

    None of this makes kits illegitimate for what they’re good for: a one-off decorative repair on something you won’t use for food, done reasonably quickly and cheaply. It’s just a genuinely different practice from traditional kintsugi, closer to an aesthetic imitation than the craft itself – useful to know going in so you’re not expecting kit results to match traditional ones, or vice versa.

    The Philosophy Behind the Gold

    Kintsugi is closely tied to two Japanese concepts. Wabi-sabi is the aesthetic appreciation of imperfection, age, and transience – finding something worth valuing in an object precisely because it shows wear rather than despite it. Mushin refers to a mental state of non-attachment and acceptance of change, including the idea that breakage isn’t a tragedy to resist but simply something that happened, worth acknowledging rather than hiding.

    Practically, this shows up as a specific choice: kintsugi doesn’t try to make a repair invisible or color-matched to blend in. It illuminates the crack, in a metal that draws the eye directly to where the damage was. The philosophy holds that this makes the piece more interesting and more genuinely its own, not less valuable, than it was before it broke.

    A Few Things People Ask Me

    Is traditional kintsugi something I can realistically learn to do myself? With patience and the right supplies, yes, though it’s a slower and more involved craft than most DIY projects – securing real urushi lacquer, managing a humidity chamber, and working across a multi-day or multi-week timeline is a real commitment compared to a gold-glue kit. A beginner kintsugi repair kit on Amazon is a reasonable low-stakes way to try the aesthetic before committing to sourcing real urushi and metal powder.

    Are kintsugi kits actually bad, or just different? Just different, not bad outright – they’re a reasonable choice for a decorative, non-food-contact repair done quickly, but they’re not the same craft or material system as traditional kintsugi, and shouldn’t be marketed or understood as interchangeable with it.

    Can I use a kintsugi-repaired chawan for actual matcha again? With a traditional urushi-and-real-gold repair, generally yes, once fully cured – that’s part of why the traditional materials matter for teaware specifically. With a kit repair, verify the specific materials are food-safe before using it with anything you’ll drink from, since many budget kits explicitly aren’t. If the crack is bad enough that repair isn’t realistic, Nio Teas’ matcha bowls and my Nio Teas teaware guide are worth a look for a replacement.

    Does kintsugi only apply to bowls, or can other ceramics be repaired this way? Any broken ceramic can technically be repaired with kintsugi – bowls, plates, vases, cups – though it’s most commonly associated with teaware specifically, largely because tea culture is where the aesthetic tradition originally developed and where broken pieces were historically valuable enough to be worth repairing this carefully rather than replacing.

    Where I Landed

    What changed my mind about that chipped chawan wasn’t really the craft technique – it was the underlying idea that a repair doesn’t have to be a cover-up. Whether or not I ever get around to learning traditional kintsugi myself, the philosophy behind it reframed a broken bowl from “ruined” to “has a history now,” which is a genuinely different way to think about the things you use daily and eventually damage. If you’re going to attempt a repair on something you actually care about, it’s worth deciding upfront whether you want the visible-history version (traditional urushi and real metal) or the quick-fix version (a kit) – they’re solving the same problem in philosophically different ways.

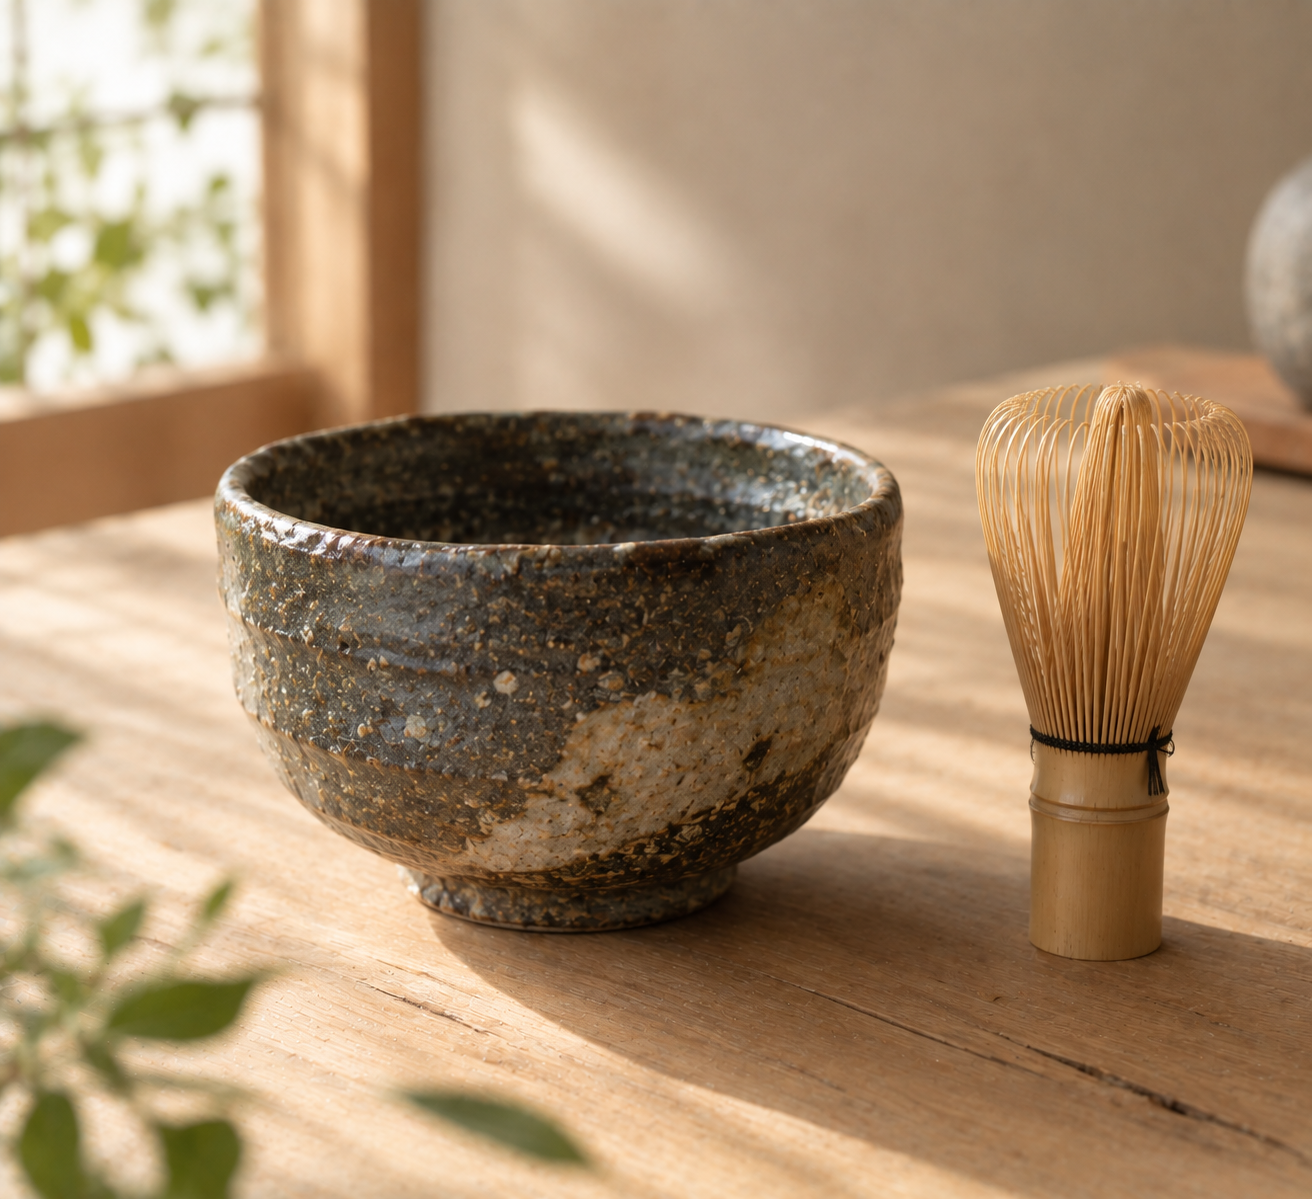
  • How to Choose a Matcha Bowl (Chawan): Shape, Season, and Style

    How to Choose a Matcha Bowl (Chawan): Shape, Season, and Style

    Disclosure: This post contains affiliate links. If you buy through one of them, I may earn a small commission at no extra cost to you.

    I bought my first chawan almost entirely on looks – a deep glossy black bowl that photographed beautifully and told me nothing about how it would actually feel to whisk matcha in. It works fine, but it’s a winter bowl and I bought it in July, when a thinner, cooler-feeling piece would have suited the season far better. Nobody told me chawan came with a “right time of year” until after I’d already picked one.

    A chawan isn’t just a bowl matcha happens to go in. Its shape, weight, and glaze all affect how the matcha whisks, how it feels in your hands, and even how it tastes – which is a lot more variables than most first-time buyers expect from something that looks, at a glance, like simple pottery.

    The Problem You’re Actually Trying to Solve

    Most chawan buying guides either dive straight into named historical styles (Raku, Hagi, Oribe) without explaining why any of it matters practically, or they treat every bowl as interchangeable as long as it’s “matcha-bowl shaped.” Neither approach actually helps you pick one that suits how and when you’ll use it. The practical questions – does this bowl’s shape suit summer or winter, is it sized right for whisking without matcha splashing everywhere, does the glaze affect the flavor – get skipped in favor of aesthetics or history alone.

    Who This Article Is NOT For

    • If you’re looking for the whisk itself rather than the bowl, my chasen care guide covers that tool specifically.
    • If you just want a functional bowl for casual home matcha and don’t care about seasonal appropriateness or named ceramic styles, any reasonably sized ceramic bowl will work – you don’t need to read the style section below.
    • If you’re shopping for a full tea ceremony set rather than a standalone chawan, my Japanese tea set gift guide covers complete sets.

    Shape and Size: The Practical Basics

    Before style or aesthetics, a chawan has to actually work as a whisking vessel. It needs to be large enough that vigorously whisking matcha with a chasen doesn’t send it splashing over the rim, but still small and comfortable enough to hold and drink from directly. A bowl that’s too shallow or narrow will fight you every time you whisk; one that’s oversized just makes a small amount of matcha look and feel strange to drink from.

    Beyond that baseline, the clay’s thickness and texture change what drinking from it actually feels like, and this is where the seasonal distinction comes in.

    Winter Bowls vs. Summer Bowls

    This is the detail most first-time buyers miss entirely, and it’s a real, functional distinction rather than just tradition for its own sake.

    Winter chawan tend to use heavier, coarser clay, built to feel rich and substantial in the hand – the goal is a cozy, hearty, deep feeling that suits the season, and the thicker walls also help retain the warmth of the matcha a little longer.

    Summer chawan go the opposite direction: thin, smooth-walled bowls meant to feel breezy, elegant, and cool. A thick winter-style bowl in the middle of summer just feels heavy and warm in a way that works against the season, while a thin summer bowl in winter cools down too fast to be pleasant.

    If you’re only going to own one chawan, this isn’t a dealbreaker – a mid-weight bowl works reasonably year-round. But if you’re building out a small collection, this seasonal logic is the traditional reasoning behind owning more than one.

    How Glaze and Clay Affect the Matcha Itself

    The glaze, clay texture, and wall thickness aren’t purely aesthetic choices – they genuinely affect how the matcha tastes and feels. A smooth, neutral cream-glazed bowl is often recommended specifically for comparing different matcha side by side, since it doesn’t add any visual or flavor bias of its own. Deeper, glossier glazes with speckling create a different visual and tactile experience without necessarily changing flavor much, while rougher, more textured clay bowls are sometimes favored for pouring matcha into a separate cup rather than drinking directly from the bowl.

    A Few Named Styles Worth Knowing

    You don’t need to memorize these to buy a good first chawan, but recognizing the names helps when you’re browsing:

    Raku bowls are hand-formed rather than wheel-thrown, from porous clay that makes them noticeably light – tap one and it produces a dull thud rather than the ringing sound of high-fired ceramics. Developed in the late 1500s in collaboration with the tea master Sen no Rikyū, Raku bowls embrace irregular, imperfect shapes as part of the aesthetic rather than a flaw.

    Hagi ware, from Yamaguchi Prefecture, is known for actually improving with age – the glaze develops fine cracks over years of use that slowly absorb tea and darken, a process called nanabake that potters consider part of the bowl’s intended life rather than wear and tear.

    Oribe ware takes a more playful, intentionally distorted approach, associated with tea master Furuta Oribe – asymmetric shapes, folded lips, and in its Ao-Oribe variant, a distinctive copper-green glaze rather than the more common black or cream tones.

    Shino ware, from the Seto/Mino region, was Japan’s first white-glazed ceramic style, recognizable by a textured surface with small pinholes rather than a smooth, even finish.

    None of these are objectively “better” than a simple, unnamed modern chawan – they’re different aesthetic and tactile traditions, and picking one is really about which look and feel appeals to you rather than which is most authentic or correct.

    A Few Things People Ask Me

    Do I actually need a dedicated chawan, or can I just use a regular bowl? A regular bowl can work in a pinch, but a proper chawan’s shape (specifically its width and slightly curved walls) is built to give the chasen room to whisk properly without splashing, which a random kitchen bowl often doesn’t replicate well.

    How many chawan does a casual matcha drinker actually need? One is genuinely enough for most people – a mid-weight, medium-sized bowl that isn’t extreme in either direction works reasonably across seasons. The winter/summer distinction matters more once you’re already invested enough to want a small collection.

    Does an expensive, named-style chawan actually make the matcha taste better than a cheap one? Not dramatically – the glaze and clay can subtly affect texture and how flavor is perceived, but a well-made, reasonably priced bowl will make good matcha taste good. The named styles are more about craft tradition and aesthetic than a guaranteed flavor upgrade.

    What should I look for if I’m buying my first chawan and don’t care about seasonal bowls yet? Prioritize size and shape (wide enough to whisk in without splashing, comfortable to hold) over glaze style or historical pedigree. Nio Teas’ matcha bowls are a reasonable place to start if you want something functional without needing to research named ceramic traditions first.

    Where I Landed

    The thing I wish someone had told me before my first chawan purchase is that the “right” bowl depends far more on how and when you’ll actually use it than on how good it looks in a photo. A gorgeous glossy black winter bowl bought in July isn’t a mistake exactly, but it’s not really suited to the season either, and that mismatch is the kind of detail that separates buying a chawan as decor from buying one you’ll actually reach for regularly. If you’re only getting one, aim for something mid-weight and comfortably sized before you worry about glaze traditions or seasonal correctness – the rest is worth learning once you’re already hooked. If you want a reliable everyday option to start with, a basic ceramic chawan on Amazon is a low-commitment way to figure out what size and weight you actually prefer before spending more on a named style.

  • Matcha for Skin: What’s Actually Backed by Evidence, and What’s Just Marketing

    Matcha for Skin: What’s Actually Backed by Evidence, and What’s Just Marketing

    Disclosure: This post contains affiliate links. If you buy through one of them, I may earn a small commission at no extra cost to you. This article discusses general skincare information and is not medical advice – see a dermatologist for concerns about your specific skin.

    Matcha shows up in a lot of skincare marketing with some fairly dramatic promises attached – reverses wrinkles, clears acne, evens out skin tone, all from one green powder. Having looked into what’s actually behind those claims, the honest answer is more modest than the marketing: matcha does have real, evidence-supported properties relevant to skin, but most of the more dramatic claims come from lab studies using concentrations far higher than what a face mask or a cup of matcha actually delivers to your skin.

    That gap between “shown in a petri dish” and “shown on an actual face” is worth understanding before you build a skincare routine around it.

    The Problem You’re Actually Trying to Solve

    Most matcha-and-skin content either oversells the science (treating a single in-vitro study as proof matcha will transform your skin) or ignores it almost entirely in favor of “it’s natural, so it’s good for you” reasoning. Neither is that useful if you’re actually trying to decide whether adding matcha to your skincare routine, in whatever form, is worth doing.

    Who This Article Is NOT For

    • If you’re dealing with a diagnosed skin condition (acne, rosacea, eczema, or anything else) that needs treatment, this is general information, not a substitute for seeing a dermatologist – please don’t use a DIY mask in place of actual treatment for anything beyond very mild, occasional skin concerns.
    • If you want matcha’s health benefits from drinking it rather than skin-specific effects, green tea’s health benefits covers that separately and in more depth.
    • If you’re expecting dramatic, fast results, this isn’t going to deliver that framing – the realistic case for matcha and skin is “modest supporting effect,” not “transformation.”

    What the Evidence Actually Supports

    Matcha’s relevant compound here is EGCG, its primary catechin, and there’s real research behind a few specific effects:

    Antioxidant activity. EGCG neutralizes free radicals that contribute to oxidative stress and skin aging – this is one of the better-supported claims, though most of the strongest evidence comes from lab studies on isolated skin cells rather than from measuring visible changes on real faces over time.

    Anti-inflammatory effects. Some studies show EGCG can reduce redness and inflammation, which is part of why matcha shows up in products aimed at sensitive or reactive skin.

    Modest UV resilience. With regular consumption, EGCG may somewhat enhance skin’s resilience to UV damage – but this is a supporting effect at best, not a substitute for sunscreen, and nothing here should be read as “matcha protects you from sun damage.”

    Possible sebum reduction. There’s preliminary evidence that EGCG may help reduce sebum production in acne-prone skin, though the human-subject evidence for this specific effect is still fairly thin and inconclusive rather than settled.

    Where the Claims Get Overstated

    The gap between marketing and evidence comes down to two things. First, most of the more dramatic claims – reversing wrinkles, eliminating acne outright, dramatically evening skin tone – are based on in-vitro (lab dish) or animal studies, not human trials measuring real-world results on skin. Second, the concentrations used in those lab studies are far higher than what reaches your skin through either drinking matcha or applying a homemade mask a couple of times a week.

    It’s also worth knowing that the strongest topical research on green tea’s skin effects generally involves direct application of concentrated green tea extract – not matcha powder mixed into a mask at home, and not matcha you’ve had to drink. Drinking matcha may offer some modest systemic antioxidant and anti-inflammatory support as part of an overall diet, but it’s a different (and more diluted) pathway than direct topical application.

    The realistic takeaway: matcha, used either as a mask ingredient or as something you drink regularly, is a reasonable small addition to a skincare routine – not a standalone treatment, and not something that replaces sunscreen, a dermatologist, or an evidence-based skincare regimen for an actual condition.

    Three Matcha Face Masks Worth Trying

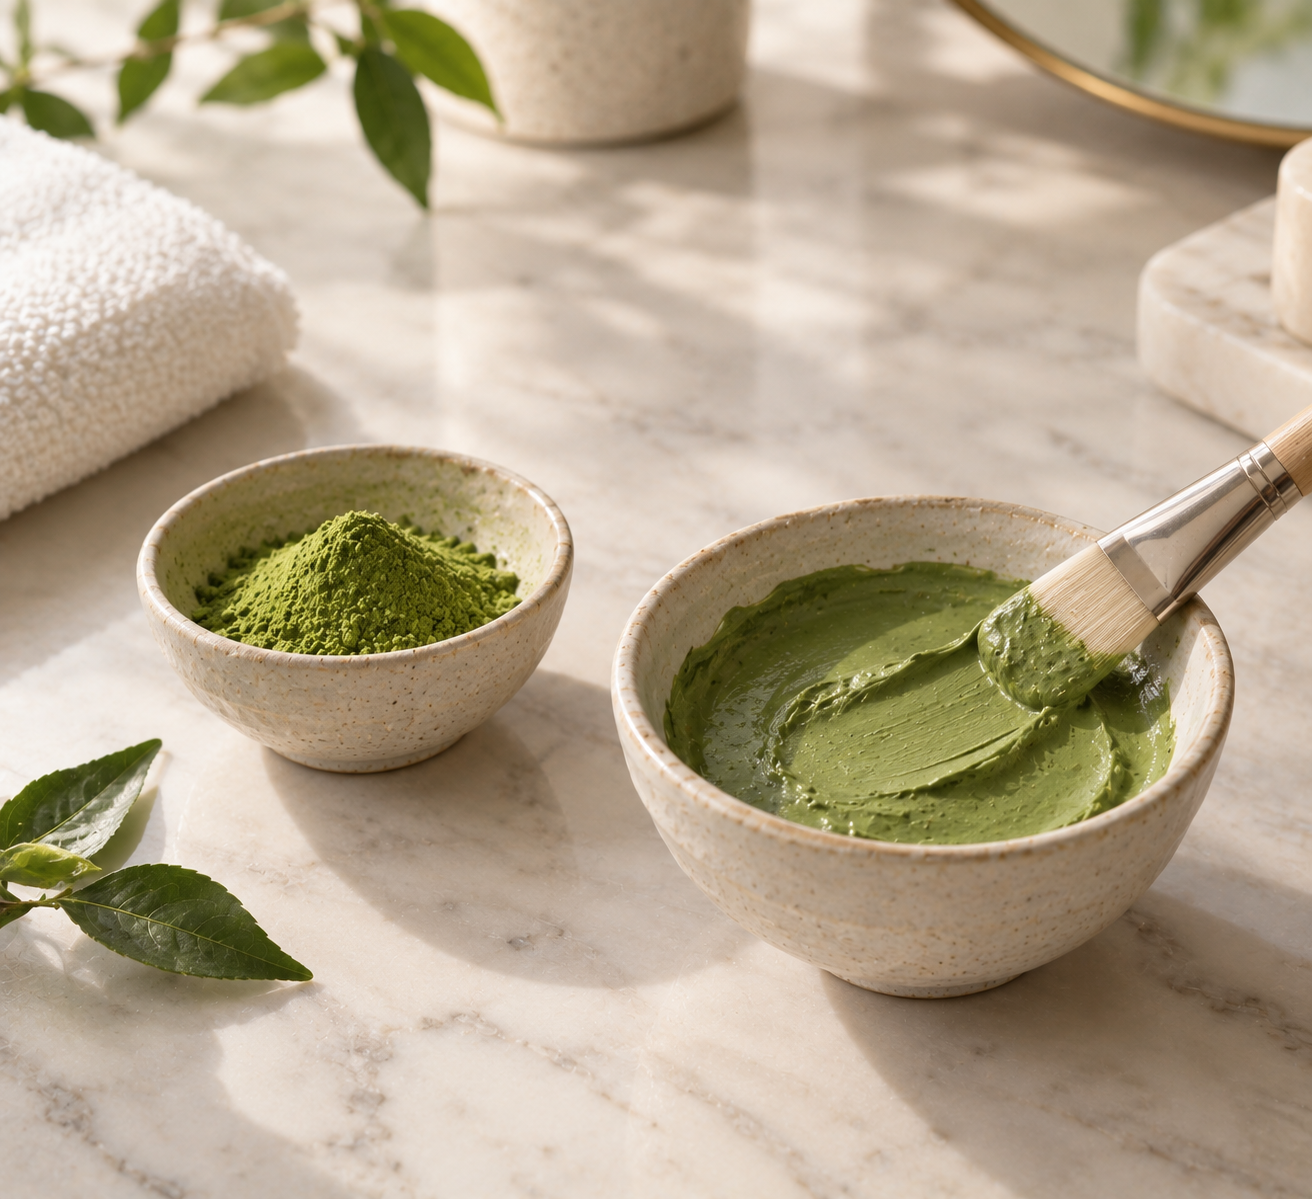
    If you want to try matcha topically, sifted culinary-grade matcha works fine here – there’s no reason to use expensive ceremonial-grade matcha on your face.

    For dry skin: Mix 1 tsp matcha powder with 1 tbsp coconut oil until well blended. Apply, focusing on dry areas, and leave on for 15-20 minutes before rinsing with warm water.

    For oiliness or blackhead-prone skin: Combine 1 tsp matcha powder, 1 tbsp raw honey, and (optionally) 1 tsp lemon juice. Apply to areas prone to blackheads and leave on for about 15 minutes before rinsing with lukewarm water. Skip the lemon juice if you have sensitive skin, since citrus can irritate it.

    For sensitive skin: Mix 1 tsp matcha powder with 2 tbsp pureed cucumber (plain yogurt is an optional addition here). Apply and leave on for 15-20 minutes, then rinse with cool water – the cucumber has a calming effect that pairs well with matcha’s gentler anti-inflammatory properties.

    As with any new skincare ingredient, patch-test on a small area first, particularly if you’re adding lemon juice or trying this for the first time.

    A Few Things People Ask Me

    Does drinking matcha do anything for skin, or does it have to be applied topically? Both have some evidence behind them, but they’re not equivalent – topical application delivers a more concentrated, direct dose to skin, while drinking matcha offers a more diffuse, systemic antioxidant effect as part of your overall diet rather than a targeted skin treatment.

    Can matcha actually replace sunscreen if it has UV-resilience properties? No – the UV-resilience evidence is modest and supportive at best, and nothing in the current research suggests matcha is anywhere close to a substitute for actual sun protection.

    Is ceremonial-grade matcha worth using on skin instead of culinary-grade? Not really – for a face mask, you’re not trying to preserve a delicate flavor profile the way you would for drinking it, so culinary-grade matcha on Amazon is the more sensible (and cheaper) choice to keep on hand for masks specifically. If you’re deciding between brands generally, my matcha powder brands comparison covers that in more depth.

    How often can I realistically use a matcha face mask? A couple of times a week is a reasonable starting point for most skin types; daily use isn’t necessary and, with ingredients like lemon juice in the mix, could be more irritating than helpful for some skin.

    Where I Landed

    The honest version of this topic is less exciting than the marketing, but I think it’s more useful: matcha has real, modest, evidence-supported properties relevant to skin – antioxidant, mildly anti-inflammatory, possibly UV-supportive – and none of them are dramatic enough to build a whole skincare identity around. Used reasonably, as an occasional mask or as part of a diet that already includes it, it’s a fine small addition. Used as a replacement for sunscreen or actual dermatological treatment, it isn’t, and no amount of “it’s natural” framing changes that. If you want Nio Teas’ matcha for both drinking and the occasional mask, one tin covers both uses without needing to buy separately for each.