Author: arino

  • Kukicha: The Twig Tea That’s Basically Green Tea’s Low-Caffeine Byproduct

    Kukicha: The Twig Tea That’s Basically Green Tea’s Low-Caffeine Byproduct

    Disclosure: This post contains affiliate links. If you buy through one of them, I may earn a small commission at no extra cost to you.

    The first time I saw kukicha described as “twig tea,” I assumed that meant something scrappy or lesser – literal sticks steeped in water. It’s actually the opposite kind of story: kukicha is made from the stems and twigs left over after sencha or matcha leaves are processed, and because caffeine and bitterness concentrate mostly in the young leaves rather than the woodier stems, what you get is a genuinely pleasant, naturally low-caffeine tea that happens to be a byproduct rather than a compromise.

    The Problem You’re Actually Trying to Solve

    Most people looking into kukicha are trying to solve one of two things: finding a green tea they can drink in the evening without the caffeine hit of sencha or matcha, or figuring out what to do with the stems left over if they’re processing their own tea. Kukicha answers both, but it gets brewed wrong constantly – people treat it like sencha and oversteep it in water that’s too hot, which is one of the few ways to actually make this forgiving tea taste bad.

    Who This Article Is NOT For

    • If you want maximum caffeine from your green tea, kukicha is deliberately the wrong choice here – my matcha vs. coffee caffeine comparison or a standard sencha is a better fit for that.
    • If you’re drinking tea specifically for the umami and richer flavor of whole leaves, kukicha’s stem-based character is intentionally lighter and sweeter rather than deep – my sencha vs. gyokuro comparison covers that leaf-forward end of the spectrum instead.
    • If you’ve never brewed Japanese green tea before and want a single starting point, a standard sencha is the more typical entry tea – kukicha is a worthwhile detour once you already know what you like.

    What Kukicha Actually Is

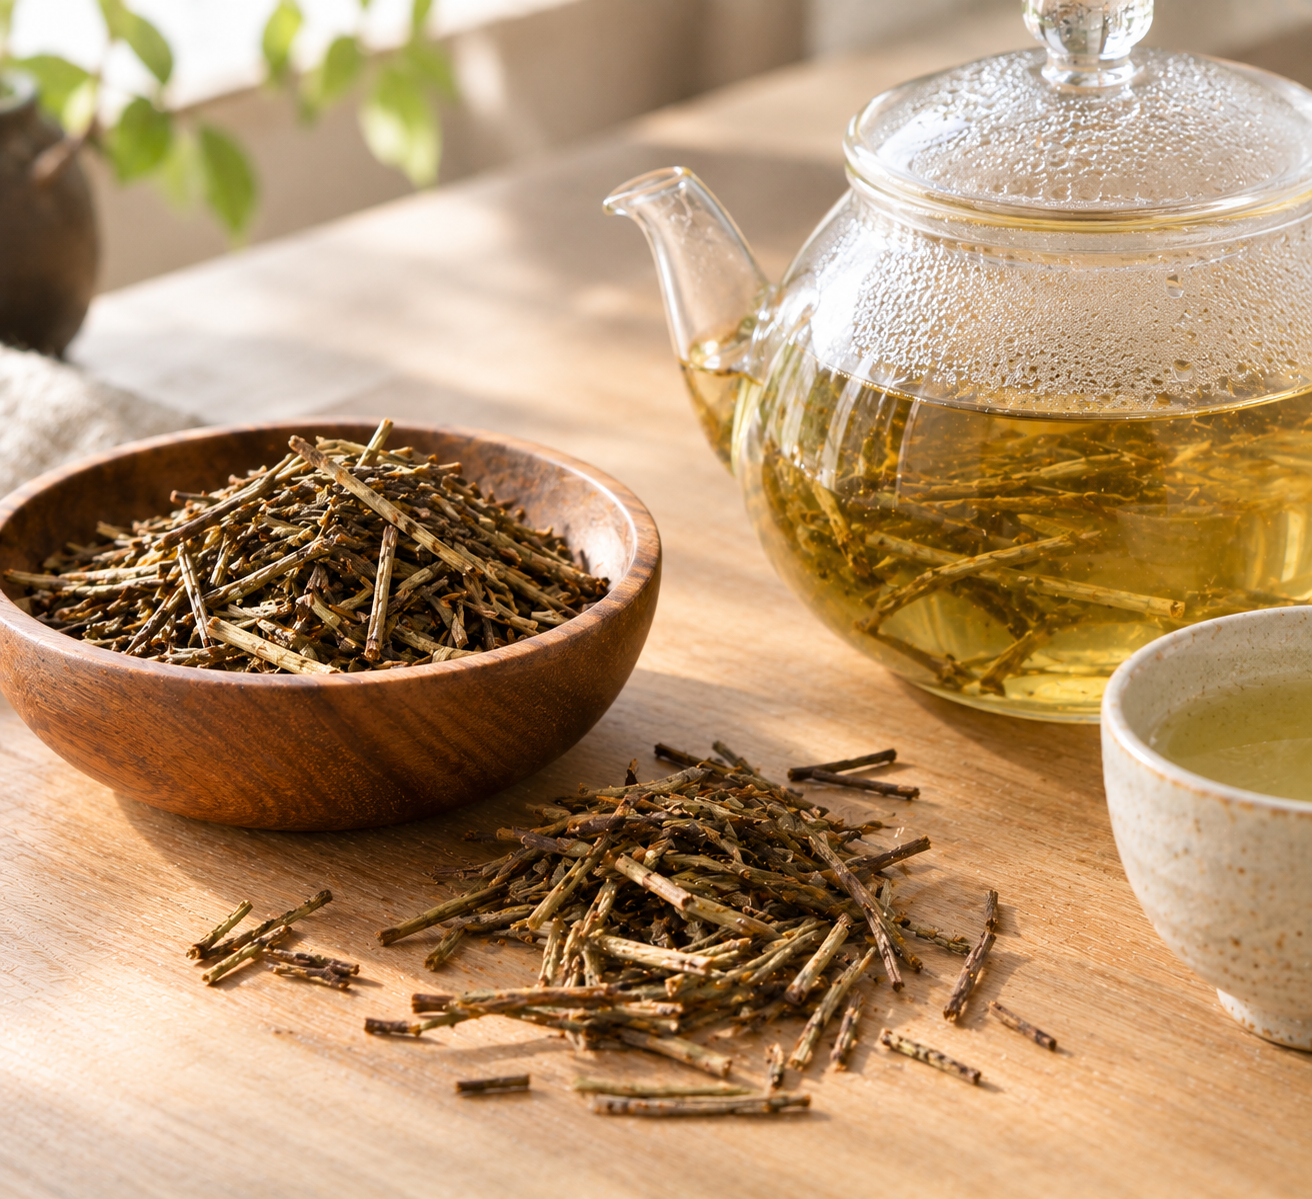
    Kukicha is made from the stems, stalks, and twigs separated out during the final sorting stage (shiage) of sencha or matcha production – not a tea grown and picked on its own, but a genuine byproduct of premium tea that would otherwise go to waste. That byproduct status is exactly why it’s traditionally inexpensive despite tasting good on its own merits, and why it’s long been associated with macrobiotic diets as an everyday, sustainable tea.

    There’s a quality hierarchy within kukicha worth knowing. Standard kukicha uses stems from various green teas, including sencha and fukamushi sencha. Karigane, the higher-quality version, comes specifically from gyokuro stems – and when that gyokuro-derived kukicha comes from Kyushu specifically, it’s sometimes called shiraore. If you see “karigane” on a package, you’re looking at the stem-tea equivalent of upgrading from sencha to gyokuro.

    Why It’s So Low in Caffeine and Astringency

    Caffeine and catechins (the compounds responsible for bitterness and astringency) concentrate heavily in young leaves, which is the plant’s own defense mechanism against insects. Stems and twigs, being older and woodier, simply contain much less of both. The rough numbers: kukicha runs somewhere around 5-10mg of caffeine per 8-ounce serving, compared to roughly 20-30mg for sencha and 70-80mg for matcha – a meaningful drop, not a marginal one.

    The flip side of lower catechins is higher theanine relative to the tea’s other compounds, which is part of why kukicha tends to taste sweeter and less astringent than leaf teas, with a milder, nuttier, slightly creamy character rather than sencha’s grassier bite. It’s also genuinely hard to oversteep into bitterness the way you can with sencha, since there’s simply less of the compound responsible for that bitterness to extract in the first place.

    How to Brew It

    For unroasted (green) kukicha:

    • Water temperature: 75-80°C (167-176°F)
    • Amount: 4-5g of kukicha per 200ml water
    • First steep: 60-90 seconds
    • Good for 2-3 infusions, though flavor drops off noticeably after the first

    For roasted kukicha (often labeled bocha):

    • Water temperature: 85-95°C (185-203°F) – it tolerates hotter water well
    • Steep time: 30-60 seconds
    • Good for up to 5 infusions

    Roasting changes the character substantially – unroasted kukicha stays pale gold with a light, vegetal sweetness, while roasted bocha develops a warmer, toasty, almost grain-like flavor from the same compounds (pyrazines) that show up in roasted hojicha. If you already like hojicha, roasted kukicha is worth trying as a close relative with an even gentler caffeine profile.

    A Few Things People Ask Me

    Is kukicha the same thing as hojicha? No, though they’re often confused. Hojicha is roasted sencha leaves (and sometimes stems); kukicha is specifically stems and twigs, which may or may not be roasted afterward. A roasted kukicha and a hojicha can taste fairly similar, but they start from different parts of the plant.

    Is karigane worth paying more for over regular kukicha? If you already like kukicha’s flavor and want to see the upper end of it, yes – karigane’s gyokuro-stem origin gives it a noticeably smoother, sweeter cup than stems sourced from sencha. If you’re just trying kukicha for the first time, standard kukicha is a perfectly good and cheaper starting point.

    Can I drink kukicha at night without worrying about caffeine? It’s genuinely one of the better options if you want green tea’s flavor without much caffeine – at roughly a quarter of sencha’s caffeine content, most people can drink it in the evening without issue, though anyone very caffeine-sensitive should still treat “low caffeine” as different from “no caffeine.”

    Where can I actually get kukicha or karigane? Nio Teas’ kukicha is a straightforward place to start, and a basic kyusu-style teapot on Amazon works fine for brewing it if you don’t already have one – kukicha doesn’t demand anything specialized.

    Where I Landed

    What changed my view of kukicha wasn’t the tea itself so much as the framing – once I stopped thinking of it as “leftover tea” and started thinking of it as a deliberately different part of the same plant, the low caffeine and mild sweetness stopped feeling like a downgrade from sencha and started feeling like their own, genuinely useful thing. It’s the tea I actually reach for later in the day now, precisely because it isn’t trying to be sencha.
  • Dirty Matcha (Matchiato): How to Actually Get the Layers Right

    Dirty Matcha (Matchiato): How to Actually Get the Layers Right

    Disclosure: This post contains affiliate links. If you buy through one of them, I may earn a small commission at no extra cost to you.

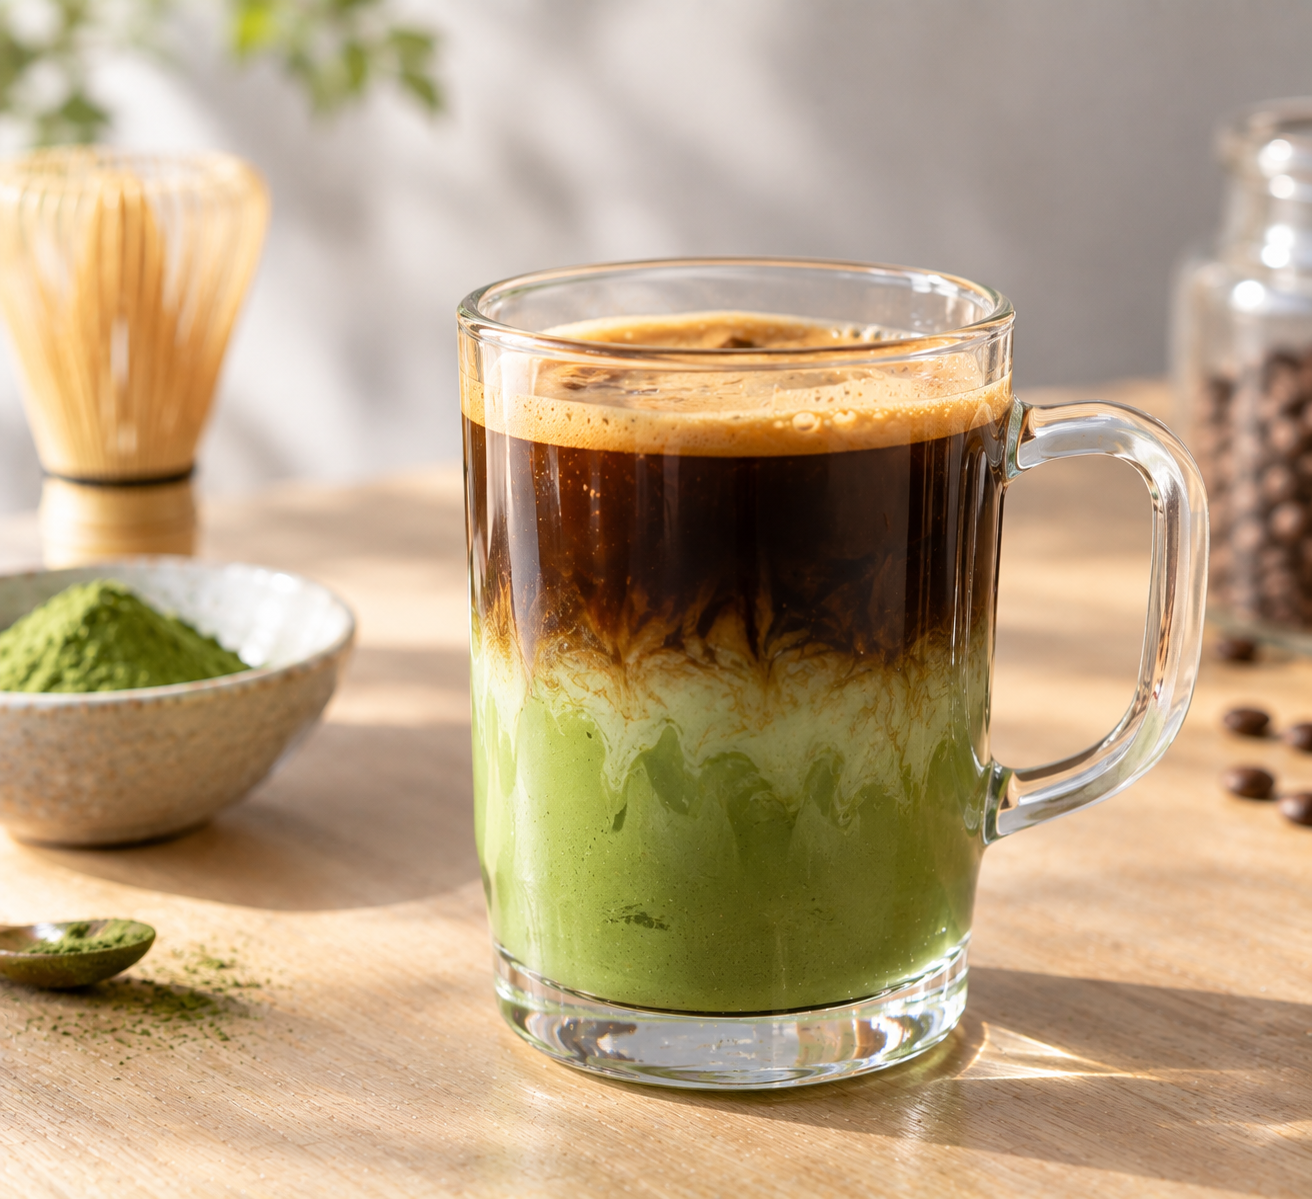
    A dirty matcha – sometimes called a matchiato – is exactly what it sounds like: matcha and espresso in the same glass, deliberately not mixed together into one uniform drink. The name comes from that imperfection. Coffee sits on top, matcha sits on the bottom, and you drink through both layers rather than a single blended flavor. My first attempt turned into a fully mixed, muddy-looking latte because I didn’t understand that the “dirty” part – the messy, unmixed layering – is the entire point, not a mistake to fix.

    The Problem You’re Actually Trying to Solve

    Most people attempting a dirty matcha at home either stir everything together immediately, losing the visual layering and the point of drinking through two distinct flavors, or get the ratio wrong and end up with coffee completely overpowering the matcha (or the reverse). Getting both the layering technique and the ratio right is really the whole recipe.

    Who This Article Is NOT For

    • If you want a fully blended matcha coffee drink rather than distinct layers, this technique isn’t necessary for you – just combine matcha and coffee together directly rather than layering.
    • If you’re sensitive to caffeine, this combines two caffeinated drinks into one, so it runs notably higher than either a matcha latte or a coffee alone – my matcha vs. coffee caffeine comparison is worth reading first if that’s a concern.
    • If you just want a simple matcha latte without any coffee involved, my guide to making a matcha latte at home is the more straightforward option.

    The Actual Recipe

    Ingredients:

    • 2 tsp matcha powder
    • 1/4 cup milk (oat milk works particularly well)
    • 2 tbsp hot water (just under boiling), for dissolving the matcha
    • 2 tsp sugar, or to taste
    • 2 tsp espresso or strong coffee
    • Ice

    Method: Sift and whisk the matcha into the hot water until completely smooth, then whisk in the sugar and milk. Pour this matcha mixture into a glass filled with ice. Separately, pull or brew your espresso and let it cool slightly – chilling the coffee somewhat before pouring helps it layer rather than immediately blending into the matcha below. Pour the espresso over the ice slowly, directly on top of the matcha layer rather than stirring it in. Done correctly, you get a visibly distinct dark coffee layer sitting over the pale green matcha, which you drink through both layers of rather than mixing.

    The 1:1 ratio of matcha to coffee by volume above is a reasonable starting point, but it’s worth adjusting to taste: if the coffee is overpowering the matcha’s flavor, reduce the espresso slightly and increase the matcha a touch rather than assuming the ratio is fixed.

    Getting the Layering Right

    Three things actually matter for clean layers rather than a muddy mix:

    Ice, and plenty of it. A glass well-filled with ice before either liquid goes in gives the two layers something to separate around, rather than immediately merging in a glass with too little ice and too much empty space.

    Pour slowly, and pour the coffee last. The matcha-milk mixture goes in first, over the ice; the coffee goes in afterward, poured slowly and gently rather than dumped in, which helps it settle as a distinct top layer rather than crashing through and mixing everything below.

    Let the coffee cool slightly first. Pouring hot espresso directly onto ice and cold matcha creates more turbulence and mixing than pouring espresso that’s had a minute or two to cool down first – the temperature difference between the two liquids is part of what keeps them from blending immediately.

    A Reasonable Substitute If Coffee Feels Too Harsh

    If straight espresso feels too aggressive against the matcha’s own flavor, hojicha powder is a genuinely good substitute for the coffee layer – it shares some of coffee’s roasted character without coffee’s sharper bitterness, giving you a tea-forward alternative that still creates the same layered visual and flavor effect, just gentler.

    A Few Things People Ask Me

    Is a dirty matcha the same thing as a matchiato? Functionally, yes – both names describe the same drink (matcha plus espresso, deliberately layered rather than fully mixed), with “dirty matcha” being the more common term and “matchiato” showing up as a playful variant riffing on “macchiato.”

    How much caffeine does a dirty matcha actually have compared to a regular latte? Meaningfully more – you’re combining matcha’s caffeine with a full shot of espresso, so the total easily exceeds either drink on its own. This isn’t a light afternoon pick-me-up; treat it more like a double-strength coffee in terms of caffeine load.

    Do I have to drink it through the layers, or is it fine to stir it together? Stirring is completely fine if you’d rather have a uniform flavor – the layered presentation is traditional and visually distinctive, but nothing about the drink requires drinking it unmixed. Some people stir the first sip to taste the layers separately, then mix the rest.

    What matcha works best for this specifically? Culinary-grade matcha on Amazon is fine here, since the coffee’s flavor is doing plenty of the work alongside it – no need for an expensive ceremonial-grade tin for a drink that’s half espresso anyway. Nio Teas’ matcha is what I used in testing the recipe above.

    Where I Landed

    The thing that took me longest to accept was that “dirty” wasn’t describing a flaw in my technique – the imperfect, unmixed layering is the actual design of the drink. Once I stopped trying to make it look like a clean, uniform latte and just let the coffee sit messily on top of the matcha, the drink started working the way it’s supposed to: two distinct flavors you move through in one glass, rather than one blended, muddier one.

  • Matcha for Breakfast: Overnight Oats and Pancakes Worth Waking Up For

    Matcha for Breakfast: Overnight Oats and Pancakes Worth Waking Up For

    Disclosure: This post contains affiliate links. If you buy through one of them, I may earn a small commission at no extra cost to you.

    Matcha at breakfast usually means a latte on the side, not something actually mixed into the food itself. That’s a missed opportunity – matcha holds up well in both a no-cook overnight oats base and a proper cooked pancake batter, and in both cases it’s doing more than adding color. The bitterness cuts through the natural sweetness of maple syrup or fruit toppings the same way it does in a dessert or cocktail, just at breakfast volume rather than dessert richness.

    The Problem You’re Actually Trying to Solve

    Matcha breakfast recipes online often treat the matcha as an afterthought – a spoonful stirred in at the end that leaves visible green clumps in the finished dish, rather than fully incorporated the way the rest of the ingredients are. Both recipes below solve that the same way: get the matcha fully dissolved into a liquid before it meets anything solid, rather than trying to fix clumping after the fact.

    Who This Article Is NOT For

    • If you want a quick drinkable breakfast rather than something you eat with a spoon or fork, my guide to making a matcha latte at home is the faster option.
    • If you’re looking for matcha desserts rather than breakfast food specifically, my matcha dessert guide covers ice cream, cheesecake, and pudding instead.
    • If you don’t have a blender and don’t want to whisk matcha by hand carefully, the overnight oats recipe specifically benefits from blending – it’s still possible without one, just more prone to clumping.

    Two Matcha Breakfasts Worth Making

    1. Matcha Overnight Oats

    A no-cook, make-ahead breakfast that’s ready the moment you wake up, with the matcha fully blended in rather than clumped on top.

    Ingredients (makes 3 servings):

    • 2 cups creamy non-dairy milk (cashew, oat, or soy work best)
    • 2 tbsp maple syrup, plus more to taste
    • 1 tsp vanilla extract
    • Pinch of salt
    • 1 tbsp matcha powder
    • 2 cups rolled or quick oats
    • 2 tbsp chia seeds
    • 1/2 cup plain unsweetened yogurt (dairy-free or regular)

    Method: Add the milk, maple syrup, vanilla, salt, and matcha to a blender and blend on high for 30-45 seconds, until the matcha is fully incorporated with no visible clumps – this step is what actually prevents the gritty, unevenly green result most people get from just stirring matcha into oats directly. In a separate large bowl, combine the oats and chia seeds. Pour the blended matcha milk over the dry ingredients, add the yogurt, and stir well. Let it sit for 5 minutes, stir again, then let it rest another 5 minutes to thicken further. Transfer to jars and refrigerate for at least 4 hours, ideally overnight. If you don’t have a blender, an immersion blender or even a chasen whisked vigorously into the milk first can substitute, though the blender gives the most reliably smooth result.

    2. Fluffy Matcha Pancakes

    A proper cooked breakfast for when overnight oats feels too light, using matcha the same way you’d use cocoa powder in a chocolate pancake – sifted into the dry ingredients rather than dissolved separately.

    Ingredients (serves 4):

    • 1 1/2 cups all-purpose flour
    • 2 1/2 tsp baking powder (aluminum-free, to avoid a metallic taste fighting the matcha)
    • 1 tbsp matcha powder
    • 1/2 tsp salt
    • 1 tbsp sugar
    • 1 1/4 cups milk
    • 1 egg
    • 1 tsp vanilla extract
    • 3 tbsp melted butter

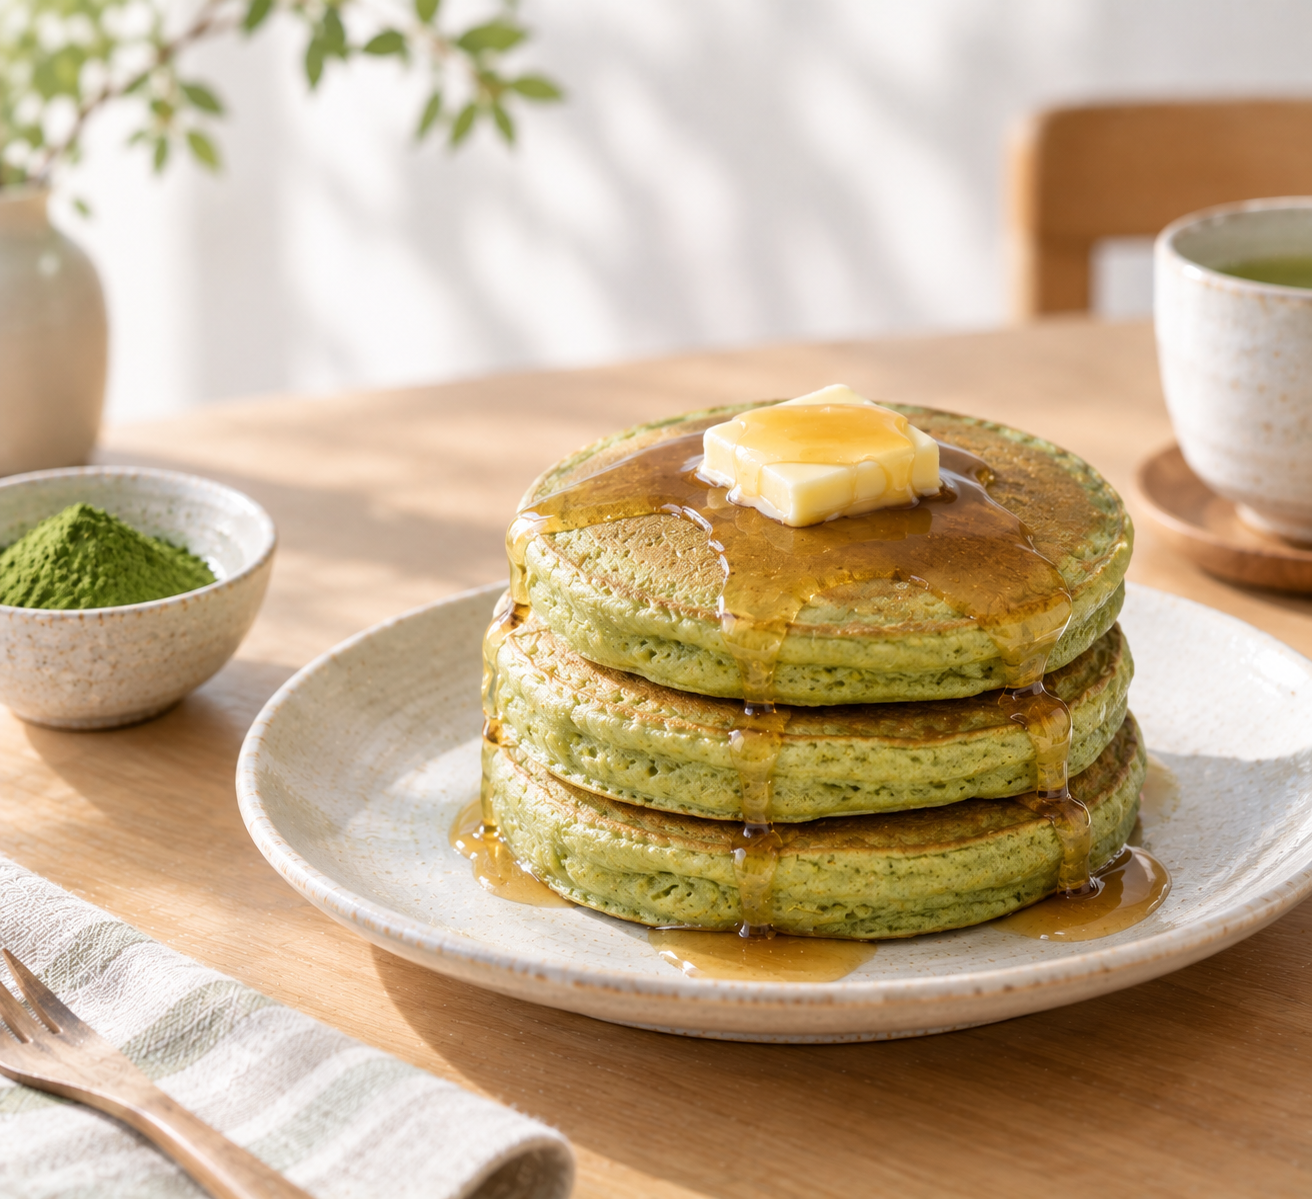
    Method: Sift together the flour, baking powder, matcha, salt, and sugar in a large bowl – sifting matters more here than with most dry ingredients, since matcha clumps more than flour does on its own. Make a well in the center, add the milk, egg, vanilla, and melted butter, and whisk until nearly smooth – stop as soon as most lumps disappear rather than mixing until perfectly uniform, since overmixing is what makes pancakes dense instead of fluffy. Heat a griddle to 300-350°F, grease lightly, and pour 1/4 cup of batter per pancake. Cook for about 2 minutes until the edges look set and bubbles appear on the surface, then flip and cook about another minute. Serve with your preferred toppings.

    A Few Things People Ask Me

    Can I use ceremonial-grade matcha for either of these, or should I stick with culinary-grade? Culinary-grade is the more sensible choice for both – neither recipe is showcasing matcha’s flavor on its own the way drinking it does, and culinary-grade holds up better against the other ingredients while costing less.

    Why does my matcha pancake batter still have small green flecks even after sifting? Sifting reduces clumping significantly but doesn’t always eliminate it completely by hand – if you want a fully smooth result, whisking the matcha into a small amount of the milk first (the same technique used in the overnight oats recipe) before combining with the rest of the wet ingredients gets you closer to zero visible flecks.

    How long do matcha overnight oats keep in the fridge? Up to about 5 days in a sealed container, making this genuinely useful for a make-once, eat-all-week breakfast routine rather than something you prep fresh daily.

    What matcha would you recommend keeping on hand for breakfast recipes like these? Culinary-grade matcha on Amazon is the practical choice here, and Nio Teas’ matcha is what I used for both recipes above if you want a specific brand to start with.

    Where I Landed

    Both of these recipes work for the same underlying reason: get the matcha smooth before it meets anything else, whether that’s blending it into liquid for the oats or sifting it into dry ingredients for the pancakes. Once that step is handled properly, matcha stops being a garnish you’re working around and becomes just another breakfast ingredient – one that happens to add a genuinely useful bit of bitterness against all that maple syrup.

  • Matcha Mocktails: Non-Alcoholic Drinks Worth Making on Purpose

    Matcha Mocktails: Non-Alcoholic Drinks Worth Making on Purpose

    Disclosure: This post contains affiliate links. If you buy through one of them, I may earn a small commission at no extra cost to you.

    Most mocktails feel like an afterthought – the “virgin” version of something built around alcohol, missing whatever the alcohol was contributing and never quite replacing it. Matcha mocktails don’t have that problem, because matcha isn’t standing in for the alcohol’s flavor role. It’s doing the same job it does in a matcha cocktail: providing bitterness and depth that a purely sweet, fruity drink usually lacks. These recipes aren’t lesser versions of anything – they’re built to work fully non-alcoholic from the start.

    The Problem You’re Actually Trying to Solve

    Most matcha “mocktails” you’ll find online are just matcha cocktail recipes with the alcohol removed and nothing added to fill the gap it left, which usually results in something thinner and less interesting than the original. A mocktail built around matcha from the start – rather than alcohol with matcha added, minus the alcohol – avoids that problem, since matcha’s own bitterness and body were always doing real work in the drink.

    Who This Article Is NOT For

    • If you actually want the alcoholic versions of these drinks, my matcha cocktail guide covers gin, whiskey, tequila, and bourbon-based versions instead.
    • If you want a simple daily matcha drink rather than something more elaborate for entertaining, my guide to making a matcha latte at home is the more everyday option.
    • If you’re avoiding caffeine entirely, these all use real matcha rather than a decaffeinated substitute, so they’re not a caffeine-free choice.

    What Makes a Matcha Mocktail Work

    The same technical basics that apply to matcha cocktails apply here: matcha needs to be dissolved into a smooth paste or slurry with warm water before it goes anywhere near ice or carbonation, since it clumps in cold liquid on its own. And the same flavor logic holds too – matcha’s bitterness pairs best with bright citrus, mint, ginger, and tropical fruit flavors that give it something to contrast against, rather than purely sugary mixers that just make the whole drink taste flat and one-note.

    Three Matcha Mocktails Worth Making

    1. Matcha Lemon Fizz

    A bright, citrusy sparkling drink that’s easy to put together and genuinely refreshing rather than just sweet.

    Ingredients:

    • 1 tbsp matcha powder
    • Juice of 1/4 lemon
    • 1 tsp sugar
    • Lemon-flavored sparkling water, to top
    • Ice

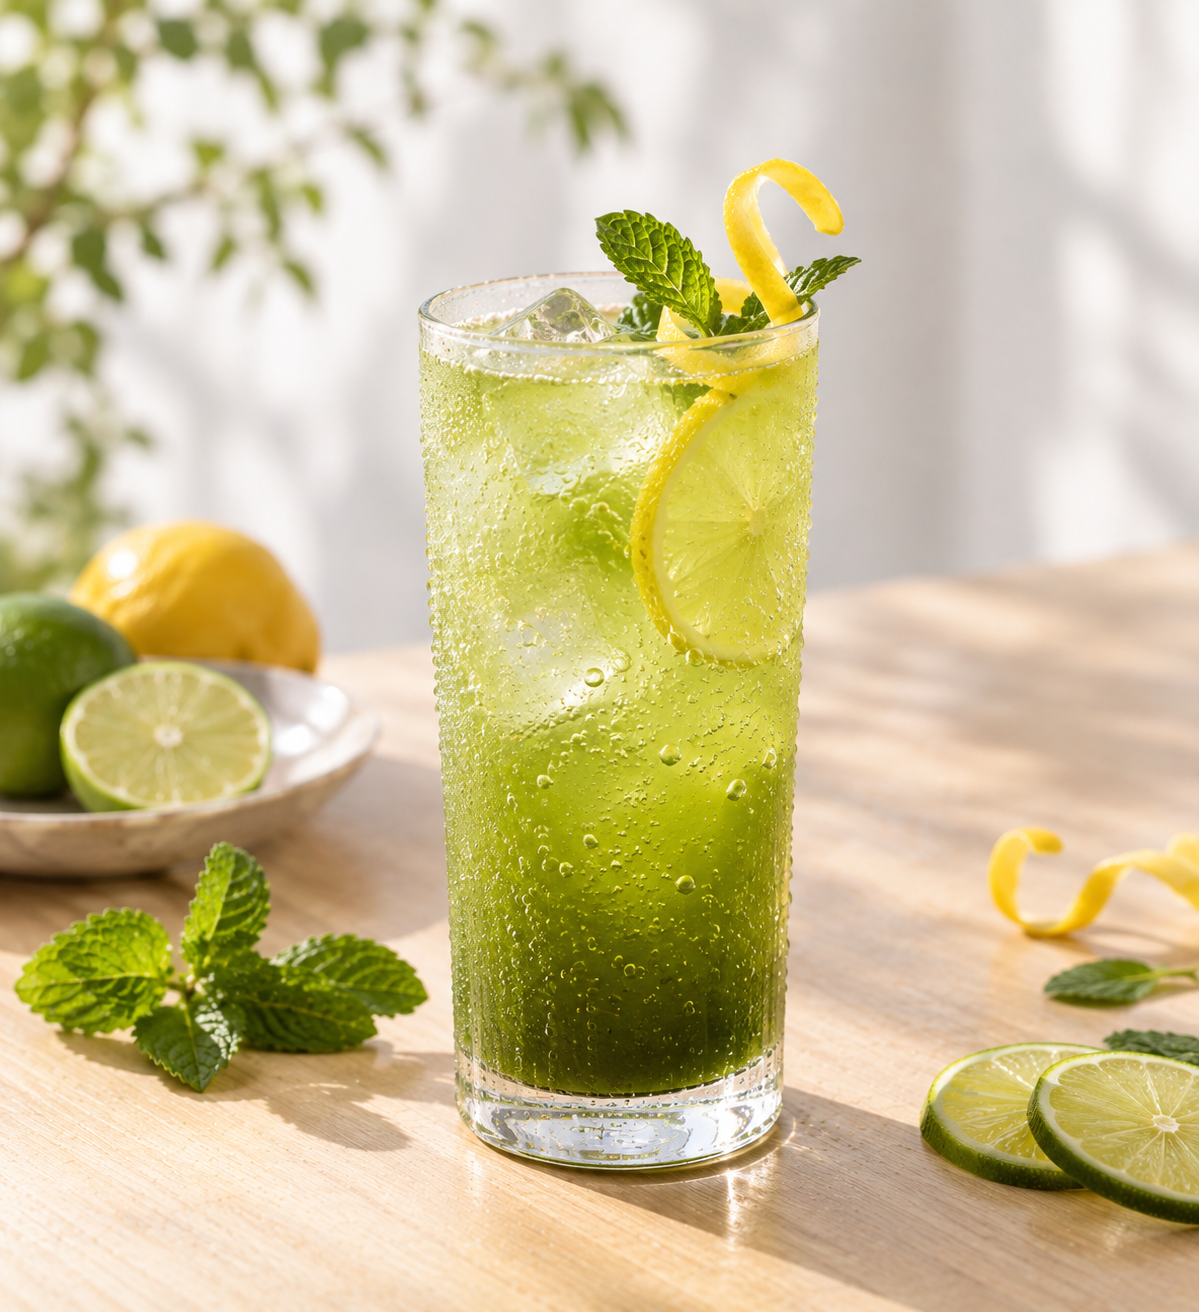
    Method: Shake the matcha, lemon juice, sugar, and a splash of water together with ice until the matcha is fully dissolved and frothy. Strain into a glass over fresh ice and top with sparkling lemon water. Garnish with a light sprinkle of matcha and a lemon twist. The sparkling water does a lot of the work here, carrying the citrus and giving the drink lift without needing anything more complicated.

    2. Matcha Mojito Mocktail

    A muddled mint-and-lime drink that borrows the mojito’s structure entirely, minus the rum.

    Ingredients:

    • 1 tsp matcha powder
    • 1 cup hot water (around 160°F/70°C)
    • 1 tsp maple syrup or mint simple syrup
    • 1 tbsp lime juice
    • 2 lime slices
    • 3-4 mint leaves
    • Ice

    Method: In your serving glass, muddle the mint leaves and lime slices together to release their oils – this matters more here than in most drinks, since there’s no alcohol to help carry the aromatics, so a good muddle does real work. In a separate cup, sift and whisk the matcha into the hot water until completely smooth, then stir in the maple syrup until dissolved. Fill the glass with ice, pour the matcha mixture over the muddled mint and lime, stir, and garnish with extra mint and lime.

    3. Matcha Piña Colada Mocktail

    A creamy, tropical option that leans into coconut and pineapple rather than citrus.

    Ingredients:

    • 1 tsp matcha powder
    • 1 oz warm water
    • 1/2 cup pineapple juice
    • 1/4 cup coconut milk
    • 1 tbsp cream of coconut, optional
    • 1/2 cup ice
    • Pineapple slice, for garnish

    Method: Whisk the matcha with the warm water until smooth and frothy – do this step separately before it touches anything cold, same principle as the other recipes. In a blender or shaker, combine the pineapple juice, coconut milk, cream of coconut if using, and ice. Add the whisked matcha and blend or shake until fully combined. Pour into a chilled glass and garnish with a pineapple slice.

    A Few Things People Ask Me

    Which of these is the easiest to start with? The Matcha Lemon Fizz, by a good margin – it’s the fewest steps and the most forgiving if your matcha doesn’t dissolve perfectly on the first try, since the sparkling water and shaking do most of the work.

    Can I make any of these ahead of time for a party? The matcha-and-liquid base for the piña colada version can be pre-blended and kept chilled for a few hours, though it’s best shaken again just before serving since it can separate slightly. The lemon fizz and mojito versions are best made fresh, since their sparkling and muddled elements don’t hold up well sitting around.

    Do these have less caffeine than the alcoholic cocktail versions? No – removing the alcohol doesn’t change the matcha content, so the caffeine level is roughly the same as the cocktail versions using an equivalent amount of matcha, just without the alcohol’s effects layered on top.

    What matcha works best for mocktails specifically? Since these drinks have plenty of competing flavor from citrus, mint, or coconut, culinary-grade matcha on Amazon works just as well as a pricier ceremonial-grade tin – save the ceremonial grade for drinking matcha on its own.

    Where I Landed

    What changed my mind about mocktails generally was realizing a good one isn’t built by subtraction – it’s built the same way a good cocktail is, just without alcohol as one of the flavor components from the start. Matcha happens to be particularly well-suited to that approach, since its bitterness and body were never dependent on the alcohol in the first place. If you want to try a specific brand across all three of these, Nio Teas’ matcha is what I used testing each one.

  • Cooking With Sencha: Ochazuke and Other Ways to Actually Eat Your Tea

    Cooking With Sencha: Ochazuke and Other Ways to Actually Eat Your Tea

    Disclosure: This post contains affiliate links. If you buy through one of them, I may earn a small commission at no extra cost to you.

    For years I only thought of sencha as something to drink, and threw the spent leaves straight in the compost after steeping – which, it turns out, was wasting a genuinely useful ingredient rather than a spent one. Sencha shows up in Japanese cooking well beyond the teacup: poured over rice as ochazuke, dried and turned into a seasoning powder, even mixed straight into rice or noodles. Once I started treating tea as something with a second life after brewing, I stopped throwing away half of what I was already buying.

    The Problem You’re Actually Trying to Solve

    Most people who cook with tea at all default to matcha, since it’s a powder that mixes easily into batter or dough. Sencha gets treated as purely a drinking tea, which means both the brewed tea itself (as a savory broth) and the leftover leaves after steeping go completely unused as ingredients, when both have real culinary applications specific to Japanese cooking that don’t require any special technique to try.

    Who This Article Is NOT For

    • If you’re looking for baking with matcha specifically, my matcha baking guide covers that separately – the technique and use case there is quite different from what follows.
    • If you don’t already drink sencha regularly, generating “spent leaves” as a byproduct of your normal tea habit is really the natural entry point here – buying tea specifically to throw away the leaves afterward defeats the appeal.
    • If you’re vegetarian or avoid fish generally, the classic ochazuke toppings below lean heavily on salmon and fish roe – the tea-over-rice base still works fine, but you’ll want to swap in pickled vegetables or umeboshi as the topping instead.

    Ochazuke: Tea Poured Over Rice

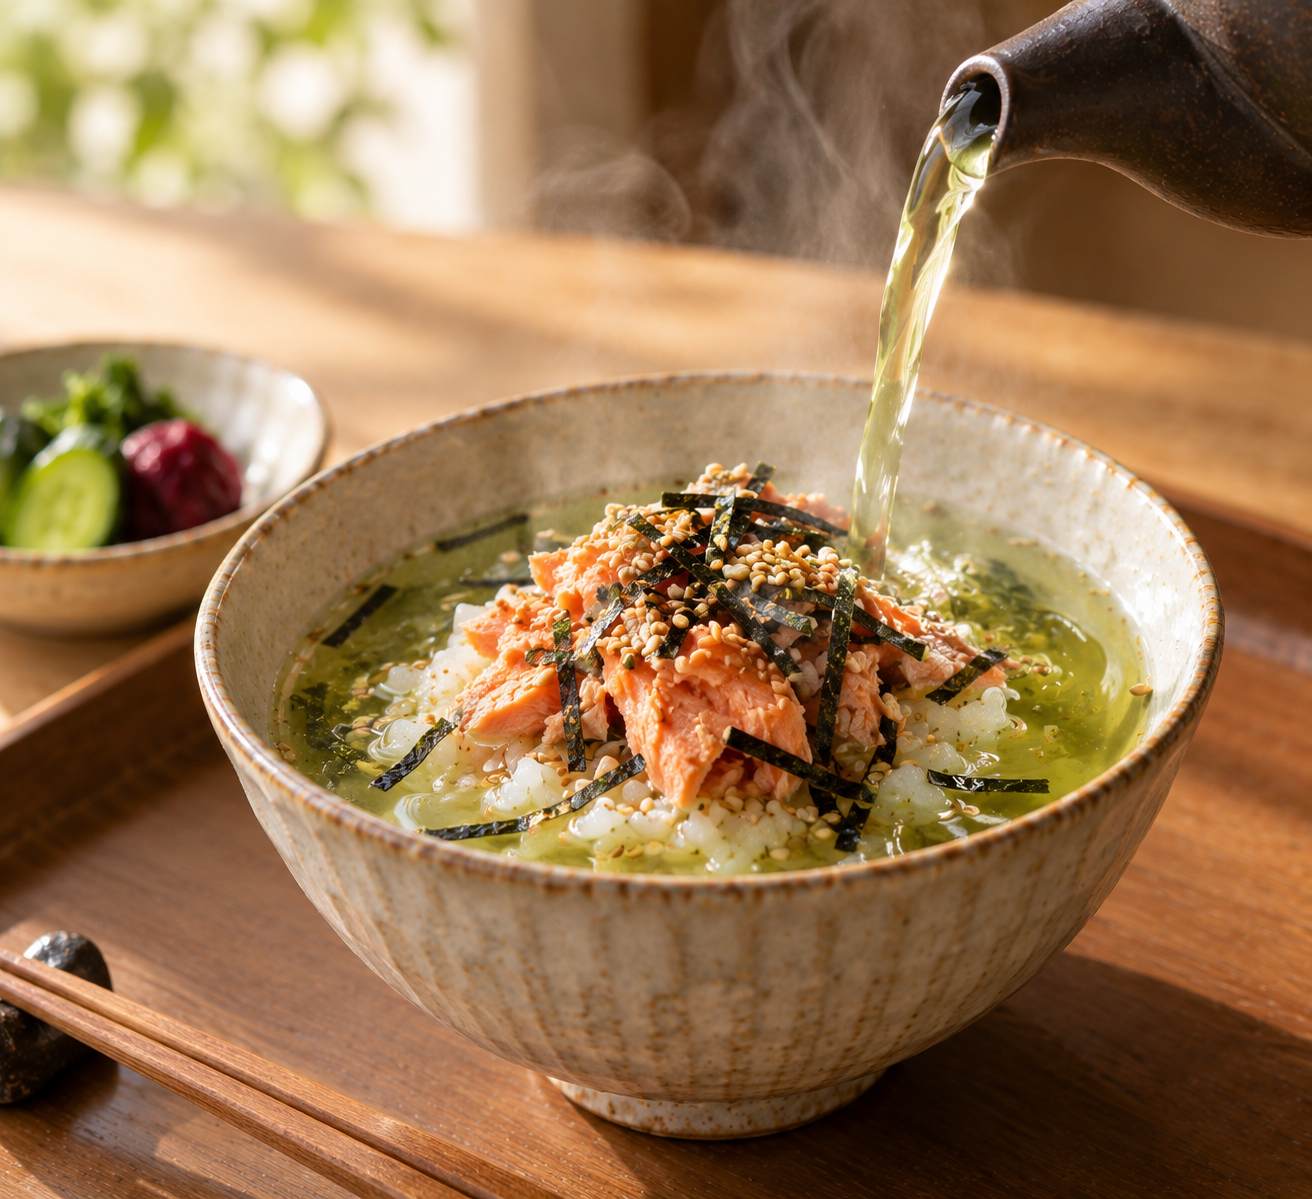
    Ochazuke is the most direct and well-known way sencha shows up in a meal rather than a cup – literally tea poured over a bowl of rice, plus toppings, eaten as a light meal or a way to use up leftover rice.

    The base: Cooked Japanese short-grain rice in a bowl, topped with something savory – classic options include flaked cooked salmon, umeboshi (pickled plum), salmon roe, shredded nori, sesame seeds, and a few sprigs of mitsuba or scallion.

    The tea: Brew 2 teaspoons of sencha leaves in about a cup of hot water for 1-2 minutes – genmaicha and hojicha work here too, each giving a slightly different character to the dish. A splash of soy sauce is a common addition to the brewed tea before pouring.

    Putting it together: Arrange the rice and toppings in a bowl first, then pour the hot tea over until it comes about halfway up the rice – not a full soup, just enough liquid to soften and flavor the top layer of rice while leaving the bottom more intact. Add wasabi if you want extra sharpness.

    There’s also a cold summer variation using chilled tea (or cold dashi) poured over room-temperature rice, which is worth trying specifically in hot weather when a hot bowl of anything feels unappealing.

    Three Things to Do With Spent Tea Leaves

    Once you’ve brewed sencha the normal way, the leaves themselves aren’t actually done working – they’ve released most, but not all, of their flavor and nutrients into the water.

    Ohitashi-style side dish. Blanch the used leaves briefly if you want a softer texture, squeeze out the excess water, then dress lightly with soy sauce and scatter bonito flakes on top. This turns leftover leaves into a small side dish rather than something to discard.

    Mixed into rice or noodles. Finely chop the spent leaves and stir them into freshly cooked rice, or add them during the final stage of cooking. The same idea works with noodles – fold chopped leaves into warm soba or scatter over udon, especially alongside sesame and a bit of soy sauce.

    Dried into a seasoning powder. Dry the used leaves slowly in a pan over low heat, stirring occasionally, until all the moisture is gone – this takes roughly five to seven minutes. Once fully dry, crumble the leaves and blend with sesame, dried bonito flakes, and salt to make a simple furikake-style seasoning. It doesn’t keep for long, so make it in small batches and use it within a few days.

    A Few Things People Ask Me

    Do I need to use fresh sencha for ochazuke, or can I use whatever’s already brewed? Freshly brewed is better for flavor – a stronger, more deliberate steep specifically for the dish tends to hold up better against the rice and toppings than tea that’s been sitting around cooling for a while.

    Is it safe to eat the actual tea leaves, not just drink the brewed tea? Yes – tea leaves are edible, and the practice of eating brewed leaves (as in the ohitashi-style dish above) is a real, traditional use rather than an unusual or risky one.

    Can I use gyokuro or fukamushi sencha instead of standard sencha for any of this? Generally yes, though gyokuro’s more delicate umami (see my sencha vs. gyokuro comparison for why) is arguably wasted poured over rice with strong toppings like salted salmon – it’s better preserved by drinking on its own. Standard or fukamushi sencha, with their more robust flavor, hold up better as an ingredient rather than purely a drink.

    What’s a good sencha to keep on hand specifically for cooking with, rather than just drinking? Nio Teas’ sencha works fine for this – you don’t need a premium single-origin leaf for cooking applications the way you might for drinking on its own. A donabe-style rice bowl on Amazon is also worth having if you plan to make ochazuke regularly, since the wider, shallower shape suits pouring tea over rice better than a standard deep bowl.

    Where I Landed

    The shift that actually mattered here wasn’t learning a new recipe – it was realizing sencha didn’t stop being useful the moment I finished drinking it. Between ochazuke as an actual meal and spent leaves turning into a side dish or seasoning, the same bag of tea does noticeably more work than “just a drink” once you start looking at it that way. If you already drink sencha regularly, most of what’s above costs nothing extra to try – it’s just using what you’d otherwise throw away.

  • Japanese Tea Ceremony Utensils: What Each One Actually Does

    Japanese Tea Ceremony Utensils: What Each One Actually Does

    Disclosure: This post contains affiliate links. If you buy through one of them, I may earn a small commission at no extra cost to you.

    The first time I saw a proper tea ceremony setup laid out, I counted at least seven distinct tools before I even got to the bowl and whisk I already recognized – a small silk cloth, a bamboo scoop, a lidded container that wasn’t the bowl, a second bamboo tool shaped like a ladle. It looked like more equipment than the actual drink could possibly justify. It isn’t excess, though – each piece has a specific, singular job, and most of them exist because chanoyu (the tea ceremony) treats the entire preparation, not just the drinking, as the point.

    You don’t need all of this to make good matcha at home – a bowl and a whisk genuinely cover the basics. But understanding what each ceremonial tool does makes it much easier to recognize what you’re looking at if you ever see a full set, whether in a shop, a museum, or an actual ceremony.

    The Problem You’re Actually Trying to Solve

    Most casual explanations of tea ceremony either overwhelm with the full ritual choreography (which utensil moves where, in what order, with what gesture) or undersell it down to just “bowl and whisk,” skipping the several other tools that have real, specific functions. If you want to actually understand what you’re looking at in a tea ceremony set without committing to studying the full ceremonial practice, a plain-language rundown of each piece’s job is the more useful starting point.

    Who This Article Is NOT For

    • If you already own a chawan and chasen and just want to make good matcha at home casually, my matcha whisk buying guide covers the two tools that actually matter for that, without needing the rest of this list.
    • If you want to learn the actual ceremonial choreography and etiquette rather than just what each tool is called and does, my simplified home tea ceremony guide is a better starting point for that.
    • If you’re shopping for a complete ceremonial set to actually practice chanoyu formally, this is background knowledge rather than a buying guide – working with an instructor is the better route for building out a proper set.

    The Core Utensils, One at a Time

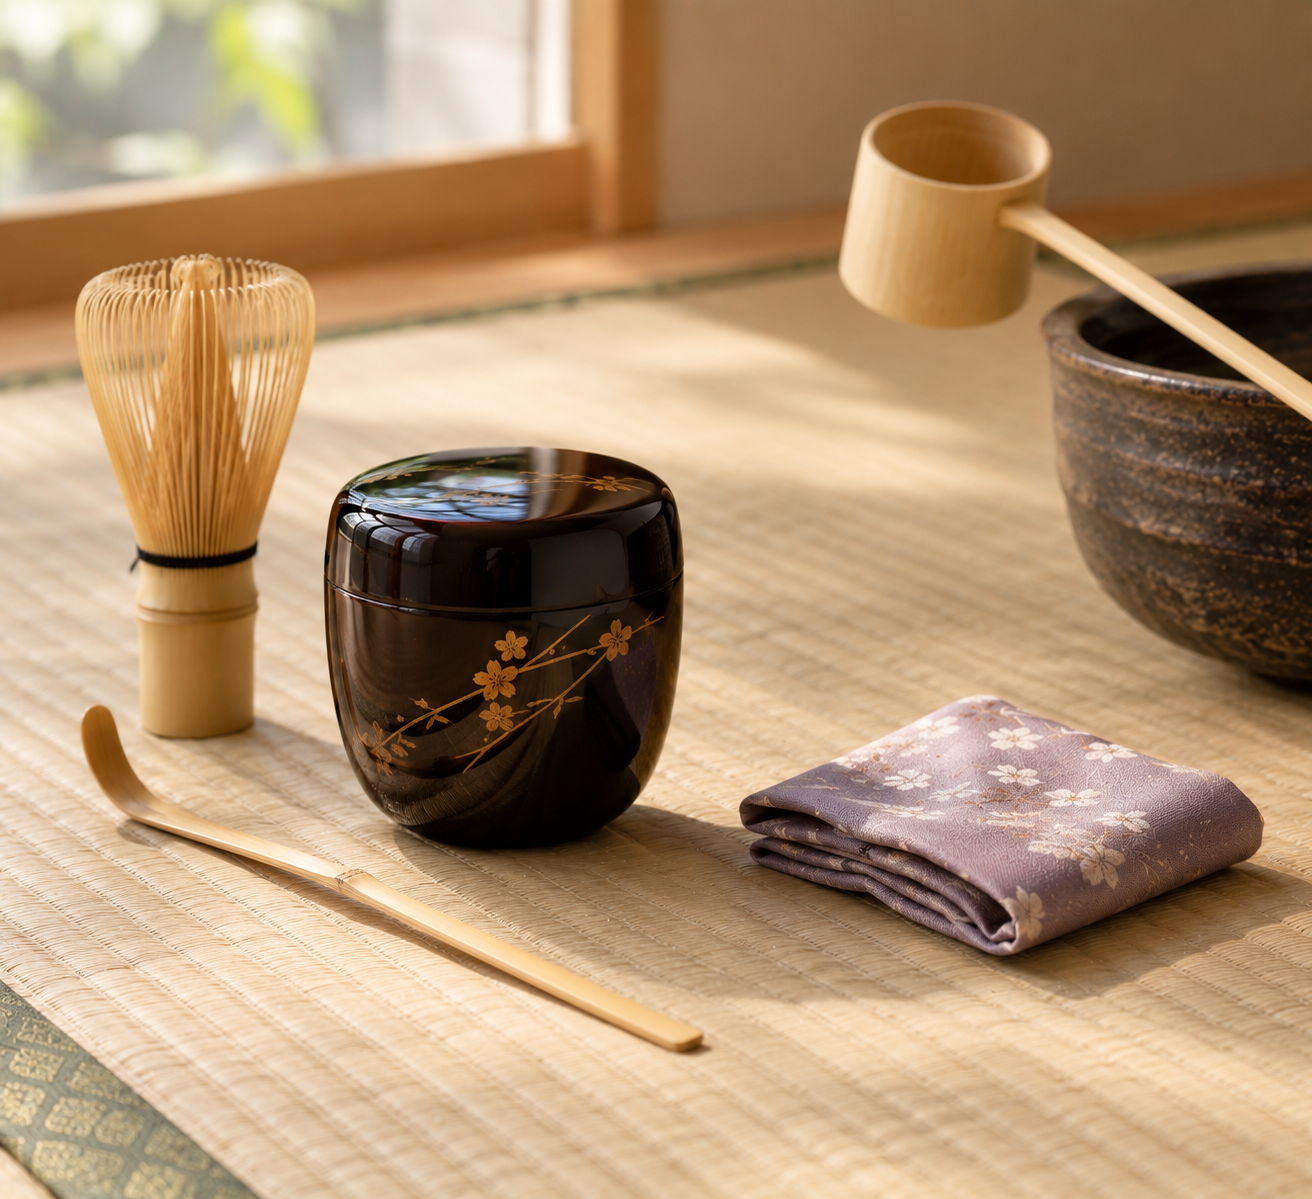
    Chasaku (bamboo scoop). A long, narrow bamboo scoop used to measure and transfer matcha from its caddy into the bowl – typically holding around two grams per scoop. These are often hand-carved, sometimes by tea masters themselves, and can carry real personal or artistic significance well beyond their simple function.

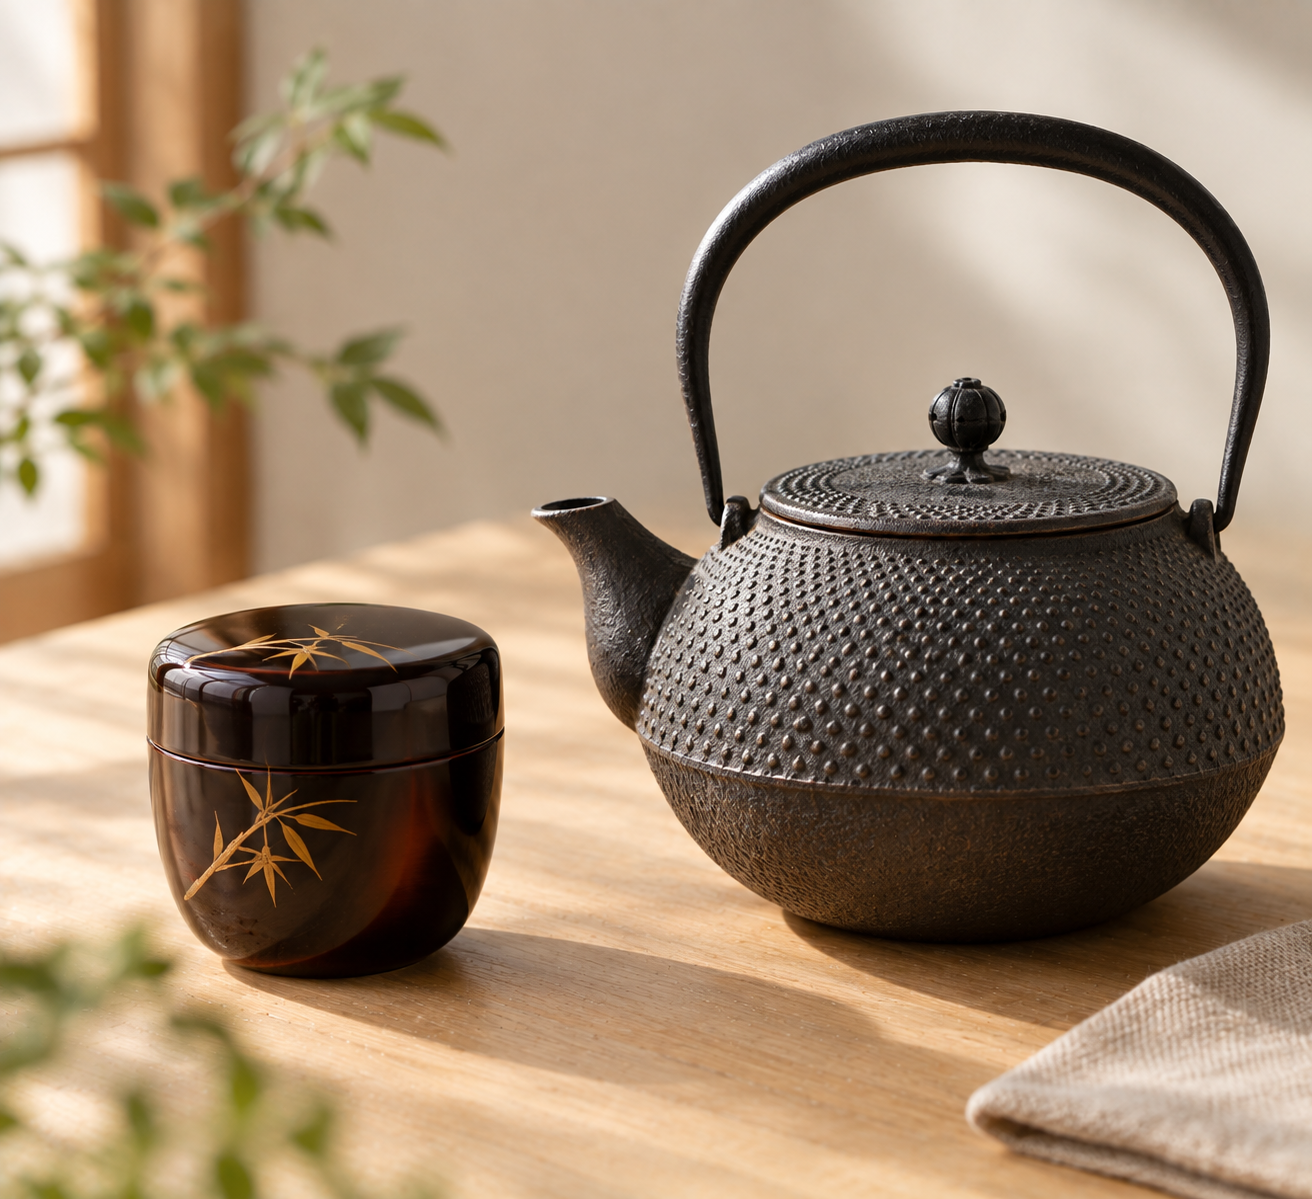
    Natsume. A lacquered wooden tea caddy used specifically for usucha (thin tea, the more casual and common style of matcha preparation). Named for its resemblance to the natsume (jujube) fruit, it’s typically finished in black or red urushi lacquer, often decorated with seasonal motifs that change with the time of year – tying back to the same seasonal sensibility that shows up in chawan and wagashi choices.

    Chaire. A ceramic tea caddy used exclusively for koicha (thick tea, a more concentrated and ceremonially formal preparation), distinct from the natsume both in material and in which style of tea it’s reserved for. Traditionally oblong with an ivory lid, a chaire is often stored in its own protective drawstring pouch when not in use.

    Hishaku. A long-handled bamboo ladle used to transfer hot water from the kettle (kama) to the tea bowl, and to scoop water for cooling. Its handling is one of the more codified parts of the ceremony – specific grips and motions are prescribed depending on what the ladle is doing at that moment.

    Fukusa. A folded silk cloth used to ritually purify the natsume, chasaku, and other utensils before and during the ceremony. It must stay dry throughout – it’s a purification tool, not a cleaning cloth for wiping up spills – and its color traditionally signals the practitioner’s gender (purple for men, orange or red for women, broadly speaking).

    Chakin. A damp linen cloth used to wipe the tea bowl itself between preparations. Where the fukusa purifies dry, the chakin is the tool that actually touches and cleans the bowl with moisture – the two serve related but distinct purification roles and aren’t interchangeable.

    Kensui. A wastewater vessel, made of clay, metal, or wood, into which used rinse water is poured after cleaning the bowl during the ceremony – essentially the practice’s built-in waste container, keeping used water contained and out of view rather than disposed of elsewhere mid-ceremony.

    Mizusashi. A lidded water container, made from ceramic, glass, metal, or wood, holding fresh cold water primarily used to refill the kettle as needed throughout the ceremony.

    Futaoki. A small rest for the kettle’s lid and the hishaku ladle when they’re not actively in use, typically made of bamboo, ceramic, or porcelain – a small detail, but one more example of the ceremony having a designated place for literally everything involved in the process.

    Why So Many Separate Tools

    The pattern across nearly all of these is separation of function and purity: a distinct tool for measuring, a distinct tool for purifying, a distinct tool for handling water, a distinct tool for waste. Nothing does double duty. That’s less about needing that many tools functionally and more about chanoyu treating the entire preparation sequence, not just the finished cup, as the meaningful part of the practice – each tool’s precise, singular role is part of what makes the process itself deliberate and unhurried rather than efficient.

    A Few Things People Ask Me

    Do I need any of these beyond a chawan and chasen to make matcha at home? No – a bowl and whisk are genuinely sufficient for casual home matcha. The rest of this list matters for understanding or practicing formal chanoyu, not for making a good everyday cup.

    What’s the actual difference between the fukusa and the chakin if they’re both cloths? The fukusa is dry and used for ceremonial purification of utensils like the natsume and chasaku; the chakin is damp and used specifically to wipe the tea bowl. They’re not interchangeable, and using one for the other’s job would be a real departure from proper practice.

    Is a chaire always more valuable or formal than a natsume? Generally, yes, in the sense that koicha (which the chaire is used for) is considered the more advanced, formal preparation compared to usucha – but that doesn’t make an individual natsume less well-crafted or valuable on its own terms; the two serve genuinely different tea styles rather than existing on a strict hierarchy.

    Where would I actually start if I wanted to build toward owning some of these pieces? A chasen and chawan first, since those are the tools any regular matcha drinker actually uses. Nio Teas’ matcha tools covers that starting point well, and a natsume-style tea caddy on Amazon is a reasonable next piece if you want something a step beyond the basics without committing to a full ceremonial set.

    Where I Landed

    What struck me most, once I understood what each piece actually did, was how little of it was decorative. Every tool in a full tea ceremony set is solving one specific problem – measuring, purifying, transporting water, containing waste – and none of them overlap in function the way household items so often do. It’s a genuinely efficient system dressed up as an elaborate one, which is a different thing than I expected walking into it.

  • How to Brew Japanese Green Tea Without a Kyusu

    How to Brew Japanese Green Tea Without a Kyusu

    Disclosure: This post contains affiliate links. If you buy through one of them, I may earn a small commission at no extra cost to you.

    A kyusu is genuinely the best tool for brewing Japanese green tea, but it’s not the only one, and most people outside Japan who want to try sencha or gyokuro don’t own one yet and aren’t sure it’s worth buying before they know they’ll actually keep drinking it regularly. The good news is that a kyusu’s whole job – controlling temperature, giving the leaf room to unfurl, and separating leaf from liquid cleanly – can be approximated well enough with things most kitchens already have.

    None of the methods below will match a good kyusu exactly, but several of them get close enough that the difference matters far less than getting the temperature and timing right in the first place.

    The Problem You’re Actually Trying to Solve

    A lot of beginner advice for Japanese green tea assumes you already own a kyusu, which leaves people either buying one before they know if they’ll stick with the habit, or giving up on Japanese green tea because they don’t have “the right equipment.” The actual requirements are simpler than a dedicated teapot: correct water temperature, a way to give the leaf room to expand, and a clean way to separate leaf from liquid once it’s done steeping. Several household items handle that well enough to get you a genuinely good cup.

    Who This Article Is NOT For

    • If you’re ready to commit to Japanese green tea as a regular habit, my kyusu buying guide is worth reading before you invest – a proper kyusu genuinely does brew a better cup once you’re past the “just trying it out” stage.
    • If you’re brewing matcha rather than steeped loose-leaf tea, none of this applies – matcha is whisked, not steeped, and needs a chasen and bowl rather than any of the vessels below.
    • If you already have reliable access to a kyusu and are just looking for brewing parameters, my guide to brewing green tea temperature covers that more directly.

    The Core Principles, Regardless of Vessel

    Whatever you brew in, three things matter more than the vessel itself: matching water temperature to the specific tea (generally 60-80°C for most sencha, cooler for gyokuro), keeping steep time controlled rather than letting the leaf sit indefinitely, and cleanly separating the leaf from the liquid once it’s done so the tea doesn’t keep over-extracting in the cup. Every method below is really just a different way of solving those same three problems.

    Five Ways to Brew Without a Kyusu

    1. Mug With a Built-In or Clip-On Strainer

    The simplest option for a single cup. Add loose leaf directly to a mug fitted with a fine mesh strainer basket, pour water at the appropriate temperature over it, and steep for the recommended time before lifting the strainer out. It’s quick, easy to clean, and needs no special technique – the only real downside is that a strainer with too-large mesh holes can let smaller leaf particles through into your cup.

    2. A Heat-Safe Glass or Jar

    A simple glass or heat-safe jar works well for one or two servings, and it has a genuine advantage over an opaque mug: you can actually watch the color develop as the tea steeps, which makes it easier to judge doneness by eye once you’ve done it a few times. Just be careful with hot glass, and strain the leaves out through a fine mesh sieve when pouring into your cup.

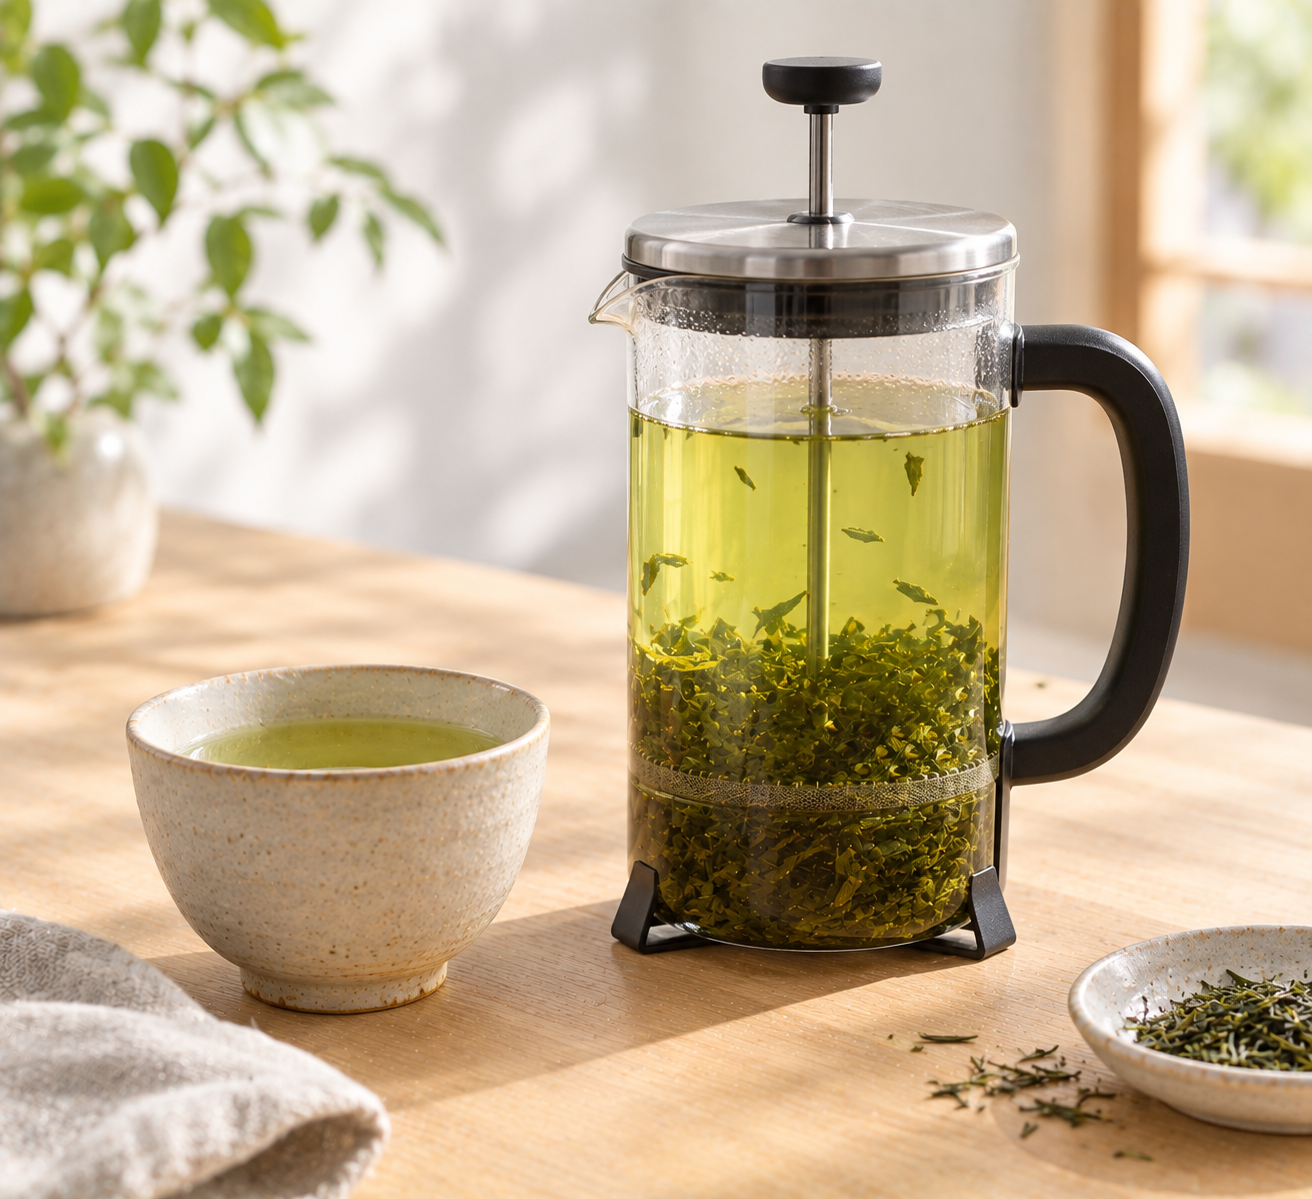
    3. French Press

    A French press handles loose-leaf green tea surprisingly well, and it’s a good option if you’re making more than a single cup at once. Use roughly 2-3 grams of tea (about a teaspoon) per 200ml of water, and let boiled water cool for 3-4 minutes before pouring over the leaves if you don’t have a thermometer – this gets you into the right general temperature range for green tea without needing to measure exactly. Steep for 2-3 minutes, then press down slowly and pour immediately. The one real risk is leaving the tea sitting in contact with the leaves too long after pressing, since a French press’s mesh doesn’t fully separate the two the way a proper strainer does – pour it all out right after pressing rather than letting it sit in the carafe.

    4. A Small Saucepan

    Useful specifically when you’re making tea for more than one or two people at once. Add leaves directly to appropriately-cooled water in the saucepan, let it steep briefly, then pour carefully through a fine strainer into cups. It takes a bit more attention to pour cleanly without leaves ending up in the cup, but it scales up more easily than most of the other methods here.

    5. A Bowl and Spoon (In a Pinch)

    Genuinely a last-resort setup rather than something to reach for regularly, but worth knowing: loose leaf steeped directly in a bowl of appropriately cooled water, then strained by holding a spoon or your fingers against the rim while pouring, will produce drinkable tea when nothing else is available. Harder to control heat and filtration precisely, but it works when you’re traveling or in someone else’s kitchen without proper tea equipment.

    A Few Things People Ask Me

    Which of these methods comes closest to what a kyusu actually does? The French press is arguably the closest functional match, since it handles larger leaf volumes and separates leaf from liquid in one motion the way a kyusu’s built-in strainer does, just less precisely.

    Can I reuse the same leaves for a second steep with any of these methods? Yes, for most of them – a second infusion works with mug-and-strainer, glass, French press, or saucepan methods the same way it would with a kyusu, generally at a slightly higher temperature and shorter time than the first steep.

    Do I need different equipment for gyokuro specifically, given how sensitive it is to temperature? Not different equipment, just extra care with temperature and ratio, since gyokuro uses notably cooler water and less liquid relative to leaf than sencha does – any of the vessels above work, but gyokuro leaves less room for temperature error regardless of what you’re brewing it in.

    Is it worth buying an inexpensive tea infuser to start, before committing to a full kyusu setup? Yes, genuinely – a mesh tea infuser on Amazon is a low-cost way to get a cleaner strain than a bowl-and-spoon setup while you figure out whether Japanese green tea is a habit worth investing further in.

    Where I Landed

    The kyusu earns its reputation – it really does make brewing Japanese green tea easier and more consistent once you have one. But treating it as a hard requirement before you can even try sencha or gyokuro properly gets the order backwards. Get the temperature and timing right first, with whatever’s already in your kitchen, and let the tea itself tell you whether it’s worth the dedicated equipment. If you decide it is, Nio Teas’ kyusu selection is a reasonable next step once you’re past the experimentation stage.

  • Does Water Quality Actually Change How Japanese Tea Tastes?

    Does Water Quality Actually Change How Japanese Tea Tastes?

    Disclosure: This post contains affiliate links. If you buy through one of them, I may earn a small commission at no extra cost to you.

    I spent a frustrating stretch of time trying to fix a matcha that kept tasting flat and muted no matter what I adjusted – grade, temperature, whisking technique, all of it. The actual problem turned out to be my tap water. Once I switched to filtered water with the right mineral profile, the same matcha I’d been brewing for weeks suddenly tasted noticeably brighter and sweeter. Nothing about the tea had changed. The water had been quietly working against it the entire time.

    This isn’t a minor, precious detail that only serious tea people need to care about. Water makes up the overwhelming majority of what’s actually in your cup, and its mineral content genuinely changes how much of the tea’s own flavor makes it into that cup versus getting bound up and lost.

    The Problem You’re Actually Trying to Solve

    Most brewing advice fixates on temperature and steep time while treating water as a neutral, interchangeable backdrop – “just use water” – when in practice tap water varies enormously by region in mineral content and chlorine treatment, both of which measurably change how Japanese green tea and matcha taste. If you’ve followed every other piece of brewing advice correctly and your tea still tastes duller or flatter than it should, water is a genuinely underrated place to look.

    Who This Article Is NOT For

    • If you already use filtered or bottled low-mineral water and are happy with how your tea tastes, this is confirming what you’re already doing right rather than telling you something new to fix.
    • If you’re troubleshooting matcha clumping or bitterness from technique rather than water, my guide to making a matcha latte at home covers whisking and dissolving issues specifically.
    • If you’re brewing black tea or coffee rather than Japanese green tea, the specific mineral ranges below are calibrated to green tea’s more delicate flavor profile and don’t necessarily transfer directly.

    The Actual Mechanism

    Water hardness – the amount of dissolved calcium and magnesium in it – changes tea flavor through a fairly specific chemical process rather than just a vague “purity” effect. Calcium ions bind with the catechins and tannins in tea, forming complexes that make those compounds less available to your palate. The practical result is muted astringency and aroma, reduced sweetness and clarity, a cloudier appearance, and an overall flatter flavor – not a smoother, gentler version of the tea, but a genuinely suppressed one.

    This matters more for Japanese green tea specifically than for many other teas, because the qualities that make sencha, gyokuro, and matcha distinctive – theanine-driven umami, delicate aromatics – are exactly the compounds most easily muted by mineral-heavy water. A tea that leans on subtlety has less room to survive that suppression than a bolder, more robustly flavored black tea would.

    Ideal Water Hardness by Tea Type

    Different Japanese green teas have slightly different sensitivity to mineral content, generally tracking with how delicate and aromatics-dependent they are:

    • Japanese green tea generally: below 100 mg/L hardness
    • Sencha: 50-100 mg/L
    • Gyokuro (the most sensitive, given its umami-forward, aromatics-heavy profile – see my sencha vs. gyokuro comparison for why): ideally below 60 mg/L
    • Matcha: 50-80 mg/L

    The pattern across all of these: the more a tea depends on theanine and subtle aroma rather than bold, assertive flavor, the more it needs genuinely soft water to actually express that character rather than have it bound up and dulled by minerals.

    Chlorine Is a Separate Problem From Hardness

    Beyond mineral content, chlorine treatment in municipal tap water is its own issue entirely – it introduces a flavor similar to what you’d notice in pool water, and it clashes with green tea’s delicate flavor in a way that’s immediately noticeable once you know what to listen for. Iron and manganese, more common in well water, cause discoloration and unpleasant flavor of their own kind. Both of these are separate from the hardness/mineral discussion above, and both are usually addressed by the same solution: filtering before brewing.

    What Kind of Filter Actually Helps

    For most home tea drinkers, a countertop filter offers the best balance of cost, tea-relevant performance, and lifespan, typically treating several hundred gallons per cartridge before needing replacement. The goal for Japanese green tea is landing in a modest mineral range – broadly in the range of 1 to 4 grains per gallon – rather than either fully mineral-stripped water or unfiltered hard tap water at either extreme.

    A basic pitcher filter is a reasonable, low-commitment starting point if you’re not ready to invest in a dedicated countertop system, though not all pitcher filters perform equally – some remove chlorine effectively but do little for hardness, so it’s worth checking what a specific filter is actually rated to remove before assuming “filtered” automatically means “right for tea.”

    A Few Things People Ask Me

    Is bottled spring water a safe default if I don’t want to deal with a filter? It can work, but spring water mineral content varies a lot by brand, and some brands run harder than ideal for delicate Japanese green tea. If you go this route, it’s worth checking a specific brand’s mineral content rather than assuming all bottled water is equally soft.

    Does distilled or reverse-osmosis water make the best tea, since it has no minerals at all? Not necessarily – completely mineral-free water can actually make tea taste flat and lifeless in a different way, since some mineral presence helps carry flavor. The target is soft, low-mineral water, not zero-mineral water.

    How much does this actually matter compared to temperature and steep time? It’s genuinely comparable in impact, which is why it surprises people – you can nail every other variable and still get a disappointing cup if the water itself is working against the tea’s flavor from the start.

    What’s a reasonable water filter to start with for someone serious about Japanese tea? A countertop water filter on Amazon rated for both chlorine and hardness reduction is the more complete solution if you’re brewing Japanese green tea or matcha regularly enough to justify it over a basic pitcher. And once your water is sorted, Nio Teas’ matcha is a good test case for actually noticing the difference, since its more delicate flavor shows the water effect clearly.

    Where I Landed

    The thing that made this click for me was realizing water isn’t a neutral medium the tea sits in – it’s an active participant in what actually ends up in the cup, capable of either letting a good matcha or sencha express itself fully or quietly suppressing most of what makes it worth drinking in the first place. If you’ve been troubleshooting a disappointing cup by adjusting everything except your water, it’s worth checking that variable before assuming the tea itself, or your technique, is the problem. Sometimes the answer really is that simple, and that unglamorous.

  • A Season-by-Season Guide to Pairing Matcha With Wagashi

    A Season-by-Season Guide to Pairing Matcha With Wagashi

    Disclosure: This post contains affiliate links. If you buy through one of them, I may earn a small commission at no extra cost to you.

    For a long time I drank matcha and ate wagashi as two separate things that happened to show up at the same tea time, without really thinking about why they’re almost always served together in Japan rather than apart. It’s not just tradition for tradition’s sake – matcha’s bitterness and wagashi’s gentle sweetness are doing real work on each other, softening the tea’s sharper edges while the tea keeps the sweet from feeling cloying. And because wagashi itself changes with the seasons, that pairing looks different depending on the time of year.

    The Problem You’re Actually Trying to Solve

    Most explanations of matcha and wagashi either treat the pairing as a vague cultural fact (“they’re traditionally served together”) without explaining the actual flavor logic, or they cover wagashi as a static category without acknowledging that what counts as “the” wagashi to pair with matcha changes meaningfully across spring, summer, autumn, and winter. If you’re trying to build an actual seasonal tea routine rather than just picking whatever wagashi happens to be in stock, that distinction matters.

    Who This Article Is NOT For

    • If you want a general introduction to wagashi as a category rather than a seasonal pairing guide, my wagashi guide is the more foundational read.
    • If you’re specifically choosing which matcha brand or grade to buy rather than what to pair it with, my matcha powder brands comparison covers that separately.
    • If you can’t access fresh seasonal wagashi where you live and want substitutes rather than the traditional pairings themselves, most of what’s below assumes at least some access to Japanese confectionery, whether local, imported, or homemade.

    Why This Pairing Actually Works

    The logic isn’t just “sweet plus bitter is nice” – it’s more specific than that. Matcha carries deep umami along with a real astringency, especially with a stronger or more ceremonial-grade preparation. Wagashi’s gentle, refined sweetness – built from ingredients like red bean paste, rice flour, and agar rather than the concentrated sugar and fat of most Western desserts – softens that astringency without overwhelming it the way a rich, buttery dessert would. The tea, in turn, keeps the sweetness from feeling cloying or one-note. Neither element fully dominates the other, which is the entire point of the pairing rather than an accident of tradition.

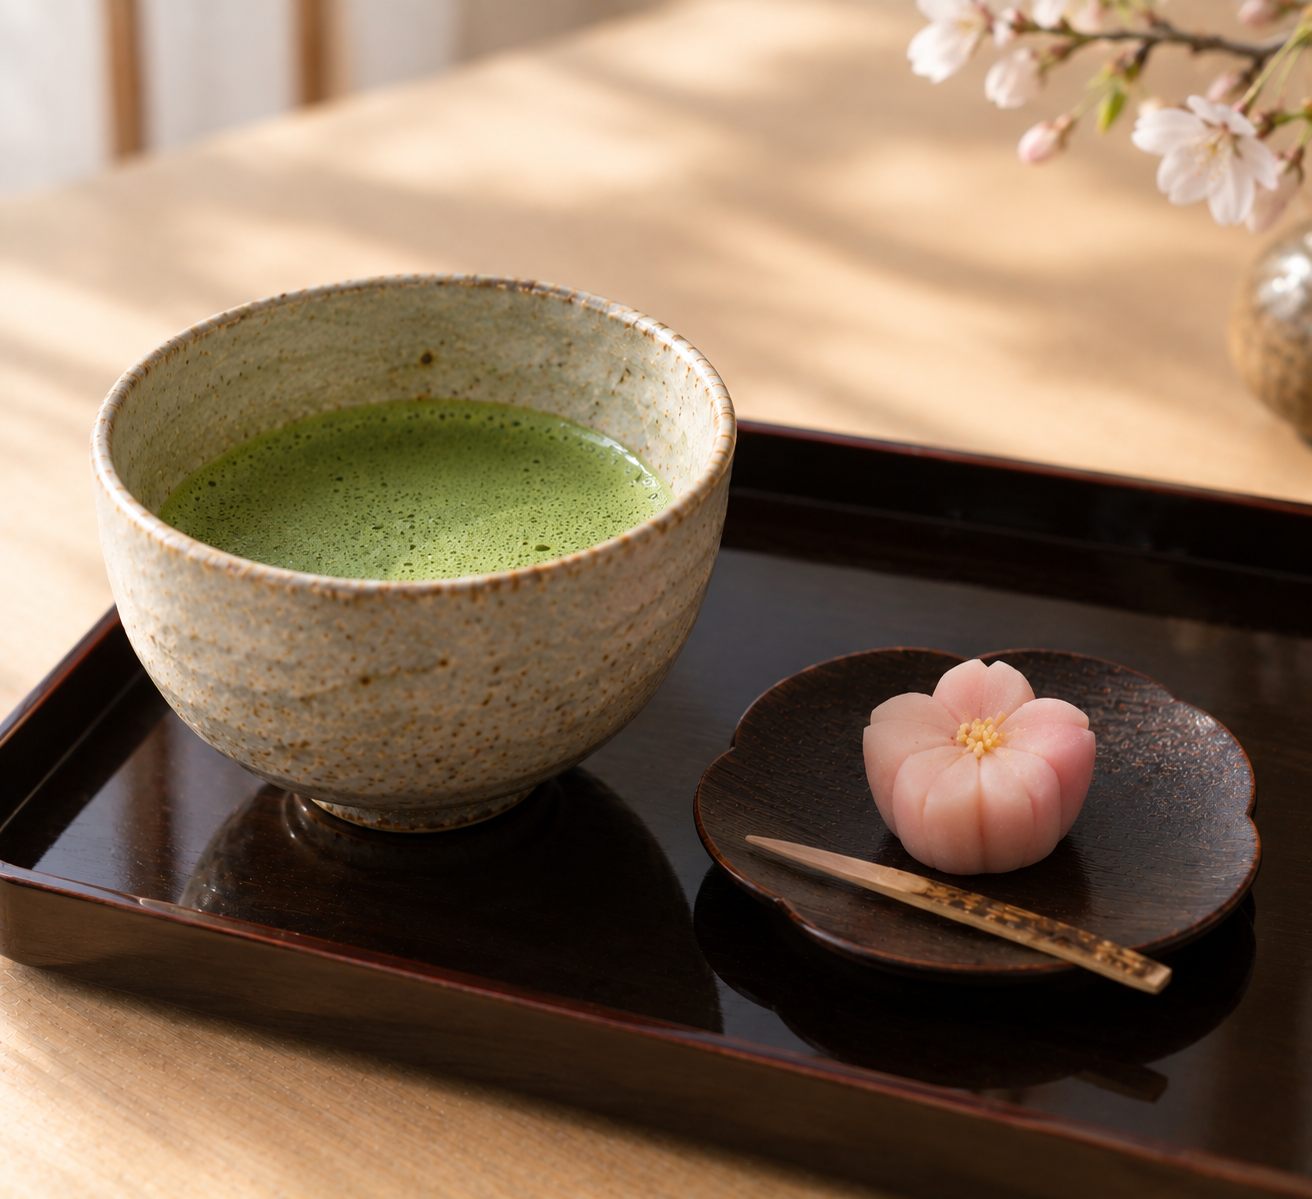
    Traditional nerikiri – wagashi hand-shaped into seasonal motifs, like a maple leaf in autumn or a cherry blossom in spring – is often held up as an ideal match for exactly this reason: its delicate sweetness and soft texture complement matcha’s intensity without a fight for dominance.

    Spring: Sakura Mochi and Hishimochi

    Spring wagashi leans heavily on cherry blossom themes and soft pink-white-green color palettes marking the change of season.

    Sakura mochi – a pink-tinted mochi wrapped around red bean filling, often wrapped again in a pickled cherry blossom leaf – is probably the most recognizable spring wagashi, and its salty-sweet edge from the pickled leaf plays especially well against matcha’s vegetal bitterness.

    Hishimochi, a diamond-shaped layered mochi in pink, white, and green, is more visual celebration than intense flavor experience, making it a lighter counterpart to a stronger matcha if you want the tea itself to carry more of the flavor weight.

    Summer: Mizu Yokan and Kudzukiri

    Summer wagashi shifts toward cooling, often chilled or jelly-like textures, since the goal is refreshment as much as sweetness.

    Mizu yokan, a lighter, more delicate version of standard yokan (a firm red bean jelly), is served chilled and pairs particularly well with a cooler-brewed matcha or even iced matcha, since both are leaning into the same seasonal need for something refreshing rather than warming.

    Kudzukiri, translucent arrowroot starch noodles typically served cold with a sweet syrup, brings a genuinely different texture to the pairing – almost more textural experience than intensely sweet, which keeps it from competing with matcha’s own flavor.

    Autumn: Kuri Manju and Tsukimi Dango

    Autumn wagashi turns toward chestnut, harvest themes, and the full moon.

    Kuri manju, a steamed bun filled with sweetened chestnut, is heartier and more filling than the lighter spring and summer options, and its warm, nutty sweetness pairs particularly well with a richer, more full-bodied matcha rather than a delicate, high-grade ceremonial one that might get lost against it.

    Tsukimi dango, round mochi balls traditionally eaten during moon-viewing celebrations, are simpler and less sweet, which makes them a good match if you want the matcha itself to be the more assertive flavor in the pairing.

    Winter: Kagami Mochi and New Year Sweets

    Winter wagashi is tied closely to New Year traditions rather than being a broad seasonal category the way the other three seasons are.

    Kagami mochi, ceremonial stacked mochi placed out during New Year celebrations for good fortune, is traditionally eaten afterward in a sweet red bean soup rather than paired directly with tea in the moment – but the same red bean sweetness that defines it works well alongside matcha whenever it’s actually served as a sweet on its own, following the same basic logic as the other seasonal pairings.

    A Few Things People Ask Me

    Does the pairing logic change based on matcha grade, or just wagashi type? Both matter, but if you’re only adjusting one side, adjusting matcha grade to match wagashi intensity is usually the more practical move – a delicate, high-grade ceremonial matcha suits lighter, subtler wagashi (tsukimi dango, hishimochi), while a more robust culinary-adjacent matcha holds up better against heartier options like kuri manju.

    Can I pair matcha with non-Japanese sweets using the same logic? To some extent, yes – the underlying principle (a refined, not-too-rich sweetness that doesn’t fight matcha’s bitterness) applies to some Western pastries too, though most Western desserts run richer and sweeter than wagashi, which can genuinely overwhelm matcha rather than balance it.

    Where can I actually source wagashi outside Japan? Specialty Japanese grocery stores and some Japanese bakeries carry at least mochi-based options regularly; more delicate seasonal items like fresh nerikiri are harder to find outside Japan and are sometimes worth making at home if you’re committed to trying the full seasonal range.

    What matcha would you recommend keeping on hand for pairing with wagashi generally? Nio Teas’ matcha is a reasonable mid-range option that works across most of the pairings above without needing to buy a different grade for every season. If you want to try making your own simple wagashi at home, a wagashi mold set on Amazon is a low-cost way to start shaping mochi-based sweets yourself.

    Where I Landed

    What changed how I think about this pairing wasn’t the tradition itself – it was realizing the seasonal rotation isn’t decorative, it’s functional. Wagashi’s texture and sweetness genuinely shift with the seasons in ways that either lighten or deepen how matcha reads against it, so the “right” wagashi for a cup of matcha really does depend on the time of year, not just personal taste. Once I started matching intensity – lighter sweets with delicate matcha, heartier sweets with more robust matcha – the pairing stopped being background tradition and started being something I actually thought about each season.

  • How to Care for Lacquerware and Cast Iron Teapots (Without Ruining Them)

    How to Care for Lacquerware and Cast Iron Teapots (Without Ruining Them)

    Disclosure: This post contains affiliate links. If you buy through one of them, I may earn a small commission at no extra cost to you.

    I made two mistakes early on with Japanese teaware, and they were opposite mistakes. I left water sitting in a tetsubin overnight, thinking cast iron was tough enough not to care – it rusted. Then, worried about damaging a lacquered natsume I’d bought, I stored it in a sealed plastic bag “to protect it” – which turned out to be exactly the wrong move, since sealed damp storage is one of the things that actually damages lacquerware.

    Urushi lacquerware and tetsubin cast iron are both durable in their own right, but they fail in specific, predictable ways when handled like ordinary ceramic or stainless steel. Knowing what each one actually needs (and doesn’t need) is most of the battle.

    The Problem You’re Actually Trying to Solve

    Both of these materials get treated too cautiously in some ways and not carefully enough in others. People baby lacquerware by sealing it away rather than using it, when it’s actually meant for regular use and improves with handling. Meanwhile, people treat cast iron as basically indestructible, when moisture left sitting inside a tetsubin for even a single evening can start visible rust. The care routines for each are simple once you know them, but they’re not intuitive if you’re coming from caring for ordinary dishware.

    Who This Article Is NOT For

    • If you’re looking for chasen (bamboo whisk) care specifically, my chasen care guide covers that separately – bamboo has entirely different failure points than iron or lacquer.
    • If your tetsubin has a fully enameled interior (common on many modern, budget-friendly versions), the rust-prevention section below matters less to you, since enamel coating largely protects against the bare-iron rust issue.
    • If you’re buying your first kyusu rather than caring for lacquerware or cast iron you already own, my kyusu buying guide is the more relevant read.

    Caring for a Tetsubin (Cast Iron Teapot)

    Never leave water sitting inside it. This is the single most important rule, and the one I broke first. Empty the tetsubin while it’s still hot right after use – the residual heat helps dry the interior almost instantly, whereas water left to cool and sit inside is exactly what starts rust forming on bare cast iron.

    Skip the dish soap. Traditional (non-enameled) cast iron is porous, and soap strips away the seasoning that protects the interior surface. Clean with hot water only, using a soft brush – a bamboo sasara brush is the traditional tool – rather than reaching for detergent out of habit.

    Dry it actively, not just by air. After washing, place the tetsubin over low heat for a minute or two until all surface moisture has fully evaporated. Air-drying alone often isn’t thorough enough, especially inside the spout and lid areas where water likes to linger.

    If rust spots do appear, treat them right away. Small orange rust spots can be addressed by scrubbing gently with a stiff brush or fine sandpaper. A more traditional fix: boil green tea leaves inside the tetsubin – the tannins react with the exposed iron to form a protective black film over the rusted area.

    Store it dry, in an open, airy spot. Avoid leaving it in a damp sink, a closed cabinet with poor airflow, or anywhere humidity tends to build up. The combination of thorough drying after each use and airy storage is really the entire rust-prevention strategy.

    Caring for Urushi Lacquerware (Natsume and Beyond)

    Hand-wash only, and do it gently. Use lukewarm water, a soft sponge, and a neutral, non-abrasive soap – never steel wool or a stiff scouring pad, which will scratch through the lacquer finish. Rinse thoroughly and dry immediately with a soft cloth rather than letting it air-dry, since sitting wet is part of what damages the finish over time.

    Keep it away from the dishwasher and the microwave, unless the specific piece is explicitly labeled as safe for either – most traditional urushi lacquerware isn’t, and the heat and washing action in a dishwasher will damage the finish. The same caution applies to sudden contact with boiling-hot liquid; let things cool slightly before they touch lacquerware if the piece doesn’t specifically say it can handle high heat.

    Store it out of direct sunlight. UV exposure fades and degrades lacquer finish over time, so a shaded cabinet is the right home for it rather than an open shelf that gets direct sun for part of the day. If fading has already started, moving it out of light going forward is the first step – a professional restorer can advise from there if the piece is valuable enough to warrant it.

    Don’t seal it away damp, and don’t over-protect it either. Ironically, both extremes cause problems: sealing a piece into an airtight bag or box while it’s even slightly damp encourages mold, while treating lacquerware as too precious to actually use denies it the handling that genuine urushi is designed for – well-made lacquerware actually grows more lustrous and durable with regular use over years, not less. If you’re storing multiple pieces stacked together, separate them with soft cloth or thin paper to avoid pressure marks on the finish, and check on stored pieces occasionally for any sign of moisture or pest damage.

    A Few Things People Ask Me

    Can I use dish soap on my tetsubin if it’s really stuck with residue? For traditional bare cast iron, it’s better to avoid soap even then – hot water and a gentle brush, repeated if necessary, is the safer approach. If a tetsubin has an enameled interior, ordinary dish soap is generally fine, since the enamel isn’t porous the way bare iron is.

    Is it normal for a well-used tetsubin to develop a black coating inside over time? Yes – that’s the seasoning building up, similar to a cast iron skillet, and it’s a sign of good care rather than something to scrub away. It’s part of what protects the interior from rust in the first place.

    How do I know if my lacquerware piece is safe for the dishwasher or microwave? Only assume it is if the manufacturer or seller explicitly says so – traditional handmade urushi lacquerware almost never is, and treating it as dishwasher-safe by default is one of the more common ways people damage a piece they didn’t realize was more delicate than it looked.

    What’s a reasonable first cast iron teapot if I don’t already own one? A tetsubin on Amazon with an enameled interior is the more forgiving starting point if you’re worried about the rust-prevention routine above – it gives you most of the aesthetic and heat-retention benefits with a lower risk of a beginner mistake turning into visible rust.

    Where I Landed

    The pattern across both materials, once I actually understood it, was less about fragility and more about moisture and timing. Cast iron fails when water sits too long; lacquerware fails when it’s either mistreated with heat and abrasion or, just as often, oversealed away out of misplaced caution. Neither one needs to be treated like fine china sitting behind glass – they need specific, fairly simple habits, done consistently, and both genuinely reward regular use over being kept for best. If you’re building out a small collection of Japanese teaware pieces, Nio Teas’ teaware selection is worth a look alongside whatever tetsubin or lacquerware you already have.