Author: arino

  • How to Season and Care for a Kyusu (Before You Ruin It With Soap)

    How to Season and Care for a Kyusu (Before You Ruin It With Soap)

    Disclosure: This post contains affiliate links. If you buy through one of them, I may earn a small commission at no extra cost to you.

    I washed my first Tokoname clay kyusu with regular dish soap exactly once, the same way I’d wash any other mug, before I found out that unglazed clay is porous enough to actually absorb detergent permanently. Every cup of tea I made in that pot afterward carried a faint soapy edge that never fully went away, no matter how many times I rinsed it. That one pot never really recovered, and it’s the reason I now treat every new kyusu with a level of care that would have seemed excessive to me a year earlier.

    The good news is that proper kyusu care is genuinely simple once you know the two or three rules that actually matter. It’s less about a complicated ritual and more about avoiding a small number of specific mistakes that are very easy to make if nobody’s told you about them first — and once those habits are in place, caring for a kyusu takes barely longer than rinsing out a regular mug.

    The Problem You’re Actually Trying to Solve

    You’ve searched for how to season or care for a kyusu because you’ve either just bought your first one and want to start off right, or you’ve read somewhere that unglazed clay needs special handling and want to understand what that actually means in practice. Both are good instincts — a kyusu, especially an unglazed clay one, behaves differently from a regular mug or Western teapot, and treating it the same way can genuinely damage it or ruin the flavor of every cup you brew in it going forward.

    Who This Article Is NOT For

    Let’s save you some scrolling if this isn’t quite your situation.

    • If your kyusu is glazed porcelain or ceramic rather than unglazed clay, most of the strict soap-avoidance rules below don’t apply as urgently to you — glazed surfaces aren’t porous in the same way, though gentle care is still worth practicing.
    • If you already have an established seasoning routine for your unglazed clay pots, this is a beginner-focused guide, not new information for an experienced clay teapot owner.
    • If you’re deciding which kyusu to buy in the first place, my kyusu teapot buying guide covers that decision — this article assumes you already have one in hand.

    If you’re past that, here’s where the actual guide starts.

    What Actually Matters With Kyusu Care

    Three rules cover almost everything you need to know, and once they’re second nature, kyusu care stops feeling like a fragile ritual and just becomes a quick habit after each cup.

    1. Never use soap on unglazed clay. This is the single most important rule on this entire page. Unglazed clay, like Tokoname or Banko, is porous enough to absorb detergent permanently, and that absorbed soap leaches back into every future cup of tea. There’s no reliable fix once it’s happened, which is exactly why this rule gets repeated so many times throughout this guide.

    2. Dedicate an unglazed clay pot to one general tea category. The same porousness that ruins a pot with soap also means it slowly absorbs the character of whatever tea you brew in it, which is desirable when it’s the same tea over time, and a problem when you switch between very different teas. Think of it as the clay slowly building a flavor memory specific to one type of tea, rather than staying neutral.

    3. Dry it properly between uses. Trapped moisture in a sealed, damp pot is the fastest route to mold or musty odor, which undoes a lot of the careful seasoning you’ve built up, sometimes within just a few weeks of neglect.

    Seasoning a New Kyusu Before First Use

    A brand-new clay kyusu can carry a faint raw-clay taste or a trace of kiln smoke from manufacturing, and seasoning removes that while beginning the process of building the pot’s long-term character.

    Step 1: Initial Rinse

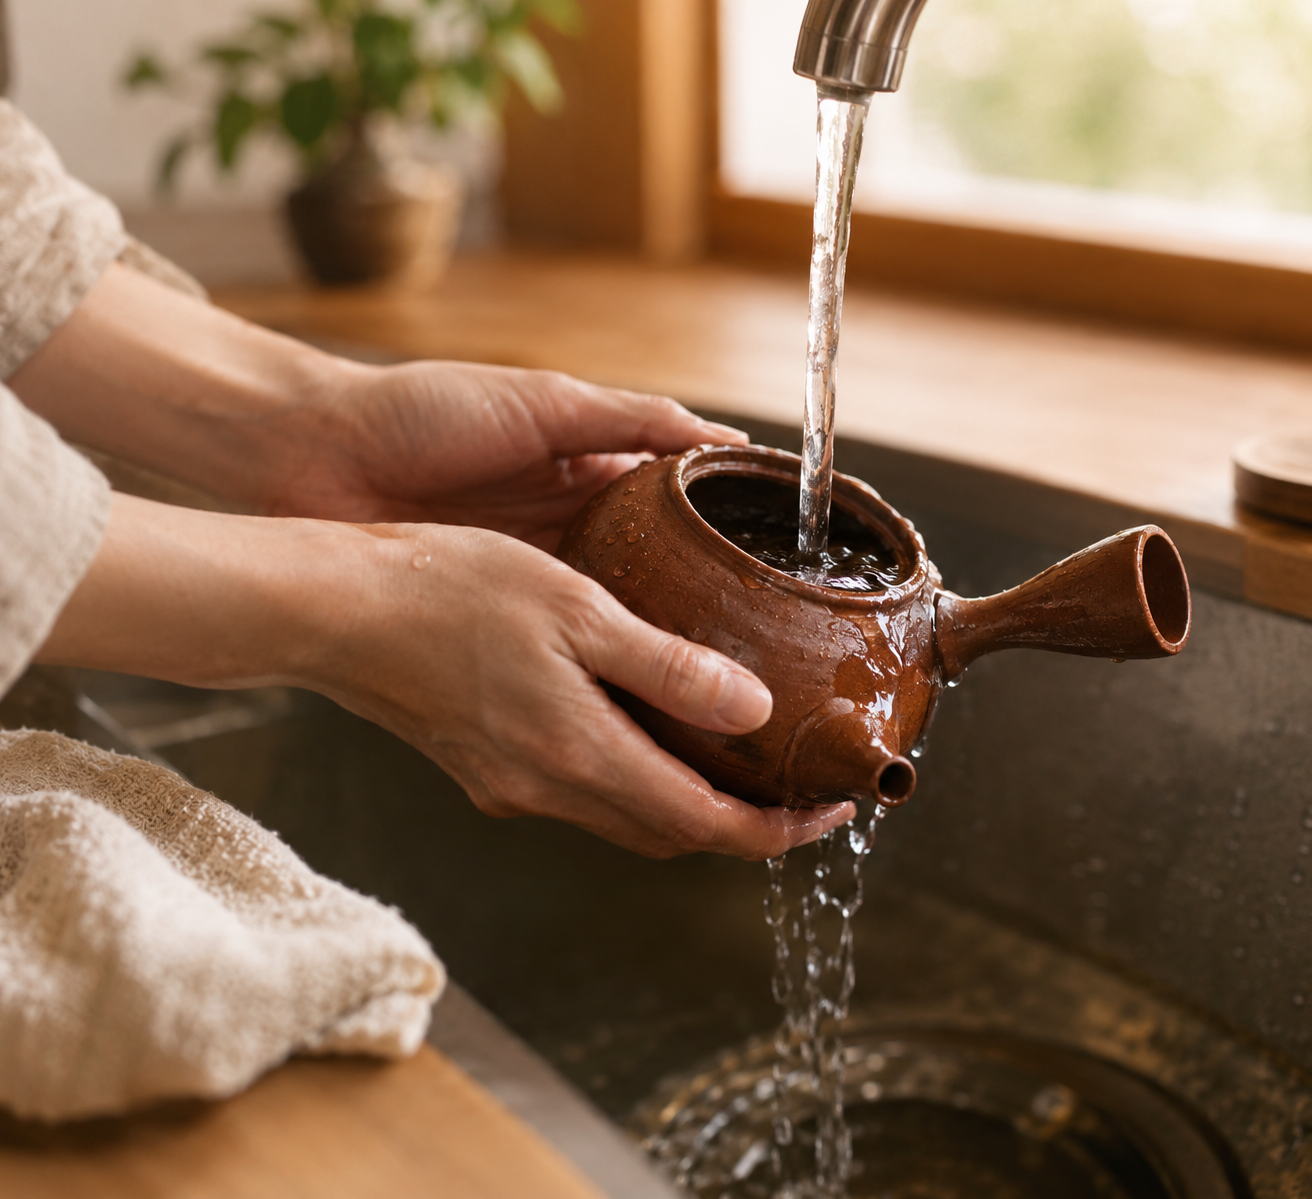
    Rinse the kyusu, inside and outside, with warm water, using your finger or a soft brush to gently wipe the interior walls. This clears out any dust or loose clay particles left over from manufacturing and shipping. No soap, at any point in this process.

    Step 2: A Warm Water Soak

    Fill a basin with warm, not boiling, water and let the kyusu soak for 15 to 20 minutes, lid separated from the body. This hydrates the clay, helps close any micro-cracks from the drying process during manufacturing, and starts washing out any lingering kiln taste.

    Step 3: Brew With the Tea You’ll Dedicate It To

    Once rinsed and soaked, brew your first pot using the tea you intend to use this kyusu for regularly, at the correct temperature for that tea (roughly 70–80°C for sencha, closer to 60°C for delicate gyokuro). This first brew effectively “introduces” the clay to that tea’s character, and it’s the beginning of the flavor-building patina unglazed clay is prized for. Glazed porcelain kyusu skip this step entirely — a simple warm water rinse is all they need before use.

    Ongoing Daily Care

    Rinse Immediately After Every Use

    Empty the leaves and rinse the interior with hot water right after you finish a pot, rather than letting it sit. Leftover leaves and residue left too long can affect both hygiene and the flavor of future brews.

    Never Use Soap, Ever, on Unglazed Clay

    This bears repeating because it’s the mistake that does the most permanent damage. If your kyusu is unglazed clay, hot water alone is the only routine cleaning agent it should ever see. For glazed porcelain or ceramic kyusu without a porous clay surface, a small amount of mild, unscented soap can occasionally be used if you rinse extremely thoroughly, though most experienced tea drinkers avoid even that.

    Dry It Fully Between Uses

    Remove the lid after rinsing and let the pot air dry completely before storing it. A sealed, damp lid traps moisture inside and is one of the more common causes of mold or musty odor developing in a kyusu that otherwise seemed well cared for.

    Keep the Filter Clear

    Whatever built-in filter style your kyusu uses, check periodically that it isn’t clogged with fine tea dust or sediment, since a blocked filter slows pouring and can affect how well the leaves inside actually steep.

    Dealing With Tea Stains and Buildup

    The brownish patina that naturally builds up inside an unglazed clay kyusu over months of use isn’t dirt to be scrubbed away — it’s the seasoning you’re actually trying to build, and traditional users tend to welcome it rather than fight it.

    That said, heavier buildup or genuine staining can be addressed occasionally with a baking soda and water soak, poured out and rinsed thoroughly afterward with clean warm water. This should stay an occasional deep-clean method for real buildup, not a routine cleaning step, since baking soda’s alkalinity can affect the clay surface if used too often. For glazed porcelain kyusu, a small amount of baking soda paste on a soft cloth can gently address surface staining, wiped on briefly and rinsed thoroughly.

    Tools That Help

    Shop soft cleaning brushes for teaware on Amazon →

    Shop kyusu teapots on Amazon →

    A Few Things People Ask Me

    I accidentally used soap on my clay kyusu. Is it ruined permanently? Not necessarily beyond hope, though it will likely taste noticeably different for a while. A long simmer in a large pot of plain water (fully submerging the kyusu, separated from any metal surfaces by a cloth) for about an hour, followed by a full air-dry and then several sessions of use as essentially a “tea pitcher” with your intended tea, can help reset it over time. It’s a slow recovery process, not an instant fix, and prevention is genuinely easier than the cure here.

    Can I switch which tea I brew in my kyusu occasionally, or does it have to be exactly one tea forever? Sticking to one general category (all green teas, for instance, rather than switching between green and heavily roasted or smoky teas) is the practical guideline. An occasional similar tea within that category won’t cause noticeable problems; a drastic switch, like brewing a smoky black tea in a pot you’ve been dedicating to delicate gyokuro, likely will.

    How do I know if my kyusu is glazed or unglazed clay? Unglazed clay typically has a matte, slightly rough, and porous-looking surface, often in earthy reds, purples, or browns, and it will absorb a small amount of water if you wet your finger and touch it briefly. Glazed ceramic or porcelain has a smooth, shiny surface that doesn’t absorb moisture the same way. If you’re unsure, treat it as unglazed and follow the stricter soap-avoidance rules — it’s the safer assumption either way.

    Does a well-seasoned kyusu actually make tea taste better, or is that just tradition talking? Many experienced tea drinkers report a genuinely noticeable difference, describing well-aged clay pots as producing a smoother, rounder cup over time. It’s difficult to separate the actual chemistry from ritual and expectation entirely, but the underlying mechanism — porous clay absorbing and mellowing tannins over repeated use — is real, not purely anecdotal.

    How often should I do a deeper clean versus just the routine hot water rinse? For most regular use, a hot water rinse after every session is genuinely all a kyusu needs. Reserve the baking soda soak for occasional heavier buildup, maybe every few months at most depending on how often you use the pot, rather than treating it as part of the normal routine.

    Is it worth having more than one kyusu if I drink several different types of tea? Yes, especially if those teas are meaningfully different in character — a smoky roasted tea and a delicate gyokuro really shouldn’t share the same unglazed clay pot. Many regular tea drinkers eventually end up with two or three kyusu, each dedicated to a different tea family, rather than trying to force one pot to serve everything.

    Where I Landed

    If you take away exactly one rule from this whole guide, make it this: no soap, ever, on unglazed clay. Everything else — the seasoning ritual, dedicating the pot to one tea, drying it fully — matters, but none of it does the kind of permanent damage that a single round with dish soap can do. My old soapy kyusu is proof of that; I still have it, and it still tastes faintly off years later, a small permanent reminder of a mistake that took about ten seconds to make and years to (mostly) live down.

    Treat a new kyusu gently for its first few uses, rinse it promptly and dry it fully after every session, and you’ll end up with a pot that genuinely improves with age rather than one that degrades. The learning curve here is short, and once the habits click, they take no real extra effort compared to how you’d already treat any other dish in your kitchen. If you’re still deciding which kyusu to bring home in the first place, my kyusu teapot buying guide is the right place to start before this one becomes relevant.
  • How to Bake With Matcha (Without Ending Up With Bitter, Brown Cookies)

    How to Bake With Matcha (Without Ending Up With Bitter, Brown Cookies)

    Disclosure: This post contains affiliate links. If you buy through one of them, I may earn a small commission at no extra cost to you.

    My first attempt at matcha cookies came out of the oven looking like regular sugar cookies with a faint grey-green tint, tasting almost nothing like matcha at all. My second attempt, overcorrecting hard, used nearly triple the matcha and came out bitter enough that even the white chocolate chips couldn’t save them. It took a few more batches to land somewhere in the middle, and once I did, the fix turned out to be almost entirely about which matcha I was using and how much, not some elaborate technique.

    Baking with matcha is genuinely more forgiving than people expect once you know the two or three things that actually matter. Get those right, and the rest of any matcha recipe — cookies, cake, brownies, whatever you’re making — behaves pretty much like a normal recipe with a green tint and an earthy edge. None of it requires special equipment or professional technique, just a slightly different mindset than baking with something like cocoa powder, which most people already have intuition for.

    The Problem You’re Actually Trying to Solve

    You’ve searched for how to bake with matcha because either your first attempt came out flavorless and dull-colored, or it came out bitter and overwhelming, and you’re trying to figure out which mistake you made. Both problems trace back to the same two variables almost every time: using the wrong grade of matcha for baking, and getting the amount wrong relative to how much flour is in the recipe.

    Unlike drinking matcha, where subtlety and umami are the whole point, baked matcha needs to survive oven heat, competing flavors like butter and sugar, and often chocolate, which means the delicate qualities of an expensive ceremonial tin are mostly wasted, while a stronger, more affordable grade actually performs better.

    Who This Article Is NOT For

    Let’s save you some scrolling if this isn’t quite your situation.

    • If you’re making a straight matcha latte or drinking matcha traditionally, you want the opposite grade advice given here — my matcha powder brands comparison and how to make a matcha latte guides cover that side properly.
    • If you already bake with matcha regularly and have your ratios dialed in, this is a foundational guide, not new information for an experienced matcha baker.
    • If you’re looking for a specific recipe with exact grams for one particular dessert, this covers the general principles that apply across cookies, cakes, and other baked goods, with example ratios rather than one single locked recipe.

    If you’re past that, here’s where the actual guide starts.

    What Actually Matters When Baking With Matcha

    Three things determine whether your matcha baked goods taste balanced or end up bitter and flat, and they’re the same three things nearly every experienced matcha baker agrees on.

    1. Grade. Culinary-grade matcha, not ceremonial grade, is the right choice for baking. It’s more affordable, has a bolder flavor that survives competing ingredients, and there’s no reason to spend ceremonial-grade money on subtlety that will get buried under butter and sugar anyway. Ceremonial grade is built to be appreciated on its own with just water; baking asks it to compete against several other strong flavors at once, which is a fight its subtlety is destined to lose.

    2. Ratio. Too little matcha and you get a barely-tinted, flavorless result. Too much and it turns bitter and chalky. The general working range is about 1 to 2 teaspoons of matcha per cup of flour, adjusted to taste from there. This is one of the more common places recipes disagree with each other, mostly because personal taste for how strongly “matcha-forward” a bake should taste varies quite a bit from person to person.

    3. Sifting and mixing method. Matcha clumps easily, and unsifted pockets of powder bake into bitter, unpleasant streaks rather than blending smoothly into the batter or dough.

    The Ratio Guide

    Matcha Amount (per 1 cup flour)Result
    Under 1 teaspoonBarely tinted, minimal flavor — not enough to register as “matcha”
    1–2 teaspoonsThe reliable working range — visible green color, clear matcha flavor, no bitterness
    Over 1 tablespoonBitter, chalky, and can taste unpleasant even with sugar and chocolate added

    Start at the lower end of the 1–2 teaspoon range for your first attempt at any new recipe, taste the raw dough or batter if it’s safe to do so, and adjust upward slightly next time if you want a stronger flavor.

    The Method, Step by Step

    Choosing Your Matcha

    Reach for a culinary-grade matcha rather than ceremonial grade. Culinary grade is processed for boldness and affordability rather than the delicate umami ceremonial grade is prized for, which makes it the better tool for a job where it has to compete with butter, sugar, eggs, and often chocolate. Save your ceremonial-grade tin for drinking straight, where its subtlety can actually be appreciated.

    Sifting Before Mixing

    Always sift matcha together with your dry ingredients (flour, baking powder, baking soda, salt) before combining with anything wet. This breaks up the natural clumps matcha forms in the tin and prevents small pockets of concentrated powder from baking into bitter streaks in the finished product.

    Mixing It In

    Add the sifted matcha-and-flour mixture to your wet ingredients gradually, mixing just until combined. Overmixing develops gluten in a way that can make baked goods tougher, and it doesn’t improve matcha distribution any further than a gentle fold already does.

    Adjusting Other Ingredients

    Matcha’s slightly bitter, earthy edge sometimes calls for small adjustments elsewhere in a recipe. A touch more sugar than the base recipe calls for can help balance a bolder matcha dose, and pairing matcha with white chocolate, rather than dark or milk chocolate, tends to complement its flavor without competing against it. Vanilla, in small amounts, also softens matcha’s more vegetal notes without masking the flavor entirely.

    Baking Temperature and Color

    Matcha’s vivid green color is genuinely heat-sensitive, similar to how it reacts to overly hot brewing water. Baking at a moderate temperature (most matcha cookie and cake recipes fall in the 325–350°F / 165–180°C range) rather than pushing higher heat for a faster bake helps the color stay vibrant instead of drifting toward a duller olive or brown as it cooks.

    Common Mistakes and How to Fix Them

    Barely any matcha flavor or color. Almost always means the matcha amount is too low, or ceremonial-grade matcha was used at a dose meant for the bolder culinary grade. Increase the amount incrementally, and confirm you’re using culinary grade.

    Bitter, chalky finished product. Too much matcha for the amount of flour, full stop. Scale back toward the 1–2 teaspoon per cup range and reassess from there.

    Green color turned brown or dull after baking. Usually an oven temperature issue — matcha’s chlorophyll degrades under high heat the same way it does under boiling water. Lower the temperature slightly and check for doneness a few minutes earlier than the recipe suggests.

    Visible green streaks or clumps in the finished bake. A sifting problem. Matcha needs to be sifted thoroughly with the dry ingredients before it ever meets a wet ingredient, not just stirred in at the end.

    Where to Get What You Need

    Shop culinary-grade matcha for baking on Amazon →

    Shop matcha sifters on Amazon →

    A Few Recipes Worth Trying

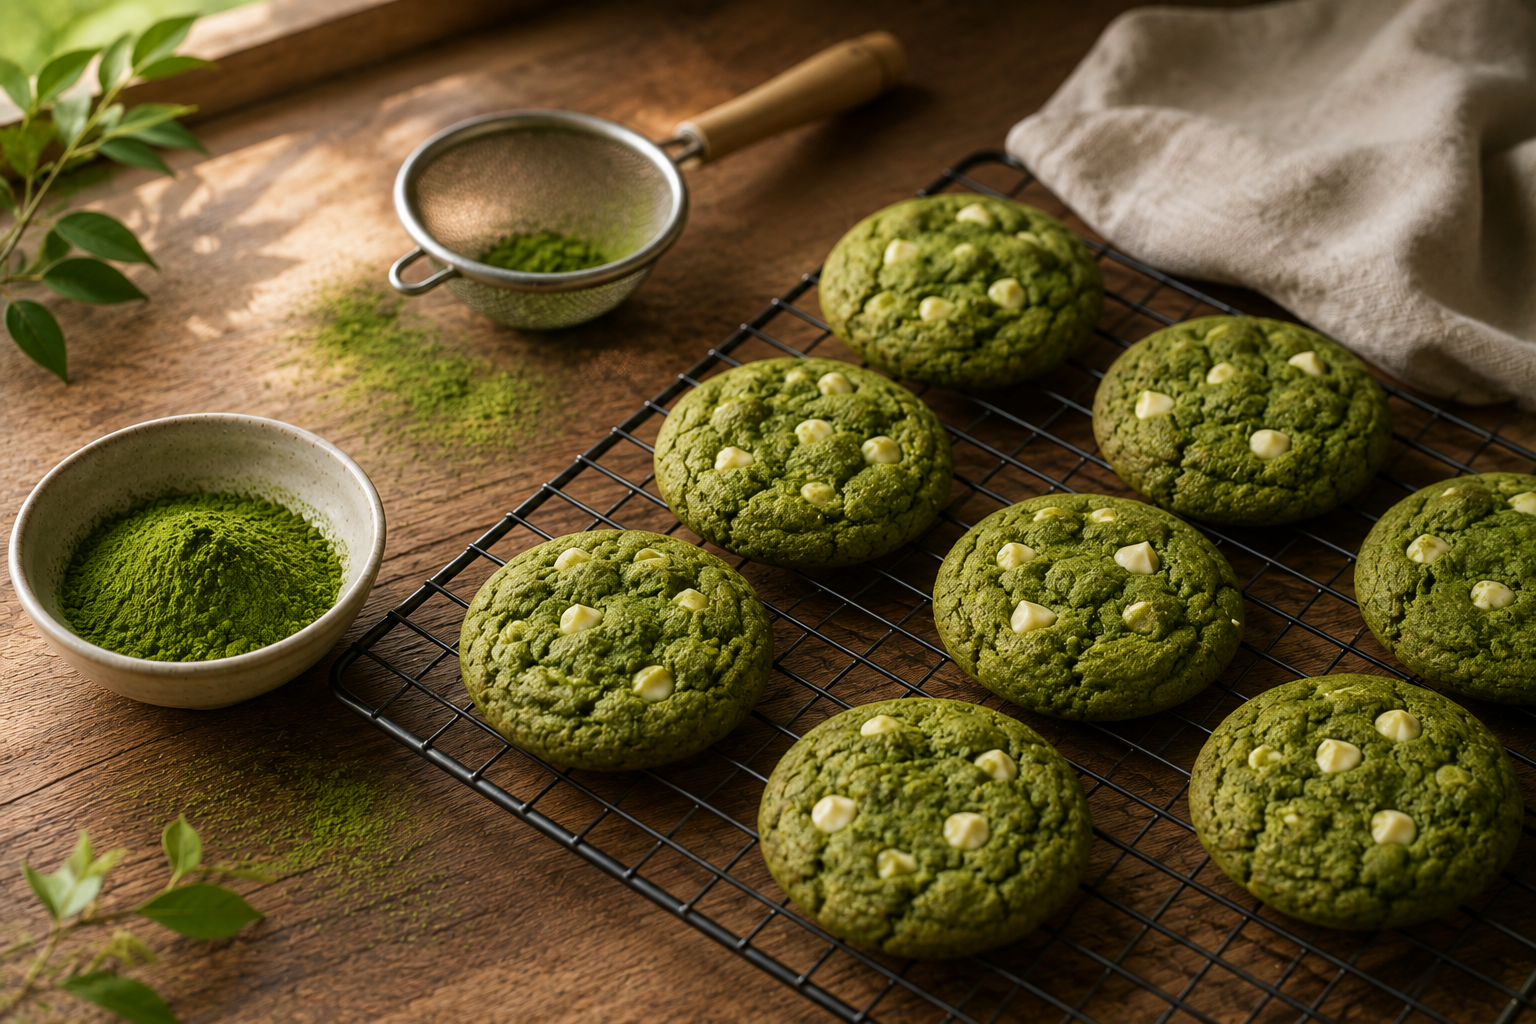
    Matcha cookies with white chocolate. The most forgiving starting point for a first attempt — a standard butter cookie base with 1 to 2 tablespoons of sifted culinary-grade matcha per roughly 2 cups of flour, and white chocolate chips folded in at the end. Chilling the dough for at least 30 minutes to an hour before baking helps the cookies hold their shape and spread evenly, and it also gives the matcha a chance to hydrate slightly into the dough rather than baking as dry pockets of powder.

    Matcha pound cake or loaf cake. A dense, buttery cake base takes matcha well, since the richness balances its earthiness naturally. Sift the matcha with the flour as usual, and consider a light glaze (a simple powdered sugar and milk mixture) on top rather than heavy frosting, which can overwhelm the tea flavor. This is also a good format for testing your preferred matcha strength, since a loaf’s simpler flavor profile makes the matcha itself easier to taste and judge than in a cookie loaded with chocolate.

    Matcha brownies. Swap a portion of the cocoa powder in a standard brownie recipe for matcha, or use matcha alongside white chocolate rather than dark chocolate or cocoa, since matcha and cocoa together can turn muddy rather than complementary. A white chocolate matcha brownie keeps the color vibrant and the flavor distinct in a way that mixing matcha directly with dark chocolate tends not to.

    A Few Things People Ask Me

    Can I use the matcha I already have for drinking in a baking recipe instead of buying culinary grade separately? You can, but expect a milder flavor and a higher cost per use than if you’d bought culinary grade specifically for baking. If you bake with matcha regularly, keeping a separate, more affordable culinary-grade tin just for that purpose makes more sense than using up an expensive drinking-grade tin.

    Why do some recipes call for a lot more matcha than others? Personal taste and the specific bake matter a lot here. A subtle matcha pound cake might use less than a bold matcha cookie meant to taste distinctly of tea. Treat any recipe’s matcha amount as a starting point within the general 1–2 teaspoon per cup range, not a fixed rule.

    Does matcha lose its health benefits when baked? Some of the more heat-sensitive compounds do degrade under oven temperatures, similar to what happens with boiling water in a drink. If you’re baking with matcha specifically for flavor and color rather than as a health strategy, this isn’t something to worry much about — treat baked matcha as a flavor ingredient, not a wellness supplement.

    Can I substitute matcha for cocoa powder or other powders 1-to-1 in an existing recipe? Not reliably. Matcha is more potent by volume than cocoa powder in terms of both color and flavor intensity, and it doesn’t behave identically in the batter. It’s safer to start from a recipe specifically designed around matcha, or add matcha to a portion of the dry ingredients at the 1–2 teaspoon per cup guideline rather than doing a straight swap.

    Why do my matcha baked goods taste better the day after baking than fresh out of the oven? This is a real phenomenon a lot of matcha bakers notice — matcha’s flavor can take a little time to settle and mellow into the rest of the batter after baking, similar to how some spiced baked goods taste better a day later once flavors have had time to meld. If your first bite out of the oven tastes slightly harsh or one-dimensional, give it until the next day before judging the recipe.

    Does the brand of matcha make a big difference in baking specifically? Less than it does for drinking straight, but it’s not negligible. A cheap, low-quality culinary matcha can taste dull or overly bitter even at the right dose, while a well-sourced culinary-grade tin holds flavor and color better through the bake. It’s worth using a reasonably good culinary-grade brand rather than the absolute cheapest option available.

    Where I Landed

    The whole lesson from my early bitter-cookie disaster came down to two fixes: use culinary grade, not ceremonial, and respect the 1–2 teaspoon per cup range instead of guessing generously. Everything else — sifting, mixing gently, watching the oven temperature for color — is standard good baking practice that just happens to matter a little more with matcha than with most other ingredients, since its color and flavor are both more heat-sensitive than a lot of home bakers expect going in.

    Once you’ve got the ratio dialed in for your own taste, matcha behaves like any other flavoring you’d fold into a batter, and it’s genuinely one of the more forgiving ingredients to experiment with once the basics click. Don’t be afraid to push your ratio slightly outside the standard range once you know your own preference — the guideline is a safe starting point, not a rule carved in stone.

    If you want to see how the same core principles apply to drinking matcha rather than baking with it, my matcha powder brands comparison is the natural next stop.

  • Green Tea Health Benefits and When to Actually Drink It

    Green Tea Health Benefits and When to Actually Drink It

    Disclosure: This post contains affiliate links. If you buy through one of them, I may earn a small commission at no extra cost to you. This article is for general information and isn’t a substitute for advice from your doctor, especially if you’re pregnant, managing a health condition, or taking medication that could interact with caffeine or tea compounds.

    For a while, I drank green tea first thing in the morning on a completely empty stomach, because that’s just when I happened to make it, and I got a mild stomachache often enough that I quietly assumed I just wasn’t someone who could handle green tea well. Turns out the timing, not the tea, was the problem. Tannins on an empty stomach are genuinely rough for some people, and once I moved my cup to after breakfast instead, the stomach issue disappeared completely and the tea itself never changed.

    That’s really the theme of this whole topic: green tea’s health reputation is well earned, but a lot of the actual benefit — and a lot of the discomfort people blame on the tea itself — comes down to timing and context more than most people realize. A lot of the health-blog coverage out there tends to either oversell green tea as some kind of cure-all, or undersell it as marketing hype with no substance behind it. The honest picture sits somewhere in between, and it’s a lot more useful once you actually see it laid out clearly.

    The Problem You’re Actually Trying to Solve

    You’ve searched for green tea’s health benefits and when to drink it because you’ve either heard the general reputation — antioxidants, metabolism, focus — and want to understand what’s actually behind it, or you’ve had a specific bad experience (stomach upset, trouble sleeping) and want to know if there’s a better way to time your cup. Both are reasonable things to want clarity on, and the honest answer sits between “miracle drink” and “just flavored water,” which is where most nutrition claims about a single food or beverage tend to land.

    Who This Article Is NOT For

    Let’s save you some scrolling if this isn’t quite your situation.

    • If you’re looking for green tea as a treatment for a diagnosed medical condition, this isn’t that resource — talk to your doctor about anything condition-specific, especially before using green tea or its extracts as a substitute for medical care.
    • If you want exact numbers on how many cups deliver a specific health outcome, that number doesn’t really exist in a scientifically settled way. Research generally points to consistent, moderate long-term consumption mattering more than hitting a precise daily target.
    • If you’re pregnant, nursing, or have a caffeine sensitivity or heart condition, timing tips aside, you should get personalized guidance on safe caffeine intake from your doctor rather than general blog advice.

    If you’re past that, here’s where the actual guide starts.

    What’s Actually Behind Green Tea’s Reputation

    Three compound groups do most of the work, and understanding them helps explain both the genuine benefits and the caveats worth knowing.

    1. Catechins, especially EGCG. These are the antioxidant polyphenols green tea is best known for, and they’re the compounds most research on green tea’s health effects actually focuses on. They’re associated in research with anti-inflammatory activity and cholesterol-related benefits, among other areas of ongoing study. EGCG specifically shows up disproportionately in green tea compared to black or oolong tea, largely because green tea skips the oxidation step that transforms many of those same compounds during processing.

    2. L-theanine. This amino acid is credited with green tea’s calmer, more sustained energy compared to coffee — it’s thought to work alongside caffeine to smooth out the jittery spike-and-crash some people get from caffeine alone. Shaded teas like matcha and gyokuro tend to have notably higher L-theanine content than sun-grown teas, which is part of why they’re often described as producing an especially calm, focused kind of energy.

    3. Tannins. These give green tea its slightly astringent character, and they’re also the reason timing matters. Tannins can bind to iron and reduce its absorption, and they can irritate some people’s stomach lining on an empty stomach. Neither effect is dangerous for a healthy adult with typical iron levels, but both are worth knowing about if you’re paying attention to either.

    What the Research Actually Supports

    It’s worth being direct about the strength of these claims rather than repeating the more sweeping versions you’ll find elsewhere. Green tea’s catechins are genuinely well studied, and research has associated regular consumption with several areas of interest: cardiovascular markers like cholesterol, inflammation-related processes, and some cognitive measures in observational studies of frequent tea drinkers. Much of this research is associative — frequent tea drinkers showing better outcomes on average — rather than proof that tea alone causes those outcomes, since diet and lifestyle patterns are hard to fully separate from a single beverage choice.

    None of that means the benefits aren’t real. It means “green tea prevents disease X” is an overstatement of what the evidence actually shows, while “regular green tea consumption is associated with several markers of better health, likely as part of an overall healthy pattern” is the more accurate version. If a headline promises green tea will single-handedly fix a specific health problem, that’s a signal to be skeptical of the framing, not necessarily of the underlying research it’s loosely based on.

    Best Times to Drink It, and Why

    TimingWhyWatch Out For
    1–2 hours after breakfastDigestive system is settled, avoids empty-stomach tannin irritationDrinking immediately on waking, before eating anything
    Between meals, not duringAvoids tannins interfering with iron absorption from foodPairing directly with iron-rich meals
    Early-to-mid afternoonGentle, sustained energy without late-day caffeine buildupTiming too close to bedtime if you’re caffeine-sensitive
    Before moderate exerciseSome research links pre-exercise green tea to modestly supporting fat oxidation during activityOverloading on tea specifically for this effect — the impact is modest, not dramatic

    Why Not First Thing on an Empty Stomach

    This is the timing mistake I made for years. Tannins, the same compounds responsible for green tea’s astringent bite, can irritate the stomach lining when there’s no food to buffer them, which is why an empty-stomach cup sometimes causes nausea or a mild stomachache in sensitive people. Waiting roughly an hour or two after breakfast sidesteps this almost entirely for most people.

    Why Not Right With Meals, Especially Iron-Rich Ones

    Tannins bind to iron and can measurably reduce how much of it your body actually absorbs from a meal, particularly plant-based iron sources like spinach and lentils, which are less bioavailable than animal-sourced iron to begin with. This matters most if you rely heavily on plant-based iron sources or have a diagnosed iron deficiency — spacing your tea 30 to 60 minutes away from meals avoids most of this interference.

    Why Afternoon Works Well for a Lot of People

    Green tea’s caffeine content is meaningfully lower than coffee’s, and combined with L-theanine’s calming effect, it tends to produce steadier energy without the same crash. That makes early-to-mid afternoon a popular timing choice for people using it as a gentler alternative to a second coffee.

    Does It Matter for Sleep?

    Yes, if you’re caffeine-sensitive. Green tea isn’t caffeine-free, and depending on your personal sensitivity and how late you drink it, it can genuinely interfere with sleep onset. If evening tea is part of your routine and you want to avoid that entirely, hojicha is a better choice specifically because roasting reduces its caffeine content compared to unroasted green tea.

    Which Green Tea for Which Goal

    For a gentle morning boost: shaded teas like matcha, gyokuro, or a good sencha tend to carry a bit more caffeine alongside their L-theanine content, making them well suited to starting the day.

    For an afternoon cup without disrupting sleep later: a lighter sencha or genmaicha, timed earlier in the afternoon rather than late in the day.

    For evening, if you want something warm without much caffeine concern: hojicha, thanks to its roasting process, or a genuinely decaffeinated green tea if you want to eliminate the concern entirely.

    A Few Things People Ask Me

    How many cups of green tea should I actually drink per day? There’s no scientifically settled magic number. Most research on green tea’s benefits comes from people who drink it consistently as part of a broader healthy diet, not from hitting a precise daily quota. A few cups a day, within your personal caffeine tolerance, is a reasonable, unremarkable amount for most healthy adults.

    Does matcha have the same benefits as steeped green tea, just stronger? Because you consume the whole ground leaf with matcha rather than a partial water extraction, you do get more of these compounds per serving. My matcha vs green tea guide goes deeper into that specific comparison if you want the full picture.

    Can green tea help with weight loss? Some research links green tea catechins to modestly supporting metabolism and fat oxidation, particularly around exercise, but the effect size in most studies is small, not a dramatic, tea-alone weight loss driver. It’s reasonable to view it as one small supporting piece of a broader healthy routine, not a shortcut on its own.

    Is it safe to drink green tea every day long-term? For most healthy adults, yes, moderate daily consumption is considered safe and is actually the pattern most research on its benefits is based on. If you’re pregnant, on medication, or managing a health condition, it’s worth checking with your doctor about how caffeine and green tea’s other compounds might interact with your specific situation.

    Does adding milk or lemon change any of the benefits? Lemon, with its vitamin C content, may actually help preserve some catechins during digestion, so it’s a reasonable addition if you enjoy it. Milk’s effect is more debated — some research suggests certain proteins in milk may bind to catechins and reduce their availability, though the practical impact for an occasional milk-and-tea drinker is likely minor rather than something to actively avoid.

    Do green tea extracts or supplements offer the same benefits as drinking the tea itself? Not necessarily in the same way. Concentrated extracts deliver a much higher dose of specific compounds than a cup of brewed tea, which changes both the potential benefit and the risk profile — high-dose green tea extract supplements have been associated with liver concerns in some case reports, which isn’t really a risk associated with drinking the tea itself in normal amounts. If you’re considering a supplement rather than the beverage, that’s a conversation worth having with your doctor specifically.

    Where I Landed

    The genuine takeaway here isn’t “drink more green tea for a specific health outcome” — it’s that green tea is a reasonable, well-studied part of a healthy routine, and paying attention to timing mostly just makes it more comfortable and slightly more effective, not miraculous. If you’ve been avoiding it because of stomach discomfort, try moving your cup to after breakfast before writing the whole category off, the way I nearly did over something that had nothing to do with the tea itself.

    Beyond that, this is genuinely a “consistency over precision” topic. A cup most days, timed reasonably away from meals and away from bedtime if you’re caffeine-sensitive, gets you the vast majority of what the research actually supports — no elaborate schedule required, and no need to chase an exact number of cups per day as though there were a hidden threshold you’re missing.

    If you’re still working out which tea to actually reach for day to day, my green tea brewing temperature guide is a good next stop for making sure whatever you choose actually tastes good enough to become a habit in the first place — because none of this matters much if the tea itself doesn’t taste good enough to keep drinking.

  • How to Store Matcha So It Doesn’t Go Dull and Flat

    How to Store Matcha So It Doesn’t Go Dull and Flat

    Disclosure: This post contains affiliate links. If you buy through one of them, I may earn a small commission at no extra cost to you.

    I once left an opened tin of genuinely good matcha sitting on a sunny counter for about six weeks, next to the coffee where it seemed convenient, and when I finally whisked a cup from it, the color had gone from vivid jade to a tired olive brown and the flavor had flattened into something closer to plain grass. Nothing was wrong with the tea when I bought it. Everything went wrong after, because I stored it exactly the way most people instinctively store spices, and matcha punishes that treatment faster than almost anything else in a kitchen.

    Matcha is more fragile than people expect, mostly because of how it’s made. You’re drinking the entire ground leaf, not a partial water extraction, and that same property that makes matcha so flavorful and concentrated also makes it degrade fast once it’s exposed to air, light, heat, and moisture. Good storage habits aren’t optional if you’ve spent real money on a decent tin — they’re the difference between that tin tasting good on day 60 versus tasting like disappointment by day 20, and the fix costs nothing beyond a bit of attention.

    The Problem You’re Actually Trying to Solve

    You’ve searched for how to store matcha because either you just bought a tin and want to protect it properly from the start, or you’ve had the experience I had — a matcha that tasted great initially and went flat, dull, or bitter well before you expected it to. Both situations come down to the same handful of storage mistakes, repeated across nearly everyone’s kitchen: leaving it out in light, letting air in every time you scoop, and not accounting for how fast it degrades once the tin is actually open.

    The good news is that fixing this is simple and doesn’t require special equipment. It’s mostly about a few consistent habits, not an elaborate setup.

    Who This Article Is NOT For

    Let’s save you some scrolling if this isn’t quite your situation.

    • If you buy small tins and finish them within a couple of weeks anyway, most of the shelf-life anxiety below won’t apply to you — you’re already moving through matcha fast enough that degradation isn’t a real risk.
    • If you’re storing culinary-grade matcha specifically for baking, the same general principles apply, but culinary grade is naturally more heat-and-processing-tolerant to begin with, so you have somewhat more room for error than with a delicate ceremonial-grade tin.
    • If you want a definitive expiration date, matcha doesn’t spoil the way dairy does — it degrades gradually rather than becoming unsafe, so this guide is about quality, not food safety.

    If you’re past that, here’s where the actual guide starts.

    What Actually Degrades Matcha

    Four things are working against your matcha from the moment the tin is opened, and understanding them explains basically every storage recommendation that follows.

    1. Oxygen. Matcha oxidizes on contact with air, which is what dulls its vivid green color into a duller olive tone and flattens its flavor over time.

    2. Light. Light breaks down chlorophyll, the same compound responsible for matcha’s color, faster than almost any other factor — a clear jar on an open counter is close to the worst place you could keep it.

    3. Heat. Warm kitchen temperatures speed up all of the above processes. A cool, stable temperature slows degradation meaningfully.

    4. Moisture. Because matcha is ground so fine, it absorbs ambient moisture easily, which causes clumping and, in worse cases, can encourage mold. This is also why the fridge is a double-edged sword — helpful for temperature, risky for condensation if not handled carefully. Fine powder has far more surface area exposed to the air than whole tea leaves do, which is part of why matcha degrades noticeably faster than loose-leaf sencha or gyokuro stored under similar conditions.

    How Long Matcha Actually Lasts

    StateShelf LifeStorage Location
    Unopened tin6–12 months, sometimes up to a yearCool pantry, or fridge/freezer if sealed
    Opened tin4–8 weeks for best flavorAirtight, opaque container, cool and dark
    Opened tin, refrigeratedUp to 2–3 monthsAirtight, double-sealed to prevent condensation

    These numbers are about quality, not safety — matcha past these windows won’t make you sick, it’ll just taste noticeably duller and less vibrant than it did fresh.

    The Actual Storage Method

    Before You Open It

    Leave a new tin sealed until you’re actually ready to start using it regularly. An unopened, properly sealed tin can hold its quality in a cool, dark pantry for months, and even longer in the fridge or freezer, since it isn’t yet exposed to the repeated air contact that accelerates degradation.

    If you’re storing it long-term unopened: the freezer is genuinely fine specifically because it’s sealed. Just make sure it comes back to room temperature, still sealed, before you open it — opening a cold tin immediately invites condensation onto the powder, which causes clumping.

    Once It’s Open

    This is where most people go wrong, mainly because the habits that work fine for coffee or spices actively work against matcha.

    1. Keep it in an airtight, opaque container. A tin with a tight double lid, or the original packaging inside a zip-top bag, both work. Clear glass jars look nice on a shelf and are genuinely one of the worst choices, since they let light straight through to the exact compound light is busy destroying.
    2. Store it somewhere cool and dark, not on a sunny counter. A kitchen cabinet away from the stove is usually sufficient. The fridge works too, but only if the container is genuinely airtight — an imperfectly sealed tin in the fridge invites moisture and can pick up odors from other food.
    3. Use a dry scoop every time. Any moisture introduced into the tin, even from a slightly damp spoon, accelerates clumping and can encourage mold over time.
    4. Reseal immediately after scooping. Don’t leave the tin open on the counter mid-preparation. Every extra minute of air exposure adds up over weeks of daily use.
    5. Consider splitting your stash. If you buy larger quantities, keep a small amount in a daily-use tin at room temperature and store the rest, still sealed, in the fridge or freezer. You get convenience for daily use without exposing your whole supply to repeated temperature swings and air contact. This is also just a good habit if you tend to buy matcha faster than you actually drink it — better to keep most of it protected than to have the whole tin degrading while you slowly work through it.

    If You Refrigerate After Opening

    This is the part people get wrong most often. Refrigeration helps with heat, but the temperature swap between fridge and room temperature causes condensation on the cold powder the moment you open the container, which ruins texture and encourages clumping.

    The fix: if you do refrigerate an opened tin, make sure it’s genuinely airtight, and let it sit sealed at room temperature for a few minutes before opening it, rather than opening it straight out of the fridge.

    Tools That Make This Easier

    An opaque, airtight tin. Shop matcha storage tins on Amazon → Look specifically for opaque metal or ceramic, not clear glass, and a tight double lid rather than a simple press-fit cap.

    A small vacuum-sealable canister. Shop vacuum-seal tea canisters on Amazon → Useful if you buy larger quantities and want a small daily-use portion separate from your sealed backup stock.

    How to Tell If Your Matcha Has Gone Downhill

    You’re looking for a shift, not a hard failure point — matcha degrades gradually rather than suddenly turning bad.

    Color. Fresh matcha should be a vivid, almost jewel-toned green. If yours has drifted toward olive, brown, or a dull yellow-green, oxidation and light exposure have already done real damage.

    Smell. Good matcha smells fresh, slightly grassy, sometimes a little sweet. A flat, dull, or musty smell is a sign it’s past its best, and a genuinely sour or moldy smell means it should be discarded, not just downgraded to culinary use.

    Taste. Stale matcha tends to taste flatter and more bitter than fresh matcha, losing the natural sweetness and umami that made it worth buying in the first place.

    Texture. Clumping that won’t break up even after sifting usually indicates moisture has gotten into the tin at some point, which is worth addressing in how you’re storing it going forward, not just this one batch.

    A Few Things People Ask Me

    Can I still use matcha that’s past its best-by date? Usually yes, as long as it shows no signs of mold or an off, sour smell. It’s a quality issue, not typically a safety one — expect a flatter flavor and duller color rather than anything harmful. If it’s degraded significantly, it may still work fine in baking or blended lattes where the subtlety wasn’t going to show through anyway.

    Does freezing matcha actually work, or does it ruin the texture? Freezing works well for unopened, properly sealed tins specifically. The risk isn’t the cold itself, it’s condensation when you go from cold to warm too quickly. Always let a frozen tin return to room temperature while still sealed before opening it.

    Why does my matcha smell like other food in my fridge? Matcha absorbs ambient odors easily because it’s such a fine, porous powder. If it’s picked up smells from your fridge, your container likely isn’t as airtight as you think — this is one of the more common signs it’s time to upgrade to a proper sealed tin rather than relying on the original bag alone.

    Is it worth buying a vacuum-sealed canister specifically for matcha? If you go through matcha slowly, or you buy in bulk, yes — a small vacuum-sealable canister for daily use paired with a larger sealed container for backup stock is a genuinely effective way to extend freshness without constantly exposing your whole supply to air.

    Should I keep matcha in its original bag, or transfer it into a new container? Keeping it in the original resealable bag or foil pouch, then placing that inside a rigid opaque tin, actually works better than dumping it loose into a new container. The original packaging is usually designed to limit air exposure already, and the outer tin adds a second layer of protection rather than replacing the first.

    Does matcha lose its nutritional benefits as it degrades, or just its taste? Both, to some degree. The same oxidation process that dulls color and flavor also breaks down some of the antioxidant compounds matcha is valued for. It’s not an immediate cliff — you’re not getting zero benefit from slightly stale matcha — but fresher matcha does deliver more of what you’re actually paying for.

    Where I Landed

    If you only change one habit after reading this, make it the container. An opaque, genuinely airtight tin, kept somewhere cool and dark rather than on a sunny counter, solves most of what causes matcha to go dull before its time. Everything else — the fridge, the freezer, splitting your stash into smaller portions — is refinement on top of that one basic fix, worth adding once the container habit is already solid.

    It’s a small amount of effort for something that, if you’ve read my matcha powder brands comparison, you probably didn’t buy cheaply in the first place. Good storage is really just protecting the money you already spent, and it’s the difference between your matcha tasting the way it did on day one versus tasting like a disappointing memory of that by week six. The tin I let sit on that sunny counter taught me that the hard way — don’t let yours suffer the same fate for the sake of convenience.

  • How to Choose a Kyusu: The Japanese Teapot Buying Guide

    How to Choose a Kyusu: The Japanese Teapot Buying Guide

    Disclosure: This post contains affiliate links. If you buy through one of them, I may earn a small commission at no extra cost to you.

    My first kyusu was a $12 impulse buy from an import shop, chosen entirely because the shape looked nice on a shelf. It worked, technically, but I had no idea for years that the handle position, the clay it was made from, and even the built-in filter type were all deliberate choices that change how the tea actually tastes, not just how the pot looks holding it. I only found that out once I compared a proper Tokoname clay pot side by side with my old one, and the difference in how smooth the same sencha tasted was hard to ignore.

    A kyusu isn’t just “a Japanese teapot” the way a mug is just a cup. It’s a purpose-built tool with a handle position designed around a specific pouring motion, a clay chemistry that can genuinely soften or round out a tea’s astringency, and a filter design that affects how well loose leaf actually opens up and steeps. None of that is obvious from a product photo, so this guide walks through what actually matters versus what’s mostly aesthetic preference — because you can absolutely spend a lot of money on the wrong features and still end up with a mediocre cup.

    The Problem You’re Actually Trying to Solve

    You’ve searched for how to choose a kyusu because you’re staring at a wall of options — different handle placements, different clay colors, wildly different prices for pots that look similar in photos — and you don’t know which differences are functional and which are just style. Maybe you’ve been steeping loose leaf green tea in whatever mug-and-infuser setup you already had, and you’re wondering if a proper kyusu is actually going to change your results or if it’s mostly about looking the part.

    The honest answer is that some of this genuinely changes your tea, and some of it really is preference. This guide sorts out which is which, so you can spend money where it actually matters and skip the parts that are just about what looks nice on your counter.

    Who This Article Is NOT For

    Let’s save you some scrolling if this isn’t quite your situation.

    • If you only ever drink tea bags or pre-bagged loose leaf, a kyusu isn’t built for that — it’s designed around loose leaf tea that needs room to unfurl and expand, and a tea bag gets no benefit from the extra brewing space or built-in filter.
    • If you already own a kyusu and are looking for advanced pairing (which clay for which specific tea), this is a beginner-to-intermediate buying guide, not a deep dive into matching clay mineral content to individual tea cultivars.
    • If you exclusively drink matcha, you don’t need a kyusu at all — matcha is whisked, not steeped, and my matcha whisk buying guide is the right resource instead.

    If you’re past that, here’s where the actual guide starts.

    What Actually Matters When Choosing One

    Three things determine whether a kyusu is right for how you actually drink tea, and once you understand them, the wall of options gets a lot easier to navigate.

    1. Handle style. This isn’t just aesthetic — it determines how you physically pour, how much control you have over the final drops, and how comfortable the pot is for your specific brewing habits.

    2. Clay type and material. Unglazed clay genuinely interacts with tea chemically over time, softening bitterness and building flavor memory into the pot. Glazed ceramic, porcelain, and glass don’t do this, which is a real tradeoff, not just a style choice.

    3. Filter design. The built-in strainer style affects how well loose leaf can actually expand and how easily fine tea dust clogs the pour. A cheap, poorly designed filter can undermine an otherwise good pot.

    Comparison Table

    Handle StyleBest ForPour ControlTypical Size
    Yokode (side handle)Solo or small servings of sencha, gyokuroBest, one-handed precision pour200–350ml
    Ushirode (back handle)Casual daily use, hojicha, genmaichaGood, familiar Western-style motion300–500ml
    Uwade (top handle)Larger pots, serving groupsModerate, two-handed for bigger pours400ml+
    Houhin (no handle)Delicate, low-temperature teas like gyokuroRequires careful grip, best for small servings100–200ml

    The Choices, One by One

    Handle Style

    Yokode, the side handle, sits at a 90-degree angle from the spout, letting you pour one-handed with your thumb resting on the lid. This is the design most associated with kyusu specifically, and it’s built around what tea enthusiasts call the “twist of the wrist” pour — a short, controlled motion that lets you extract the final concentrated drops precisely rather than dribbling out an uneven stream.

    Why it’s usually the right default: For solo or small servings of sencha or gyokuro, this handle style gives you the most control, and it’s genuinely the most intuitive once you’ve used it a few times. If you’re buying your first kyusu and aren’t sure what to get, this is the safe, traditional choice.

    Ushirode, the back handle, sits opposite the spout, similar to a Western teapot. It’s the most familiar shape if you’re coming from typical teapot use, and it tends to come in larger sizes suited to more casual, higher-volume teas like hojicha and genmaicha.

    Why you might prefer it: If the twist-of-the-wrist yokode motion feels unfamiliar or awkward, ushirode requires no adjustment at all — you pour it exactly like any Western teapot you’ve already used.

    Uwade, the top handle, usually a basket-style handle arching over the lid, suits larger pots meant for serving multiple people or multiple rounds at once.

    Why you might prefer it: If you’re regularly brewing for a group rather than a solo cup, the larger typical size and two-handed pour give you more volume per steep than a yokode is built for.

    Houhin, a handleless variant, is designed specifically for delicate, low-temperature teas like gyokuro, where you’re working with small quantities of concentrated, precious leaf and want to control the pour by gripping the body directly.

    Why you might prefer it: If gyokuro or other high-grade delicate teas are your main focus, houhin’s design is purpose-built for exactly that use case in a way general-purpose kyusu aren’t.

    Clay Type

    The two dominant Japanese clay traditions are Tokoname-yaki, from Aichi Prefecture, and Banko-yaki, from Mie Prefecture, and they genuinely produce different results in the cup, not just different colors on a shelf.

    Tokoname clay, typically a red, iron-rich shudei, is prized for smoothing out tannins and softening astringency, which makes it well suited to everyday sencha and most standard green teas.

    Banko clay, typically purple or yellow, is associated with enhancing umami and better heat retention, which makes it a stronger match for gyokuro, kabusecha, and higher-grade sencha where umami is the whole point.

    Why this matters: Unglazed clay pots absorb tea oils over repeated use, gradually building flavor character into the pot itself — which is also why dedicating an unglazed clay kyusu to one general category of tea (rather than switching between wildly different teas in the same pot) actually matters. A strongly roasted or smoky tea can leave lingering flavor in unglazed clay that affects a more delicate tea brewed in it afterward.

    Glazed ceramic, porcelain, or glass kyusu don’t have this absorption property, which means they’re more flexible for brewing different tea types in the same pot without cross-contamination of flavor, at the cost of not developing that same smoothing effect over time. Glass in particular is worth mentioning separately — it adds no mineral character at all and lets you watch the leaves unfurl, which some people genuinely enjoy as part of the ritual, even though it does nothing functional that ceramic doesn’t already do.

    Filter Design

    Most modern kyusu use one of a few common built-in filter styles, usually a fine ceramic mesh built into the body near the spout, sometimes called sasame or ceramesh. Older or cheaper pots may use simpler perforated holes, which tend to clog more easily with fine tea particles and let more sediment through into your cup.

    Why it matters: A well-designed built-in filter is what actually lets loose leaf tea expand fully inside the pot rather than getting compressed against a poor screen, which directly affects how much flavor you extract per steep. This is one area where paying slightly more for a reputable pot genuinely pays off in the cup, not just in durability.

    Which Kyusu Should You Actually Buy

    If you’re buying your first kyusu and brewing mostly for yourself: a 200–350ml Tokoname yokode. It’s the traditional, versatile default for standard sencha and most everyday green tea.

    If you regularly drink hojicha or genmaicha and want something familiar to use: an ushirode in a larger size, since those teas are typically brewed in bigger, more casual batches than delicate sencha or gyokuro.

    If you’re serving tea to a group or brewing multiple rounds at once: an uwade, sized for higher volume without sacrificing too much precision.

    If gyokuro or other high-grade delicate teas are your main focus: a houhin, purpose-built for small, careful, low-temperature brewing.

    If you drink a wide variety of very different teas and don’t want flavor crossover: a glazed ceramic or porcelain kyusu instead of unglazed clay, since it won’t absorb and carry over flavor between different tea types the way unglazed clay does.

    Where to Actually Buy One

    Shop Tokoname kyusu teapots on Amazon →

    Shop Banko kyusu teapots on Amazon →

    Shop houhin (handleless) teapots on Amazon →

    A Few Things People Ask Me

    Do I really need a dedicated kyusu, or can I use a regular teapot with an infuser basket? A regular teapot will technically work, but you lose the built-in filter design that lets loose leaf expand properly, and you lose the handle-and-pour ergonomics that make the final concentrated drops easy to extract cleanly. If you’re already committed to loose leaf Japanese tea, a proper kyusu is a worthwhile upgrade, not just a purist’s preference.

    Can I use the same kyusu for green tea and black tea? Technically yes with a glazed pot, but with unglazed clay specifically, dedicate it to one general tea category. A pot that’s absorbed the character of a smoky black tea will carry some of that into a delicate green tea brewed in it afterward.

    How do I take care of a clay kyusu? Rinse with hot water only after each use, no soap, which would strip the flavor-building patina unglazed clay develops over time. Let it air dry fully with the lid off between uses to avoid trapping moisture and developing odor or mold inside.

    Is a more expensive kyusu actually worth it, or is that just paying for craftsmanship prestige? Both are somewhat true. A well-made filter and quality clay genuinely affect brewing performance, which is worth paying for. Beyond a certain point, though, you are paying for the reputation of a specific potter or region, similar to how a well-known ceramic artist’s work commands more than an equally functional piece from an unknown maker.

    What size kyusu should I get for one or two people? Somewhere around 200–350ml is the standard recommendation for solo or two-person use, and it pairs naturally with the typical 3–5 gram doses used for quality loose leaf tea. Going much larger than that for a single-serving habit just means more leaf and more waiting per pour than you actually need.

    Does the shape of the spout matter as much as the handle? It matters, though less dramatically. A well-tapered spout produces a clean, controlled stream and stops dripping cleanly at the end of a pour, while a poorly shaped one can dribble down the side of the pot. It’s worth checking reviews for spout complaints specifically, since it’s a common quality issue on cheaper mass-produced pots.

    Where I Landed

    If I had to point a total beginner toward exactly one pot, it’d be a mid-range Tokoname yokode kyusu, somewhere in the 250–300ml range. It’s the traditional default for a reason — the handle style is the most intuitive once you’ve used it a few times, the clay is forgiving and well-suited to everyday sencha, and it’s versatile enough to handle most of what a typical home tea routine actually needs.

    Once you know you’re sticking with loose leaf tea as a regular habit, that’s when it’s worth exploring Banko clay for your higher-grade gyokuro, or a houhin if delicate teas become your main focus. Don’t feel pressured to build out a whole collection of specialized pots right away — most people are genuinely well served by one good all-purpose kyusu for years before a second pot starts to make sense. Start simple, and let your own brewing habits tell you where to specialize from there — my green tea brewing temperature guide is a good companion piece once you’ve got the pot itself sorted out.

  • How to Make a Matcha Latte That Doesn’t Taste Bitter or Clumpy

    How to Make a Matcha Latte That Doesn’t Taste Bitter or Clumpy

    Disclosure: This post contains affiliate links. If you buy through one of them, I may earn a small commission at no extra cost to you.

    My first several attempts at a homemade matcha latte all had the same two problems: little green flecks floating on top that never fully dissolved, and a bitterness underneath the milk that no amount of syrup could fully mask. I assumed I just had bad matcha. I didn’t. I had the right matcha and completely the wrong method — pouring cold milk directly onto dry powder and hoping it would work itself out, which it never does.

    Once I actually understood why cafés get a smooth, vibrant latte and home attempts so often turn out clumpy and flat, fixing it took about thirty extra seconds of technique, nothing more. That’s really what this whole recipe comes down to: order of operations and temperature, not some secret ingredient or expensive equipment. You don’t need a barista-grade setup to get this right at home — you need to stop doing the two things that ruin it, which is exactly what most quick recipe cards skip over in favor of just listing ingredients.

    The Problem You’re Actually Trying to Solve

    You’ve searched “how to make a matcha latte” because either your homemade attempts keep coming out clumpy, bitter, or oddly flat compared to what you’ve had at a café, or you’ve never made one and don’t want to waste good matcha figuring it out through trial and error. Both are the same underlying issue: matcha lattes fail for very predictable, very fixable reasons, and almost nobody explains why before handing you a recipe.

    The two failure points account for nearly every bad homemade matcha latte: pouring cold milk onto dry matcha powder, which will clump every single time no matter how hard you stir, and using water that’s too hot to dissolve the matcha first, which scorches it into bitterness. Fix those two things and the rest of the recipe is genuinely simple — everything past that point is really just preference, whether that’s your milk of choice, how sweet you like it, or whether you want it hot or over ice.

    Who This Article Is NOT For

    Let’s save you some scrolling if this isn’t quite your situation.

    • If you want an authentic, traditional matcha preparation (usucha or koicha) rather than a latte, this isn’t that guide — a latte is a modern, milk-based drink, and traditional preparation skips milk entirely. My matcha whisk buying guide is a better starting point for that.
    • If you’re using culinary-grade matcha specifically for baking, this recipe is built around drinking matcha, not baking with it — the ratios and technique are different when matcha is one ingredient among several rather than the star.
    • If you already make great matcha lattes and just want new flavor variations, skip to the variations section near the end rather than reading through the basic method again.

    If you’re past that, here’s where the actual recipe starts.

    What Actually Makes or Breaks a Matcha Latte

    Three things determine whether your latte turns out café-smooth or disappointing, and they’re the same three things almost every good recipe agrees on once you dig past the surface-level instructions.

    1. Order of operations. Matcha gets whisked into a small amount of hot water first, forming a smooth paste, before any milk touches it. Cold milk poured directly onto dry matcha powder will clump, full stop, no matter how vigorously you stir afterward.

    2. Water temperature. Hot, not boiling — roughly 160–175°F (70–80°C). Boiling water scorches matcha and pulls out bitterness the same way it does with delicate green tea leaves.

    3. Sifting before whisking. Matcha compacts in the tin over time, and sifting it before adding water breaks up those clumps before they ever have a chance to survive into your finished drink.

    The Basic Ratio

    ComponentStandard LatteStronger Latte
    Matcha1 tsp (about 2g)1.5–2 tsp (3–4g)
    Hot water (70–80°C)2 oz (60ml)2–3 oz (60–90ml)
    Milk6–8 oz (180–240ml)6–8 oz (180–240ml)

    This ratio works for both hot and iced versions — the only real difference between the two is whether your milk is warmed or poured cold over ice at the end.

    The Method, Step by Step

    Making the Matcha Base

    1. Sift your matcha. Push 1 to 2 teaspoons through a fine mesh sifter into a bowl or mug. This single step prevents most of the clumping people struggle with.
    2. Add hot water, not boiling. About 2 ounces at 160–175°F (70–80°C). If you just boiled your kettle, let it sit off the heat for roughly a minute before pouring.
    3. Whisk in a brisk zigzag or “W” motion for 15 to 20 seconds, until the mixture is smooth, slightly frothy, and free of visible clumps. This is the base every version of the latte builds on, hot or iced. The zigzag motion matters more than people expect — a slow circular stir won’t incorporate the same air, and you’ll end up with a flatter, less frothy result even if the matcha technically dissolves.

    Finishing It Hot

    1. Warm or steam 6 to 8 ounces of milk of your choice.
    2. Pour the warmed milk slowly over the matcha base, stirring gently to combine.
    3. Add sweetener now if you want it — honey, maple syrup, or simple syrup all dissolve easily into warm milk.

    Finishing It Iced

    1. Fill a glass with ice.
    2. Pour 6 to 8 ounces of cold milk over the ice.
    3. Pour your matcha base slowly over the milk and ice. For the classic layered, ombré look, pour it directly over the ice rather than stirring it in immediately — stir right before drinking instead.

    Common Mistakes and How to Fix Them

    Clumpy texture. Almost always caused by skipping the sift step, using water that’s too cool to fully dissolve the powder, or pouring cold milk onto dry matcha instead of onto an already-whisked base. Fix the order of operations first before troubleshooting anything else — it solves the vast majority of clumping complaints on its own.

    Bitter aftertaste. Water too hot, full stop. If you’re using a kettle without temperature control, let boiled water rest uncovered for about a minute before pouring it onto your matcha. A cheap thermometer removes the guesswork entirely if bitterness keeps showing up despite your best estimate.

    Flat, foam-less latte. This is more about technique than ingredients — a proper zigzag whisking motion incorporates air into the base, which is what produces that light foam on top. A milk frother works as a substitute if you don’t have a bamboo whisk, and can also help froth the milk itself for extra texture.

    Latte tastes like plain sweetened milk with barely any matcha flavor. Usually means you’re under-measuring the matcha itself. Don’t be shy with the ratio above — a proper matcha latte should taste distinctly like matcha, not like milk with a green tint.

    Whisked base looks fine but the finished latte still separates or looks streaky. This usually comes down to pouring technique rather than the base itself. Pour slowly and along the side of the glass rather than dumping the matcha base in all at once, and give it a gentle stir right before drinking rather than expecting it to fully combine on its own.

    A Few Variations Worth Trying

    Vanilla matcha latte. Add a small splash of vanilla extract, or a vanilla syrup, to the milk before combining.

    Honey matcha latte. Stir honey directly into the warm matcha base before adding milk — it dissolves more evenly there than into cold milk later.

    Blended iced matcha latte. No whisk or frother on hand? Add the matcha, hot water, and milk to a blender and blend for about 10 seconds. It won’t be quite as traditional, but it fully dissolves the powder and produces a genuinely frothy result.

    Dirty matcha latte. Add a shot of espresso alongside the matcha base for a caffeine-forward hybrid that’s become popular at specialty cafés — it also happens to smooth over some of matcha’s more vegetal notes if you’re still adjusting to the flavor, and it’s an easy way to use up matcha you weren’t sure you loved on its own.

    Brown sugar matcha latte. Dissolve a spoonful of brown sugar or a brown sugar syrup into the milk before combining, for a deeper caramel-like sweetness than honey or plain syrup gives you.

    Tools That Make This Easier

    A bamboo whisk (chasen). Shop bamboo matcha whisks on Amazon → The traditional tool, and still the one that produces the most consistent froth in the base before milk is added.

    A milk frother. Shop milk frothers on Amazon → A solid substitute if you don’t have a whisk, and it does double duty frothing the milk itself for hot lattes.

    A fine-mesh sifter. Shop matcha sifters on Amazon → The cheapest fix for clumping, and worth having even if you already own a whisk or frother.

    A Few Things People Ask Me

    Can I use a blender or milk frother instead of a bamboo whisk? Yes, and for a latte specifically, either works well since the milk is going to mute some of matcha’s finer texture anyway. A bamboo whisk matters more for traditional straight matcha than it does here, though it still produces a nice, controlled froth if you have one.

    Why does my matcha latte turn brown or dull green instead of staying vibrant? This is almost always a water temperature issue — water that’s too hot degrades the chlorophyll responsible for matcha’s bright green color, the same mechanism that causes the bitterness. Staying within the 160–175°F range protects both the color and the flavor.

    Which matcha grade should I use for lattes? You don’t need your most expensive ceremonial-grade tin here — a solid culinary or “latte grade” matcha is built specifically to hold up against milk and sweetener, and it’s usually more affordable than ceremonial grade. Save the top-tier tins for drinking straight, where their subtlety actually shows up. My matcha powder brands comparison breaks down which brands offer good latte-specific options.

    How much caffeine is in a matcha latte compared to coffee? A standard-strength matcha latte using about 2 grams of matcha typically lands somewhere between a cup of green tea and a shot of espresso, though it varies by brand and grade. If you’re sensitive to caffeine, start with the lighter end of the ratio rather than the stronger version.

    How much caffeine is in a matcha latte compared to coffee? A standard-strength matcha latte using about 2 grams of matcha typically lands somewhere between a cup of green tea and a shot of espresso, though it varies by brand and grade. If you’re sensitive to caffeine, start with the lighter end of the ratio rather than the stronger version.

    Do I need to use a special kind of milk, or does dairy work fine? Dairy works fine, though a lot of people find oat milk in particular pairs especially well with matcha’s vegetal, slightly bitter edge, since it has a natural sweetness and body that balances it nicely. Almond milk tends to be thinner and can separate a bit more visibly, which matters mostly for how the drink looks rather than how it tastes.

    Can I make the matcha base ahead of time and store it? You can, briefly. A whisked matcha base will keep in the fridge for a few hours without much quality loss, though the vibrant color and froth do fade somewhat over time. For the best result, whisk it fresh each time rather than batching a large amount days in advance.

    Where I Landed

    The whole recipe really comes down to one habit: always whisk matcha into hot water first, and never let cold milk touch dry powder directly. Everything else — the exact ratio, hot versus iced, which milk you use — is genuinely flexible and comes down to personal taste. Once that one order-of-operations habit sticks, you’ll stop thinking about it and just make a good matcha latte on autopilot, the same way you eventually stop measuring coffee grounds once you’ve made enough pots to know it by feel.

    It’s worth remembering, too, that a slightly imperfect latte still tastes far better than the clumpy, bitter version most people accidentally make on their first few tries. Don’t let chasing café-perfect technique stop you from just making one and adjusting from there — small tweaks to ratio and sweetness matter more to your personal taste than getting every step textbook-precise.

    If you’re still figuring out which matcha to actually keep in your kitchen for this, my matcha powder brands comparison is the natural next stop — and my matcha whisk buying guide covers the tools, including a decent milk frother alternative, if you don’t already have a whisk on hand.

  • Green Tea Temperature Guide: The Right Water Temp for Every Japanese Tea (With Chart)

    Green Tea Temperature Guide: The Right Water Temp for Every Japanese Tea (With Chart)

    Disclosure: This post contains affiliate links. If you buy through one of them, I may earn a small commission at no extra cost to you.

    For years I made green tea exactly the way I made black tea: kettle to full boil, pour straight over the leaves, done. It tasted bitter and vaguely medicinal every single time, and I quietly assumed that was just what green tea was supposed to taste like. Nobody had ever told me that boiling water is actively wrong for most Japanese green tea, wrong enough that it’s the single most common reason people insist they don’t like sencha when what they actually don’t like is scorched leaves.

    Temperature is not a minor technique detail with green tea the way it might be with coffee. It’s the difference between a smooth, naturally sweet cup and a genuinely unpleasant, astringent one, using the exact same leaves. This guide exists because that one piece of information would have saved me years of thinking green tea just wasn’t for me — I’d occasionally get a good cup somewhere else, assume it was luck or a better tin, and go right back to boiling my own kettle dry over it at home.

    The Problem You’re Actually Trying to Solve

    You’ve searched for a green tea brewing temperature guide because either you’ve had good green tea somewhere and your attempts at home don’t match it, or you’ve had bitter, harsh-tasting green tea and want to know if you’re doing something wrong before giving up on the category. In both cases, the answer is almost always the same: water that’s too hot.

    Unlike black tea, which is fully oxidized and can handle near-boiling water without much consequence, Japanese green tea is unoxidized and steamed rather than withered during processing, which leaves the leaf structure much more delicate. Boiling water pulls out excessive tannins and catechins too fast, producing that sharp, bitter, almost chalky quality that gets mistaken for “how green tea tastes.” Get the temperature right, and the same leaves produce something genuinely sweet and smooth, closer to what people who love matcha and sencha are actually describing when they talk about umami.

    Who This Article Is NOT For

    Let’s save you some scrolling if this isn’t quite your situation.

    • If you’re brewing bottled or bagged supermarket green tea for a quick everyday cup, this level of temperature precision won’t change your life much — mass-market tea bags are generally more forgiving of hotter water than delicate loose-leaf sencha or gyokuro.
    • If you already brew Japanese loose-leaf tea regularly and know your temperatures, this is a beginner-to-intermediate guide, not new information for you.
    • If you’re brewing hojicha specifically, it actually wants hotter water than the other teas covered here — roasting changes its chemistry enough that it behaves differently, and I cover that distinction below rather than treating it like an exception to ignore.

    If you’re past that, here’s where the actual guide starts.

    What Actually Determines the Right Temperature

    Three things drive how you should brew a specific green tea, and once you understand them, you can make a reasonable guess at correct temperature even for a tea not explicitly covered below.

    1. How the tea was shaded and harvested. More shading and more delicate, younger leaves (gyokuro, higher-grade sencha) need cooler water to avoid scorching their more concentrated amino acids into bitterness.

    2. How it was processed afterward. Roasted teas like hojicha have already had a lot of the bitterness-causing compounds broken down by heat, so they tolerate — and actually benefit from — much hotter water than unroasted greens.

    3. Leaf size and cut. Finer, more broken leaves (common in tea bags) extract faster and need either cooler water or a shorter steep than whole, unbroken loose leaves.

    Green Tea Temperature Chart

    Tea TypeWater TempSteep Time (1st Infusion)Notes
    Gyokuro140–158°F (60–70°C)90–120 secMost delicate, needs the coolest water
    Sencha158–176°F (70–80°C)60–90 secThe everyday Japanese green tea
    Fukamushi (deep-steamed sencha)158–176°F (70–80°C)30–45 secBrews faster and darker than standard sencha
    Genmaicha176–203°F (80–95°C)30–60 secRoasted rice tolerates more heat
    Hojicha194–212°F (90–100°C)30–45 secRoasting removes most bitterness risk

    Japanese Tea Brew Calculator

    Pick your tea and how many cups. You’ll get the water temperature, how much leaf to use, and timing for each infusion.

    Cups
    2
    Units

    Starting points, not rules — adjust the leaf amount to taste, and shorten the time first if a cup comes out bitter.

    The Method, Step by Step

    Getting the Water Temperature Right Without a Thermometer

    You don’t strictly need a thermometer, though one makes this easier. The classic method: boil your water fully, then pour it between two cups or a separate vessel before it touches your tea leaves. Each pour drops the temperature roughly 10–20°F, depending on the size of the vessel and how long the water sits in the air. Two or three pours between cups typically gets boiling water down into sencha or gyokuro range.

    Why this works: This isn’t just a workaround — it’s the traditional method used specifically because it also lets you measure out the right amount of water per cup at the same time you’re cooling it, using the cups themselves as your measuring vessels.

    Brewing Sencha, the Everyday Standard

    Sencha is what most people picture when they think “Japanese green tea,” and it’s the most forgiving of the delicate teas, which makes it the right place to start if you’re new to this.

    The method: Water around 158–176°F (70–80°C), roughly 1.5 tablespoons of leaf for two servings, steeped about 60–90 seconds without swirling or agitating the pot. Agitation increases bitterness by extracting compounds faster than a still steep does.

    What changes the result most: Steep time matters almost as much as temperature. A properly cooled cup of water left steeping for three minutes instead of one will still turn out bitter, just more slowly than boiling water would.

    Brewing Gyokuro, the Delicate One

    Gyokuro is shaded longer than sencha before harvest, which concentrates its amino acids and sweetness dramatically — and also makes it the least forgiving of heat out of any tea on this list.

    The method: Cooler water, 140–158°F (60–70°C), a higher leaf-to-water ratio than you’d use for sencha, and a longer steep, 90 to 120 seconds, using less water overall so the result is a small, concentrated, intensely flavorful serving rather than a full mug.

    What changes the result most: Gyokuro rewards patience more than any other tea here. Rushing the cooling step and brewing even 10-15°F too hot will mute the sweetness that’s the entire reason to seek gyokuro out in the first place — you’ll end up with something that tastes like an expensive, slightly better sencha instead of the genuinely different experience gyokuro is supposed to be.

    Brewing Genmaicha

    Genmaicha is green tea blended with roasted brown rice, and that rice content changes its temperature tolerance noticeably compared to a pure leaf tea.

    The method: Hotter than sencha, 176–203°F (80–95°C), steeped 30 to 60 seconds. The roasted rice can handle, and honestly benefits from, more heat than delicate unroasted leaf.

    What changes the result most: Because the rice adds its own toasty flavor regardless of exact temperature, genmaicha is one of the more mistake-tolerant teas on this list — a reasonable place to practice if you’re nervous about getting the more delicate teas wrong.

    Brewing Hojicha

    Hojicha is roasted rather than steamed the way the other teas here are, and that roasting process breaks down a lot of the compounds responsible for bitterness under high heat, which flips the usual green tea rule on its head.

    The method: Close to boiling, 194–212°F (90–100°C), steeped briefly, around 30 seconds. This is the one tea on this list where you genuinely don’t need to worry much about scorching it.

    What changes the result most: If you brew hojicha the same cautious way you’d brew sencha, cooler water and a longer steep, you’ll actually get a weaker, less aromatic cup than the tea is capable of. It wants heat that the other teas here would punish you for using.

    Common Mistakes That Undo Correct Temperature

    Getting the water temperature right is most of the battle, but a few other habits can quietly sabotage a properly cooled cup.

    Swirling or shaking the pot. Agitating the leaves speeds up extraction the same way stirring a cocktail speeds up dilution — it pulls out bitterness faster than a still steep would, even at the correct temperature. Let the leaves sit and unfurl on their own.

    Leaving leaves in the pot after pouring. If any liquid remains sitting on the leaves after you’ve poured your cup, it keeps steeping and turns increasingly bitter, which then throws off your next infusion too. Pour every last drop out before setting the pot down.

    Using the same steep time for every infusion. The first infusion, second, and third all want different timing as the leaves gradually open and extract faster. Using your first infusion’s steep time on the second round is a common way to end up with an unexpectedly harsh second cup.

    Tools That Make This Easier

    You genuinely don’t need special equipment to brew good green tea, but a couple of inexpensive tools remove most of the guesswork.

    A variable-temperature electric kettle. If you brew gyokuro or sencha often, a kettle that holds an exact temperature saves a lot of guesswork – my electric kettle guide explains which features actually matter. Shop variable-temperature kettles on Amazon → These let you set an exact target temperature instead of eyeballing the pour-between-cups method every time. If you drink green tea regularly, this is the single upgrade that saves the most daily effort.

    A kyusu with a built-in strainer. Shop kyusu teapots on Amazon → Not strictly necessary, but it makes pouring out every last drop — which matters for avoiding bitterness on the next infusion — much easier than fishing a loose infuser basket out of a regular mug.

    If matcha is also part of your routine, note that none of the temperature guidance above applies to it — whisking matcha uses different water temperatures entirely, and a good bamboo whisk matters more there than any thermometer.

    A Few Things People Ask Me

    Do I need a kyusu (Japanese teapot) specifically, or can I use any teapot? A kyusu with a built-in strainer makes loose-leaf brewing more convenient, but temperature and steep time matter far more than the vessel itself. A basic infuser in a regular mug will produce a good cup if the water temperature and timing are right.

    Can I reuse the same leaves for a second cup? Yes, and with sencha and especially gyokuro, subsequent infusions are considered part of the experience, not a downgrade. Generally use slightly hotter water and a shorter steep for the second infusion, since the leaves are already partially opened and will extract faster than the first round.

    What if I don’t have a thermometer or the patience to pour water between cups? A rough shortcut: boil your water, then let it sit uncovered for about 3-5 minutes before pouring over sencha, or closer to 8-10 minutes for gyokuro. It’s less precise than active cooling, but it gets you meaningfully closer than pouring straight off a rolling boil.

    Why does my tea taste bitter even when I think I got the temperature right? Steep time is the other half of the equation, and it’s easy to forget about once you’re focused on temperature. Oversteeping correctly-tempered water will still produce bitterness, just more slowly than boiling water would. If bitterness persists after fixing your temperature, start timing your steeps more carefully.

    Does the type of water matter, not just the temperature? It matters more than most people expect. Very hard tap water or heavily chlorinated water can flatten green tea’s more delicate notes regardless of how carefully you control temperature. Filtered water is a worthwhile upgrade if you’re already being this precise about everything else.

    Where I Landed

    The single biggest fix, if you only take one thing from this guide, is simple: stop pouring water straight off a rolling boil onto anything except hojicha. That one change alone would have fixed most of my early bad experiences with green tea, well before I ever thought about leaf-to-water ratios or multiple infusions. Get the temperature right first, let steep time follow from there, and the tea you’ve been drinking out of obligation might turn out to be the tea you actually enjoy once it’s finally brewed the way it was meant to be.

    It’s worth remembering that none of this is about achieving some rigid, unforgiving standard — it’s just about understanding what each tea actually wants, so you’re not fighting against the leaves’ own chemistry every time you make a cup. Once the temperature habit sticks, you’ll stop thinking about it consciously at all, the same way you eventually stop measuring coffee grounds once you’ve made enough pots to know it by feel.

    If you’re ready to put this into practice with something worth brewing carefully, my matcha powder brands comparison and best hojicha brands guides are good next stops — matcha follows different rules entirely since you’re whisking the whole leaf rather than steeping it, but hojicha slots directly into the high-heat brewing method above.

  • Wagashi for People Who Aren’t Sure About Anko (And What to Pair With Matcha)

    Wagashi for People Who Aren’t Sure About Anko (And What to Pair With Matcha)

    Disclosure: This post contains affiliate links. If you buy through one of them, I may earn a small commission at no extra cost to you.

    I’ll say the quiet part out loud: the first time someone handed me a piece of yokan, dense red bean jelly, sweet in a way I wasn’t expecting from something that texturally resembled a fruit gummy, I didn’t love it. It took me a few different wagashi, in a specific order, before anko clicked for me instead of feeling like an obstacle. I think a lot of people give up one bite too early, on the wrong wagashi, and decide the whole category isn’t for them.

    That’s really the honest starting point for this guide. Anko, sweetened red bean paste, is the backbone of most traditional Japanese sweets, and it’s also the single biggest reason Western newcomers bounce off wagashi entirely. The texture is unfamiliar — a sweet bean paste isn’t a flavor concept most people grew up with — and if your first experience is something anko-forward like a dense slice of yokan, it’s easy to write off the whole category before giving it a fair shot. Nobody tells you there’s actually a natural order to work through, one that lets you build up tolerance and appreciation the way you might work up to darker roast coffee or spicier food.

    The Problem You’re Actually Trying to Solve

    You’ve searched for a wagashi guide, maybe because you’re pairing something with matcha and want to do it properly, maybe because you’re just curious about Japanese sweets and don’t know where to start. Either way, you’ve probably run into the same wall I did: most wagashi guides list fifteen types in one long, undifferentiated block, with zero acknowledgment that some of these are a much easier on-ramp than others if you didn’t grow up eating sweetened bean paste.

    This guide sorts wagashi by how approachable they are for a first-timer, specifically around anko intensity, so you can actually build up to the deeper end of the category instead of getting thrown into it and deciding you don’t like any of it.

    Who This Article Is NOT For

    Let’s save you some scrolling if this isn’t quite your situation.

    • If you already love anko and eat wagashi regularly, this beginner-focused ordering will feel too cautious — you probably already know your way around yokan and monaka.
    • If you want a full historical and cultural breakdown of every wagashi category (namagashi, han-namagashi, higashi, and all their sub-classifications), this is a practical tasting guide, not an academic deep dive into Japanese confectionery classification.
    • If you’re gluten-free or have a peanut allergy specifically, most wagashi are naturally free of both, but always check ingredient labels individually — I’m not covering allergen specifics item by item here.

    If you’re past that, here’s where the actual guide starts.

    What Actually Determines How Approachable a Wagashi Is

    Three things, and once you know them, you can predict pretty accurately whether a wagashi you’ve never tried will feel easy or challenging on a first bite.

    1. How much anko is actually present, and how concentrated it is. A dollop tucked inside a pancake-like shell reads very differently than a solid block of nothing but bean paste.

    2. Texture familiarity. Anything chewy, gooey, or jelly-like (mochi, kanten-based jellies) asks more of an unfamiliar palate than something crisp or cake-like, which reads closer to Western baked goods.

    3. Sweetness balance. Some wagashi lean quite sweet on their own; others are deliberately restrained specifically because they’re meant to be eaten alongside bitter matcha, which changes how they taste in isolation versus with tea. A wagashi that seems too sweet eaten alone can taste perfectly balanced once you actually put it next to a bowl of whisked matcha, which is worth keeping in mind before writing anything off based on a solo bite.

    Comparison Table

    WagashiAnko LevelTextureBeginner FriendlinessPairs Well With
    RakuganNoneDry, crumbly, hard candy-likeVery easyUsucha (thin matcha)
    CastellaNoneSoft, sponge cake-likeVery easySencha, hojicha
    SenbeiNone (savory)Crisp, crunchyVery easyAny tea, especially hojicha
    DorayakiModerate, containedSoft pancake exterior, smooth fillingEasyHojicha, mild sencha
    DaifukuModerate, containedChewy mochi exteriorModerateSencha, usucha
    MonakaHigh, but crisp shellCrisp wafer, dense paste fillingModerate-challengingUsucha, koicha
    YokanVery high, solid formDense, jelly-likeMost challengingKoicha (thick matcha)

    The Wagashi, One by One

    Rakugan

    Shop rakugan on Amazon →

    Rakugan is a dry, pressed sweet made from rice flour, sugar, and a liquid sweetener called mizuame, shaped into intricate molded forms, often flowers or seasonal motifs. It contains no anko at all.

    Why it’s a good starting point: The texture is closer to a firm sugar candy than anything unfamiliar, and the flavor is straightforwardly sweet without the bean paste element that trips people up. It’s also traditionally served specifically with usucha, thin matcha, in tea ceremony settings, so it’s a historically correct pairing, not just a beginner workaround.

    The tradeoff: It’s quite sweet and quite dry on its own, meant to be eaten in small pieces alongside tea rather than as a standalone snack. Don’t expect much complexity — this is about pure, simple sweetness, and it can feel a little chalky if you eat it without tea to wash it down.

    Castella

    Shop castella cake on Amazon →

    Castella is a soft, honey-sweetened sponge cake, baked rather than steamed or pressed, and while purists debate whether it technically counts as wagashi versus a Portuguese-influenced import, it’s sold and eaten alongside other traditional sweets throughout Japan.

    Why it’s a good starting point: This is the easiest entry point on the entire list, because it tastes almost exactly like a Western sponge cake. No anko, no unfamiliar texture, nothing to adjust to. If you want proof that Japanese sweets aren’t universally challenging for a Western palate, this is it.

    The tradeoff: Because it’s so close to something you already know, it doesn’t really teach you anything new about wagashi as a category. Think of it as the on-ramp, not the destination.

    Senbei

    Shop senbei rice crackers on Amazon →

    Senbei are savory or lightly sweet rice crackers, often brushed with soy sauce, and while they sit slightly outside the sweet-wagashi conversation, they’re a traditional higashi-category pairing for tea and worth knowing about specifically because they sidestep the sweetness question entirely.

    Why it’s a good starting point: If you’re someone who generally prefers savory over sweet, this is your entry point into the tea-pairing world without touching anko or heavy sugar at all.

    The tradeoff: If what you actually wanted was a sweet treat to go with your tea, senbei won’t scratch that itch — it’s a genuinely different category of pairing.

    Dorayaki

    Shop dorayaki on Amazon →

    Dorayaki is two small, fluffy castella-style pancakes sandwiched around a filling of sweetened anko. This is where anko actually enters the picture, but in a contained, moderate way.

    Why it’s a good starting point: The pancake exterior is instantly familiar, and the anko filling is portioned rather than dominant, so you get a genuine introduction to the flavor without it overwhelming the bite. This is often the wagashi I’d recommend as someone’s actual first anko experience — it asks the least of you while still being the real thing, not a workaround.

    The tradeoff: The filling does have that distinct sweetened bean texture, slightly grainy, quite sweet, and if that specific mouthfeel isn’t for you, dorayaki will make that clear quickly, even in a small dose.

    Daifuku

    Shop daifuku mochi on Amazon →

    Daifuku is a soft mochi ball wrapped around a filling, most commonly anko, though strawberry and other fruit variations are common too and often easier for a first-timer than the plain red bean version.

    Why it’s worth trying next: The chewy mochi exterior is a genuinely different texture experience than anything in Western desserts, and it’s worth getting comfortable with on its own before combining it with anko. Starting with a fruit-filled daifuku lets you adjust to the mochi texture first before tackling mochi and anko together.

    The tradeoff: Mochi’s stickiness and chew is polarizing even independent of the anko question — some people love it immediately, others need a few tries before it stops feeling unusual.

    Monaka

    Shop monaka on Amazon →

    Monaka is anko sandwiched between two thin, crisp wafers made from mochi rice, often shaped like flowers, leaves, or the moon. Despite the crisp wafer shell, the anko filling itself is usually dense and largely unmodified — this is closer to the real thing.

    Why it’s worth trying next: The crisp wafer gives you a textural anchor that’s easy to like immediately, which makes the anko filling underneath feel more approachable than it would completely on its own.

    The tradeoff: The anko-to-shell ratio is much higher than dorayaki, so if you weren’t sold on the bean paste texture there, monaka will ask more of you, not less.

    Yokan

    Shop yokan on Amazon →

    Yokan is a dense, jelly-like block made almost entirely of sweetened bean paste set with agar (kanten). There’s no shell, no pancake, no wafer to soften the experience — it’s anko in its most concentrated, unaccompanied form.

    Why it’s worth trying last, not first: This is the wagashi that most directly tests whether you actually enjoy anko’s flavor and texture on their own terms, without any supporting structure to ease you in. In my experience, people who’ve built up to yokan through the other wagashi on this list tend to genuinely enjoy it, appreciating the concentrated flavor rather than being ambushed by it; people who start here often don’t, and end up assuming the problem is wagashi as a whole rather than just this one especially intense entry point.

    The tradeoff: It’s the most likely wagashi to end someone’s wagashi journey prematurely if it’s their first exposure. Save it for later, once you already know anko works for you.

    Which One Should You Actually Start With

    If you want zero risk and guaranteed enjoyment: Castella. It’s essentially cake, and it pairs beautifully with any tea you already like.

    If you want the traditional tea ceremony pairing without any anko involved: Rakugan alongside usucha (thin matcha).

    If you’re ready for your actual first anko experience: Dorayaki. Contained, familiar shell, moderate filling.

    If you’ve enjoyed dorayaki and want to go further: Daifuku, ideally a fruit-filled version first, then a plain anko version once you’re comfortable with the mochi texture itself.

    If you’re confident anko is for you and want the real, concentrated experience: Monaka, then yokan, in that order.

    A Few Things People Ask Me

    What tea should I actually pair with wagashi? Sweeter, richer wagashi like yokan and monaka traditionally pair with koicha, thick matcha, because the tea’s intensity balances the concentrated sweetness. Lighter wagashi like rakugan and castella pair well with usucha or a simple sencha, since neither the tea nor the sweet needs to compete with the other.

    Is there a wagashi with no sugar or minimal sweetness at all? Senbei is your best bet if you want something to pair with tea without leaning sweet at all. Beyond that, most wagashi are built around sweetness as the whole point, so a genuinely low-sugar option within the sweet category is hard to find authentically.

    Can I make anko more approachable at home, or does it always taste the same? Anko varies more than people expect — koshian (smooth, strained paste) and tsubuan (chunkier, with whole beans left in) have noticeably different textures, and some brands sweeten more aggressively than others. If your first anko experience was overly sweet or grainy, it’s worth trying a different preparation before writing off the flavor entirely.

    Is wagashi always this small and delicate, or are there bigger portions? Traditional wagashi are intentionally small — they’re meant to be a few refined bites alongside tea, not a full dessert course. If you’re craving a bigger portion, dorayaki and daifuku tend to come in more substantial single servings than something like rakugan or monaka.

    Where I Landed

    I’ll be honest: yokan still isn’t my favorite, even now, and that’s fine. The point of this guide was never to convert you into loving every single wagashi — it’s to make sure you actually give the category a fair trial instead of judging all of wagashi off one dense, anko-heavy first impression. Start with castella or rakugan, work your way through dorayaki and daifuku, and see where your own preference actually lands before deciding anko isn’t for you. Some people stop happily at dorayaki and never look back, and that’s a completely legitimate place to land — you don’t owe the category a full commitment to yokan just because it exists.

    If you’re building this into an actual matcha routine at home, pair the lighter sweets with a usucha-style whisked matcha, and save the richer, anko-forward ones for when you’ve got a proper thick koicha to stand up to them — my matcha powder brands comparison is a good next stop if you’re still figuring out which matcha to keep on hand for exactly that.

  • Uji vs Shizuoka vs Yame Matcha: How Japan’s Matcha Regions Actually Differ

    Uji vs Shizuoka vs Yame Matcha: How Japan’s Matcha Regions Actually Differ

    Disclosure: This post contains affiliate links. If you buy through one of them, I may earn a small commission at no extra cost to you.

    I used to assume “matcha is matcha” the same way I used to assume all olive oil was basically interchangeable, until someone handed me two tins side by side — one from Uji, one from Kagoshima — and the difference wasn’t subtle at all. One was creamy and almost sweet in a rounded, restrained way. The other hit brighter and more direct, less shy about announcing itself. Same plant, same general process, wildly different personality. That’s when region started actually meaning something to me instead of just being a line on a tin I skimmed past.

    If you’ve started noticing that matcha tins list a region like Uji or Kagoshima the way a wine bottle lists an appellation, and you’ve wondered whether that actually matters or if it’s just marketing dressing, this article is here to answer that honestly. Some of it is genuine terroir. Some of it really is just prestige branding built up over centuries. I’ll tell you which is which, region by region, so the next time you’re staring at a tin deciding between two similarly priced options, you’ll actually know what that geographic label is telling you.

    Quick Picks: Which Region to Buy

    • Best for classic ceremonial matcha: Uji – the traditional benchmark for usucha. Uji ceremonial matcha on Amazon
    • Best value for everyday drinking: Nishio – smooth and balanced without the prestige markup. Nishio matcha on Amazon
    • Best for lattes and baking: Kagoshima – sweet, creamy and strong enough to survive milk.
    • Best for single-origin tins from small farms: Nio Teas’ matcha collection. At the time of writing, ordering through the links on this page automatically applies a 10% discount at checkout – no code needed. Offers can change, so check the final price in your cart.

    Want specific brands rather than regions? My matcha brand comparison covers where well-known brands source from. The full regional breakdown, a “how you drink it” chart and the head-to-head comparisons are below.

    The Problem You’re Actually Trying to Solve

    You’ve searched for a comparison of matcha-growing regions because you’re trying to figure out whether region should actually factor into your buying decision, or whether it’s a distinction that matters mostly to specialists and doesn’t change much for a casual home drinker. You might also just be curious why Uji gets treated like the gold standard everywhere you look, while Kagoshima and Shizuoka rarely get the same reverence despite Kagoshima actually producing more tea overall.

    The honest answer sits in the middle. Region genuinely does shape flavor — soil, climate, and altitude all leave a real fingerprint on the final cup, the same way they do in wine or coffee. But region isn’t a strict quality hierarchy either. Uji’s reputation comes from centuries of tradition and refined processing as much as raw terroir, and some of the other regions are quietly excellent in ways Uji’s fame overshadows.

    Who This Article Is NOT For

    Let’s save you some scrolling if this isn’t quite your situation.

    • If you’re brand new to matcha and haven’t settled on liking it yet, region-level nuance won’t matter to you at this stage — start with a well-reviewed everyday matcha brand instead and worry about regional character once you already know you’re hooked.
    • If you only ever drink matcha in lattes with milk and sweetener, most regional nuance gets buried under dairy and sugar anyway. This distinction matters most for people drinking matcha straight.
    • If you want a definitive “best region” ranking, that’s not really how this works — the regions below are different, not stacked in a strict order, and the “best” one depends entirely on what you’re looking for in a cup.

    If you’re past that, here’s where the actual comparison starts.

    What Actually Shapes Regional Character

    Three things determine why matcha from one region tastes noticeably different from another, and once you understand them, the flavor descriptions below will make a lot more sense.

    1. Climate and terrain. Temperature swings, fog, altitude, and rainfall all affect how the tea plant develops, the same way they affect wine grapes. A region with hot summers and cold winters, like Uji, develops differently than a warmer, more consistently temperate region like Kagoshima.

    2. Soil composition. Volcanic soil, river-valley soil, and mountain soil all carry different mineral profiles into the leaf. Kagoshima’s volcanic soil in particular is often cited as a defining factor in its smoother, less bitter character compared to regions on more traditional agricultural soil.

    3. Local processing tradition. Some regions specialize in techniques refined over centuries specifically for ceremonial-grade matcha, while others built their reputation around volume and consistency for everyday drinking and food use. This is arguably as influential as the growing conditions themselves — the same leaf handled by two different processing traditions can end up tasting meaningfully different.

    Comparison Table

    RegionPrefectureFlavor ProfileTextureBest For
    UjiKyotoBold umami, creamy, naturally sweetVelvety smoothCeremonial drinking, tea ceremony
    NishioAichiBalanced sweetness, gentle bitterness, brightFine and smoothEveryday drinking, lattes, baking
    ShizuokaShizuokaLight, grassy, refreshingly astringentSmooth, less creamyBeginners, blended drinks
    KagoshimaKagoshimaRich, sweet, minimal bitternessCreamy and smoothLattes, desserts, casual daily drinking
    YameFukuokaVery sweet, mellow umami, highly aromaticSilky smoothLuxury ceremonial matcha, wagashi pairing

    A quick note before diving into each region: this isn’t a niche distinction reserved for tea sommeliers. Once you’ve tasted two or three of these back to back, the differences stop feeling subtle and start feeling obvious — the same shift that happens the first time you compare a light-roast coffee to a dark-roast one side by side instead of drinking them weeks apart.

    The Regions, One by One

    Uji (Kyoto)

    Uji is where shading tea plants to produce tencha — the leaf that becomes matcha — was pioneered centuries ago, and that head start shows in how deeply refined the region’s processing tradition is. The climate, hot summers and cold winters, is credited with developing especially high-grade leaves, and Uji’s growers have had the longest runway of anyone to perfect the craft.

    Why it tastes the way it does: Uji matcha tends toward bold umami with a creamy, naturally sweet character and a deep, vivid green color. It’s the flavor profile most people picture when they imagine “proper” ceremonial matcha, largely because Uji effectively set that template in the first place.

    The catch: Uji production has been shrinking, and that scarcity, combined with centuries of prestige, pushes prices upward in a way that isn’t purely about the leaf in the tin — you’re also paying for reputation and heritage. That doesn’t make it bad value, but it’s worth knowing the price reflects more than terroir alone. If you’re buying Uji matcha purely for the flavor and not the name, it’s worth comparing it honestly against Nishio or Yame before assuming Uji automatically wins.

    Nishio (Aichi)

    Nishio produces a striking share of Japan’s tencha output from a relatively small number of dedicated growers, and it’s built its reputation on consistency and value rather than ceremonial prestige. The Samidori cultivar, closely associated with this region, produces a vivid green color and refined umami.

    Why it tastes the way it does: Balanced sweetness with gentle bitterness, bright and vivid green, generally described as clean and approachable rather than intense in any one direction.

    The catch: Because Nishio isn’t chasing Uji’s reputation game, it tends to be undervalued relative to what’s actually in the tin — genuinely good matcha at a more reasonable price than the ceremonial-prestige regions charge for similar quality.

    Shizuoka

    Shizuoka is Japan’s largest overall tea-producing region by volume, though matcha specifically is a smaller part of a broader green tea operation that also produces enormous quantities of sencha. The terrain near Mount Fuji gives the tea a clean, brisk quality.

    Why it tastes the way it does: Lighter, grassier, and noticeably more astringent than Uji or Kagoshima matcha, with a brighter, less creamy character overall.

    The catch: That brisker, more astringent profile makes Shizuoka matcha a genuinely good beginner-friendly option, but it’s not the pick if you’re chasing the deep umami and sweetness that draws people to matcha in the first place. Think of it as matcha’s more assertive, less coddling entry point.

    Kagoshima

    Kagoshima recently overtook Shizuoka as Japan’s top tea-producing region by volume, and its volcanic soil is a defining feature of the local growing conditions. Warmer weather and a longer growing season than Kyoto also shape how the plants develop here.

    Why it tastes the way it does: Rich and sweet with minimal bitterness, vibrant bright green, and a creamy, smooth texture that holds up particularly well in lattes and desserts.

    The catch: Kagoshima’s scale and warmer climate make for reliable, crowd-pleasing matcha, but it doesn’t carry the same centuries-deep ceremonial tradition Uji or Yame can claim — this is matcha built for wide appeal and everyday use rather than formal tea ceremony. That’s not a knock on quality, just a different design goal than the more ceremony-focused regions.

    Yame (Fukuoka)

    Yame built its reputation on gyokuro, a shade-grown loose-leaf tea prized for its intense sweetness, and that same expertise in shading and cultivation carries directly over into their matcha.

    Why it tastes the way it does: Very sweet with mellow umami and a notably aromatic quality, deep jade green in color, and an especially silky-smooth texture — arguably the sweetest, most fragrant of the five regions here.

    The catch: That sweetness and refinement come at a price point that competes directly with Uji, and Yame doesn’t carry quite the same name recognition outside Japan, so you’re relying more on your own palate than brand prestige to judge whether it’s worth it. In my experience, it usually is — this is the region I’d point to as the most underrated relative to its actual quality.

    Head to Head: The Comparisons People Search For

    Uji vs. Shizuoka: Uji is creamier, sweeter and deeper in umami; Shizuoka is lighter, grassier and more astringent. Choose Uji for traditional usucha you’ll drink straight, and Shizuoka if you want a brisker, more affordable matcha or you’re still working out whether you like matcha at all.

    Uji vs. Yame: the closest match on this list. Both make refined ceremonial matcha. Yame tends to be sweeter and more aromatic; Uji tends to be deeper and more classic. If you love one, the other is worth trying – Yame often costs a little less for similar quality, because its name carries less of a premium outside Japan.

    Uji vs. Nishio: Nishio is the practical alternative to Uji – smooth, bright and balanced, usually at a lower price. For everyday drinking and lattes, many people won’t miss the difference. For a special bowl of usucha, Uji still has the edge in depth.

    Uji vs. Kagoshima: different design goals. Uji is built around tradition and ceremony; Kagoshima around sweetness, creaminess and everyday use, which makes it one of the best choices for lattes and desserts.

    Which Region for How You Drink It

    Region matters a lot for some uses and barely at all for others. This is the chart I’d use before paying extra for a region name.

    How you drink itBest regionsDoes region matter?What to look for on the label
    Usucha (thin tea), straightUji, Yame, NishioA lotFirst harvest, ceremonial or usucha grade
    Koicha (thick tea)Uji, YameA lotKoicha grade – expensive, so buy small tins
    Hot matcha latteKagoshima, NishioSomewhat“Latte” or premium culinary grade
    Iced latte or smoothieKagoshima, ShizuokaA littleBright color; freshness matters more than prestige
    Baking and dessertsNishio, Kagoshima, ShizuokaVery littleCulinary grade; skip expensive ceremonial tins

    If you mostly make lattes or bake, don’t pay extra for a famous region name – that money is better spent on fresher matcha in a smaller tin.

    Which Region Should You Actually Buy

    If you want the classic, deeply traditional matcha experience: Uji. It set the template most people associate with “real” ceremonial matcha, for good reason.

    If you want excellent quality without paying for prestige: Nishio. Consistently good, less defined by reputation than by what’s actually in the cup.

    If you’re new to matcha and want something less intense to start with: Shizuoka. Lighter and brisker, a gentler on-ramp than the creamier regions.

    If lattes and desserts are your main use case: Kagoshima. Rich, sweet, and built to hold up against milk and sugar without disappearing.

    If you want the sweetest, most aromatic option and don’t mind paying for it: Yame. Underrated outside Japan relative to how good it actually is.

    A Few Things People Ask Me

    Is Uji matcha always the best? Not objectively — it’s the most prestigious and traditional, but “best” depends on what you’re after. Yame arguably edges it out on pure sweetness and aroma, and Nishio offers comparable quality at a friendlier price. Uji’s reputation is earned, but it isn’t the automatic top pick for every use case.

    Does region matter more than grade? They matter differently. Grade tells you about harvest timing, leaf selection, and processing quality within a batch; region tells you about the underlying flavor character that grade is then refining. A high grade from a region whose profile you dislike will still taste like that region, just a more polished version of it.

    Can I taste the regional difference in a latte, or does milk erase it? Milk mutes a lot of nuance, but it doesn’t erase everything — Kagoshima’s natural sweetness and creaminess in particular tend to survive milk better than Shizuoka’s brisker, more astringent profile does. If lattes are your main use case, leaning toward Kagoshima or Nishio makes practical sense.

    Do brands usually disclose the growing region on the package? The better ones do, and it’s a genuinely useful signal — a brand willing to name Uji, Nishio, Kagoshima, or Yame specifically is telling you more than one that just says “grown in Japan.” Vague sourcing language is often a sign the tea is a blend from wherever was cheapest that season, not a deliberate regional choice.

    Are there other matcha-growing regions besides these five? Yes — Mie prefecture (sometimes marketed under the Ise name) and a handful of smaller producing areas also grow tencha, but Uji, Nishio, Shizuoka, Kagoshima, and Yame account for the overwhelming majority of what actually reaches the export market, which is why they’re the five worth knowing well.

    Where I Landed

    If I’m being honest about where my own preference landed after actually tasting through all five, it’s Yame — that sweetness and aroma won me over in a way I didn’t expect, especially given how little attention it gets outside Japan compared to Uji. But I’d never tell someone new to matcha to start there. Start with Uji or Nishio to understand what “classic” matcha tastes like, then branch out to Kagoshima if you’re leaning toward lattes, Shizuoka if you want something lighter, and Yame once you’re ready for the sweetest, most fragrant version of all of this.

    None of these regions are wrong choices, and none of them are automatically “better” than the others despite what price tags and prestige might suggest. The real value of knowing this stuff isn’t picking a winner — it’s being able to walk into a tea shop or scroll through an online listing and actually understand what you’re being offered, instead of defaulting to whichever tin has the most recognizable name on it.

    If you’re ready to actually buy based on region rather than just brand name, my matcha powder brands comparison covers where several well-known brands source from, which is often the fastest way to shop by region. If you’d rather try single-origin tins from small farms, Nio Teas’ matcha collection is where I’d start – the link-only discount mentioned at the top applies there too.

  • Matcha vs Green Tea: What’s Actually Different (And Which One You Should Be Drinking)

    Matcha vs Green Tea: What’s Actually Different (And Which One You Should Be Drinking)

    Disclosure: This post contains affiliate links. If you buy through one of them, I may earn a small commission at no extra cost to you.

    Someone once told me matcha was “just stronger green tea,” the way espresso is stronger coffee, and I let that idea sit unquestioned in my head for way longer than I should have. It’s not true, and once you actually understand why, a lot of confusing label claims and wildly different price tags suddenly make sense. Matcha and green tea come from the exact same plant. That’s about where the similarities stop.

    I get why the confusion sticks around. Every grocery store green tea box says “made from the finest green tea leaves,” every matcha tin says roughly the same thing, and both liquids end up some shade of green in your cup. The marketing language is nearly identical even though the products underneath it are genuinely different. If you’ve ever wondered why matcha costs three or four times as much as sencha, or why one makes you jittery and the other doesn’t, or which one you should actually be reaching for on a given morning, this is the article that untangles it.

    The Problem You’re Actually Trying to Solve

    You’ve searched “matcha vs green tea” because somewhere along the way, you got curious enough to want the real answer instead of another vague “they’re basically the same, just different forms” line. Maybe you’re trying to decide which one to buy. Maybe you read a health claim about one of them and want to know if it’s actually true or just marketing. Maybe you had both back to back and noticed they tasted nothing alike and want to know why.

    The short, honest answer is that matcha is a specific, more intensive version of green tea production — same plant, dramatically different growing method, processing, and how you actually consume it. Once you understand those three differences, most of the confusing claims you’ve run into online start to make sense on their own.

    Who This Article Is NOT For

    Let’s save you some scrolling if this isn’t quite your situation.

    • If you already know the production differences and just want to know which specific brand to buy, skip ahead to my matcha powder brands comparison or my best hojicha brands guide instead — this article is about the category-level differences, not brand picks.
    • If you’re looking for a deep dive into the chemistry and clinical research, this is a practical explainer, not a scientific literature review. I’ll cover what the actual compound differences are, but I won’t be citing dosage-specific studies or making medical claims.
    • If you’re only interested in flavored or bottled green tea drinks, most of what’s below assumes you’re drinking loose leaf or whisked matcha, not a sweetened bottled beverage — the comparisons don’t map cleanly onto those products.

    If you’re past that, here’s where the actual explanation starts.

    What Actually Makes Them Different

    There isn’t a long list of vague factors here — the differences boil down to three things, and once you understand these, everything else about matcha versus green tea follows naturally.

    1. How the plant is grown. This is the biggest, earliest divergence, and it happens weeks before either tea is even picked.

    2. How the leaf is processed after harvest. This is where “green tea” splits into dozens of styles (sencha, bancha, gyokuro) while matcha stays on its own single track.

    3. How you actually consume it. This is the difference most people notice first, even if they don’t realize it’s downstream of the first two.

    Comparison Table

    MatchaGreen Tea (e.g. Sencha)
    Growing methodShaded 3–4 weeks before harvestGrown in full sun
    ProcessingSteamed, dried, deveined, stone-ground into powderSteamed, rolled, dried into whole or cut leaves
    How you drink itWhole leaf consumed, whisked into waterLeaves steeped, then discarded
    CaffeineHigher (whole leaf ingested)Lower (only what leaches into the water)
    L-theanineHigher (shading boosts it significantly)Present, but at lower levels
    FlavorConcentrated umami, vegetal, slightly bitterLighter, grassy, sometimes floral or nutty
    Typical priceSignificantly higher per servingGenerally more affordable

    The Differences, One by One

    The Growing Method

    Ordinary green tea grows in full sun, the way most people picture a tea field — rolling green hills under open sky. Matcha starts life the same way, but a few weeks before harvest, the plants are covered to block most of the sunlight. That shading is not a minor detail; it’s the single decision that sets everything else about matcha in motion.

    Why it matters: Blocking sunlight forces the plant to produce more chlorophyll to compensate, which is a big part of why matcha has that intensely vivid green color that ordinary green tea leaves don’t share. Shading also increases the leaf’s L-theanine content, an amino acid responsible for a lot of the calm, smooth “umami” character matcha is known for, while suppressing the compounds that would otherwise make the tea taste sharply bitter or astringent.

    What this means for you: If you’ve ever wondered why matcha tastes rounder and more savory while sencha tastes brighter and grassier, this is the root cause. It’s not a different plant — it’s a plant grown under deliberately different conditions to push its chemistry in a specific direction. It also explains why matcha’s growing season is more limited and labor-intensive than ordinary green tea’s, since the shading structures have to be built, maintained, and timed precisely around harvest — another reason matcha commands a higher price before it’s even been processed.

    The Processing

    After harvest, both teas get steamed almost immediately to stop oxidation and lock in that green color — this part is actually similar. From there, the paths split completely.

    Ordinary green tea gets rolled, shaped, and dried into the whole or cut leaves you recognize from a tea bag or loose-leaf tin. Matcha’s leaves, called tencha before processing, skip the rolling step entirely. Instead, the leaves are dried flat, have their stems and veins removed, and are then stone-ground into the ultra-fine powder that defines matcha. That grinding process alone is slow and labor-intensive — traditional stone mills produce only a small amount of matcha per hour, which is a real part of why matcha costs what it does.

    Why it matters: This processing difference is the reason matcha and green tea aren’t interchangeable in recipes or brewing methods, even though they come from the same plant. You can’t “steep” matcha the way you’d steep sencha, because there’s no discrete leaf to strain out — it’s already a powder meant to be fully suspended in the water. It also explains the price gap more directly than anything else on this list: grinding tencha into matcha the traditional way, on granite stone mills, is genuinely slow. A single traditional stone mill typically produces only a small amount of true ceremonial-grade matcha per hour, which is part of why higher-end matcha carries a price tag that ordinary rolled-leaf green tea never approaches.

    How You Actually Consume It

    This is the difference most people notice immediately, even before they understand why it’s happening. With green tea, you steep leaves in hot water, let the flavor infuse, and then discard the spent leaves. You’re only getting whatever compounds successfully dissolved into the water during that steeping window.

    With matcha, there’s no discarding step. You whisk the entire ground leaf directly into water, which means you’re consuming the whole leaf, not just what leached out of it. That’s the real reason matcha delivers noticeably more caffeine and L-theanine per serving than an equivalent amount of steeped green tea — you’re not filtering anything out.

    Why it matters: This is also why matcha hits differently than a cup of green tea. The caffeine comes in alongside a much higher dose of L-theanine, which is often described as producing a calmer, more sustained energy than the sharper jolt-and-crash some people get from coffee or plain caffeine. Whether that’s the case for you personally varies, but the mechanism — whole leaf versus steeped-and-discarded — is the actual explanation, not just marketing language. It’s also worth knowing this cuts both ways: because you’re consuming everything in the leaf, matcha also concentrates whatever else was present in that leaf, which is part of why sourcing and growing conditions matter more for matcha than they do for a tea you’re only partially extracting.

    Why the Price Gap Is So Large

    This is worth calling out on its own, because it’s the practical question underneath a lot of “matcha vs green tea” searches: why does a tin of matcha cost what four or five bags of sencha cost?

    It comes down to the three differences above stacking on top of each other. Shading the plants requires physical infrastructure and reduces how much usable leaf a farm produces per season. Only the youngest, most tender leaves are typically selected for higher-grade matcha, which narrows the harvest window further. And the grinding process itself, done properly, is slow by design. None of that applies to ordinary green tea, which can be harvested more broadly, processed faster, and doesn’t require specialized milling equipment. You’re not paying extra for a fancier label — the entire production chain is genuinely more constrained at every step.

    That’s also why “cheap ceremonial-grade matcha” is worth being skeptical of. If the price doesn’t reflect that constrained production process, something in the chain was almost certainly cut — often the shading period, the leaf selection, or the grinding method.

    Which One Should You Actually Reach For

    If you want a daily ritual that feels calm and deliberate: matcha. The whisking process itself, plus the L-theanine-driven steadiness many people report, makes it suited to a slower morning routine rather than a rushed one.

    If you want something light, easy, and affordable to drink multiple times a day: green tea, specifically a straightforward sencha. It’s gentler, cheaper, and doesn’t require special equipment the way whisking matcha does.

    If you want the most caffeine for the least effort: matcha, since you’re consuming the whole leaf rather than a partial steeped extraction — though if pure caffeine content is genuinely your top priority, coffee will still outpace both.

    If you’re cooking or baking: green tea, or a culinary-grade matcha rather than ceremonial grade. Ceremonial matcha’s subtlety gets lost against other ingredients, so save that grade for drinking it straight, and use a cheaper culinary grade or plain green tea leaves in recipes instead.

    If you’re just starting out and unsure which you’ll actually like: green tea is the lower-commitment entry point — no whisk required, cheaper to experiment with, and a more familiar starting flavor for most people coming from black tea or coffee.

    A Few Things People Ask Me

    Is matcha just “stronger” green tea? Not exactly — it’s a different growing and processing method applied to the same plant, which changes the flavor profile and nutrient concentration, not just the strength. A very strong cup of steeped sencha still won’t taste like matcha, because the shading and whole-leaf consumption change the actual chemistry, not just the intensity.

    Does matcha really have more antioxidants than green tea? Because you consume the whole leaf with matcha instead of a partial water-soluble extraction, you generally do end up with more of the leaf’s compounds per serving, antioxidants included. That said, be wary of any specific numeric claim (“10x the antioxidants!”) without a cited source — a lot of marketing rounds this up aggressively.

    Which one has less caffeine, if I’m sensitive to it? Green tea, by a meaningful margin, since you’re only getting what dissolves during steeping rather than the whole ground leaf. If caffeine sensitivity is a real concern, a lighter steeped green tea, or hojicha specifically (which is roasted in a way that further reduces caffeine), are both gentler options than matcha.

    Can I substitute one for the other in a recipe? Not cleanly. Matcha’s concentrated powder form behaves very differently in baking and cooking than steeped green tea leaves or liquid would, and the flavor intensity is much higher. If a recipe calls for one, swapping in the other usually throws off both the texture and the taste.

    Is one of them more “authentic” or traditional than the other? Not really — both have deep roots in Japanese tea culture, just in different contexts. Matcha is closely tied to formal tea ceremony, while steeped green teas like sencha are the everyday, at-home tea most people in Japan actually drink day to day. Neither one is a lesser or more “real” version of the other; they simply developed for different occasions.

    Where I Landed

    Neither one is objectively “better” — they’re suited to different moments, and honestly, I keep both in my kitchen for exactly that reason. Matcha is what I reach for when I want a slower, more deliberate morning, something closer to a ritual than a beverage. Green tea, usually a simple sencha or a good hojicha, is what I drink the rest of the day when I just want something pleasant without the ritual attached, or when I’m on my third cup and don’t want to whisk anything.

    The confusion around these two was never really about the tea itself — it was about the language brands use to describe them, which tends to flatten two genuinely different products into interchangeable-sounding marketing copy. Now that you know where the actual differences come from — the shading, the grinding, the whole-leaf consumption — you can read past that marketing copy a lot more easily, and price tags that used to seem arbitrary will start to make a lot more sense.

    If you’d rather just taste the difference for yourself before reading another word about it, a simple side-by-side works well: a basic loose-leaf sencha next to a starter tin of ceremonial-grade matcha will make everything above click into place faster than any explanation can.

    If you’ve read this far because you’re trying to decide what to actually buy rather than just understand the difference, that’s the natural next step — take a look at my matcha powder brands comparison if matcha’s the direction you’re leaning, or my best hojicha brands guide if you want something gentler and more everyday. Either way, now you’ll actually know why they taste as different as they do.