Disclosure: This post contains affiliate links. If you buy through one of them, I may earn a small commission at no extra cost to you.
My first several attempts at a homemade matcha latte all had the same two problems: little green flecks floating on top that never fully dissolved, and a bitterness underneath the milk that no amount of syrup could fully mask. I assumed I just had bad matcha. I didn’t. I had the right matcha and completely the wrong method — pouring cold milk directly onto dry powder and hoping it would work itself out, which it never does.
Once I actually understood why cafés get a smooth, vibrant latte and home attempts so often turn out clumpy and flat, fixing it took about thirty extra seconds of technique, nothing more. That’s really what this whole recipe comes down to: order of operations and temperature, not some secret ingredient or expensive equipment. You don’t need a barista-grade setup to get this right at home — you need to stop doing the two things that ruin it, which is exactly what most quick recipe cards skip over in favor of just listing ingredients.
The Problem You’re Actually Trying to Solve
You’ve searched “how to make a matcha latte” because either your homemade attempts keep coming out clumpy, bitter, or oddly flat compared to what you’ve had at a café, or you’ve never made one and don’t want to waste good matcha figuring it out through trial and error. Both are the same underlying issue: matcha lattes fail for very predictable, very fixable reasons, and almost nobody explains why before handing you a recipe.
The two failure points account for nearly every bad homemade matcha latte: pouring cold milk onto dry matcha powder, which will clump every single time no matter how hard you stir, and using water that’s too hot to dissolve the matcha first, which scorches it into bitterness. Fix those two things and the rest of the recipe is genuinely simple — everything past that point is really just preference, whether that’s your milk of choice, how sweet you like it, or whether you want it hot or over ice.
Who This Article Is NOT For
Let’s save you some scrolling if this isn’t quite your situation.
- If you want an authentic, traditional matcha preparation (usucha or koicha) rather than a latte, this isn’t that guide — a latte is a modern, milk-based drink, and traditional preparation skips milk entirely. My matcha whisk buying guide is a better starting point for that.
- If you’re using culinary-grade matcha specifically for baking, this recipe is built around drinking matcha, not baking with it — the ratios and technique are different when matcha is one ingredient among several rather than the star.
- If you already make great matcha lattes and just want new flavor variations, skip to the variations section near the end rather than reading through the basic method again.
If you’re past that, here’s where the actual recipe starts.
What Actually Makes or Breaks a Matcha Latte
Three things determine whether your latte turns out café-smooth or disappointing, and they’re the same three things almost every good recipe agrees on once you dig past the surface-level instructions.
1. Order of operations. Matcha gets whisked into a small amount of hot water first, forming a smooth paste, before any milk touches it. Cold milk poured directly onto dry matcha powder will clump, full stop, no matter how vigorously you stir afterward.
2. Water temperature. Hot, not boiling — roughly 160–175°F (70–80°C). Boiling water scorches matcha and pulls out bitterness the same way it does with delicate green tea leaves.
3. Sifting before whisking. Matcha compacts in the tin over time, and sifting it before adding water breaks up those clumps before they ever have a chance to survive into your finished drink.
The Basic Ratio
| Component | Standard Latte | Stronger Latte |
|---|---|---|
| Matcha | 1 tsp (about 2g) | 1.5–2 tsp (3–4g) |
| Hot water (70–80°C) | 2 oz (60ml) | 2–3 oz (60–90ml) |
| Milk | 6–8 oz (180–240ml) | 6–8 oz (180–240ml) |
This ratio works for both hot and iced versions — the only real difference between the two is whether your milk is warmed or poured cold over ice at the end.
The Method, Step by Step
Making the Matcha Base
- Sift your matcha. Push 1 to 2 teaspoons through a fine mesh sifter into a bowl or mug. This single step prevents most of the clumping people struggle with.
- Add hot water, not boiling. About 2 ounces at 160–175°F (70–80°C). If you just boiled your kettle, let it sit off the heat for roughly a minute before pouring.
- Whisk in a brisk zigzag or “W” motion for 15 to 20 seconds, until the mixture is smooth, slightly frothy, and free of visible clumps. This is the base every version of the latte builds on, hot or iced. The zigzag motion matters more than people expect — a slow circular stir won’t incorporate the same air, and you’ll end up with a flatter, less frothy result even if the matcha technically dissolves.
Finishing It Hot
- Warm or steam 6 to 8 ounces of milk of your choice.
- Pour the warmed milk slowly over the matcha base, stirring gently to combine.
- Add sweetener now if you want it — honey, maple syrup, or simple syrup all dissolve easily into warm milk.
Finishing It Iced
- Fill a glass with ice.
- Pour 6 to 8 ounces of cold milk over the ice.
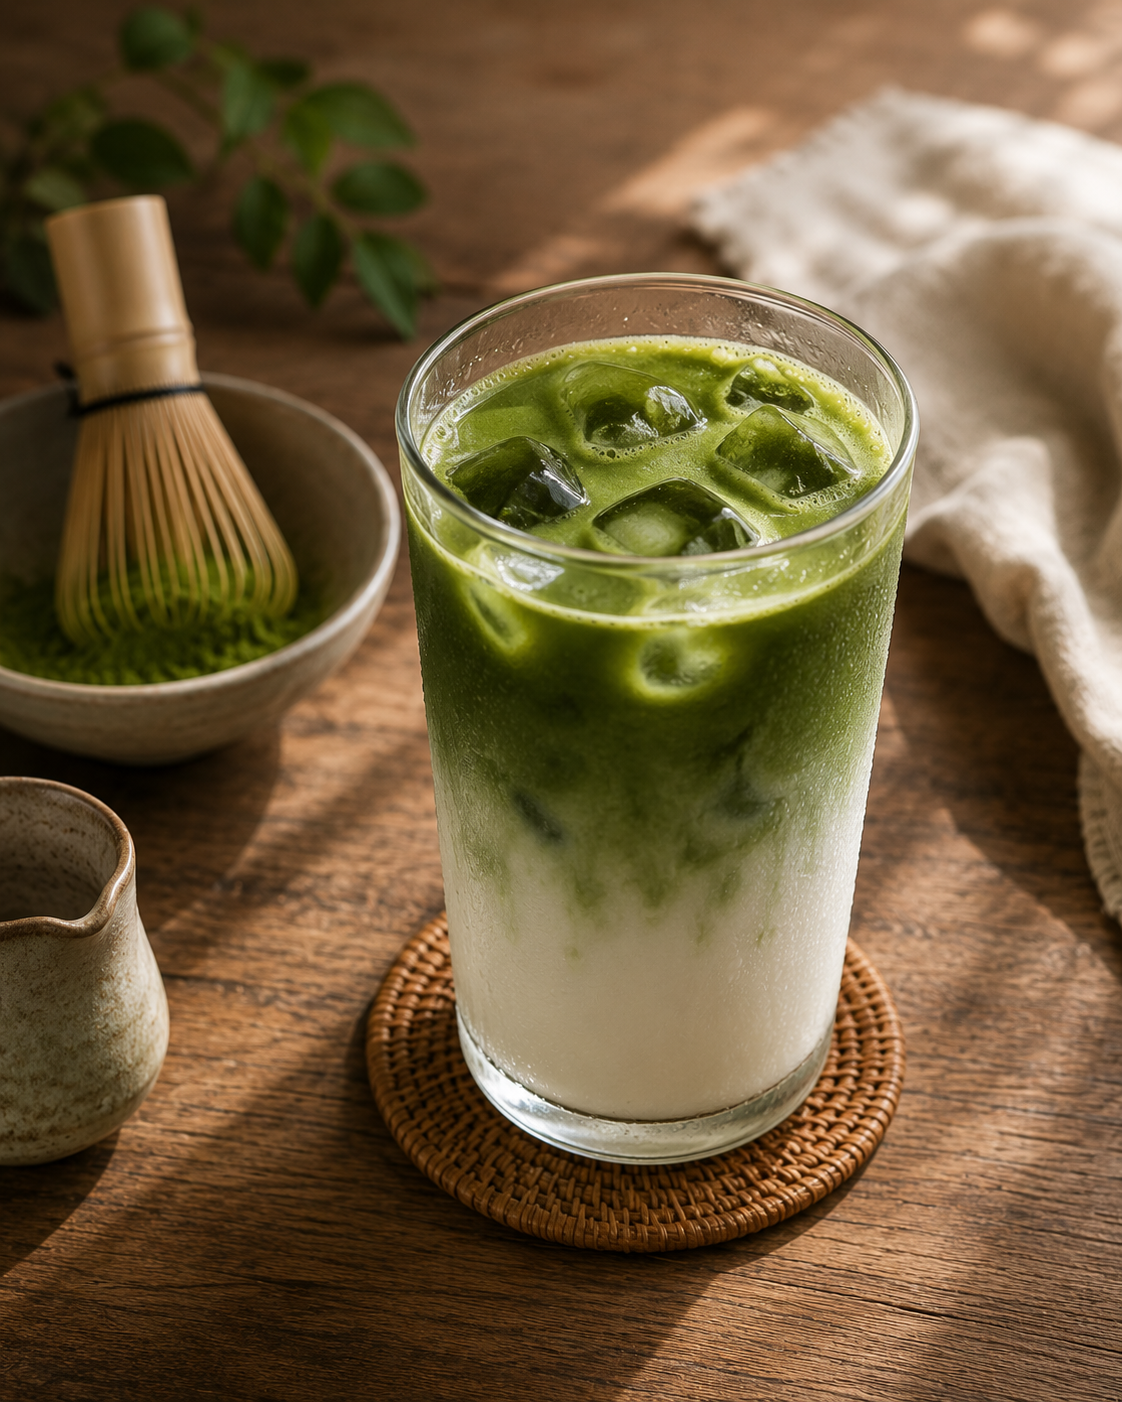
- Pour your matcha base slowly over the milk and ice. For the classic layered, ombré look, pour it directly over the ice rather than stirring it in immediately — stir right before drinking instead.
Common Mistakes and How to Fix Them
Clumpy texture. Almost always caused by skipping the sift step, using water that’s too cool to fully dissolve the powder, or pouring cold milk onto dry matcha instead of onto an already-whisked base. Fix the order of operations first before troubleshooting anything else — it solves the vast majority of clumping complaints on its own.
Bitter aftertaste. Water too hot, full stop. If you’re using a kettle without temperature control, let boiled water rest uncovered for about a minute before pouring it onto your matcha. A cheap thermometer removes the guesswork entirely if bitterness keeps showing up despite your best estimate.
Flat, foam-less latte. This is more about technique than ingredients — a proper zigzag whisking motion incorporates air into the base, which is what produces that light foam on top. A milk frother works as a substitute if you don’t have a bamboo whisk, and can also help froth the milk itself for extra texture.
Latte tastes like plain sweetened milk with barely any matcha flavor. Usually means you’re under-measuring the matcha itself. Don’t be shy with the ratio above — a proper matcha latte should taste distinctly like matcha, not like milk with a green tint.
Whisked base looks fine but the finished latte still separates or looks streaky. This usually comes down to pouring technique rather than the base itself. Pour slowly and along the side of the glass rather than dumping the matcha base in all at once, and give it a gentle stir right before drinking rather than expecting it to fully combine on its own.
A Few Variations Worth Trying
Vanilla matcha latte. Add a small splash of vanilla extract, or a vanilla syrup, to the milk before combining.
Honey matcha latte. Stir honey directly into the warm matcha base before adding milk — it dissolves more evenly there than into cold milk later.
Blended iced matcha latte. No whisk or frother on hand? Add the matcha, hot water, and milk to a blender and blend for about 10 seconds. It won’t be quite as traditional, but it fully dissolves the powder and produces a genuinely frothy result.
Dirty matcha latte. Add a shot of espresso alongside the matcha base for a caffeine-forward hybrid that’s become popular at specialty cafés — it also happens to smooth over some of matcha’s more vegetal notes if you’re still adjusting to the flavor, and it’s an easy way to use up matcha you weren’t sure you loved on its own.
Brown sugar matcha latte. Dissolve a spoonful of brown sugar or a brown sugar syrup into the milk before combining, for a deeper caramel-like sweetness than honey or plain syrup gives you.
Tools That Make This Easier
A bamboo whisk (chasen). Shop bamboo matcha whisks on Amazon → The traditional tool, and still the one that produces the most consistent froth in the base before milk is added.
A milk frother. Shop milk frothers on Amazon → A solid substitute if you don’t have a whisk, and it does double duty frothing the milk itself for hot lattes.
A fine-mesh sifter. Shop matcha sifters on Amazon → The cheapest fix for clumping, and worth having even if you already own a whisk or frother.
A Few Things People Ask Me
Can I use a blender or milk frother instead of a bamboo whisk? Yes, and for a latte specifically, either works well since the milk is going to mute some of matcha’s finer texture anyway. A bamboo whisk matters more for traditional straight matcha than it does here, though it still produces a nice, controlled froth if you have one.
Why does my matcha latte turn brown or dull green instead of staying vibrant? This is almost always a water temperature issue — water that’s too hot degrades the chlorophyll responsible for matcha’s bright green color, the same mechanism that causes the bitterness. Staying within the 160–175°F range protects both the color and the flavor.
Which matcha grade should I use for lattes? You don’t need your most expensive ceremonial-grade tin here — a solid culinary or “latte grade” matcha is built specifically to hold up against milk and sweetener, and it’s usually more affordable than ceremonial grade. Save the top-tier tins for drinking straight, where their subtlety actually shows up. My matcha powder brands comparison breaks down which brands offer good latte-specific options.
How much caffeine is in a matcha latte compared to coffee? A standard-strength matcha latte using about 2 grams of matcha typically lands somewhere between a cup of green tea and a shot of espresso, though it varies by brand and grade. If you’re sensitive to caffeine, start with the lighter end of the ratio rather than the stronger version.
How much caffeine is in a matcha latte compared to coffee? A standard-strength matcha latte using about 2 grams of matcha typically lands somewhere between a cup of green tea and a shot of espresso, though it varies by brand and grade. If you’re sensitive to caffeine, start with the lighter end of the ratio rather than the stronger version.
Do I need to use a special kind of milk, or does dairy work fine? Dairy works fine, though a lot of people find oat milk in particular pairs especially well with matcha’s vegetal, slightly bitter edge, since it has a natural sweetness and body that balances it nicely. Almond milk tends to be thinner and can separate a bit more visibly, which matters mostly for how the drink looks rather than how it tastes.
Can I make the matcha base ahead of time and store it? You can, briefly. A whisked matcha base will keep in the fridge for a few hours without much quality loss, though the vibrant color and froth do fade somewhat over time. For the best result, whisk it fresh each time rather than batching a large amount days in advance.
Where I Landed
The whole recipe really comes down to one habit: always whisk matcha into hot water first, and never let cold milk touch dry powder directly. Everything else — the exact ratio, hot versus iced, which milk you use — is genuinely flexible and comes down to personal taste. Once that one order-of-operations habit sticks, you’ll stop thinking about it and just make a good matcha latte on autopilot, the same way you eventually stop measuring coffee grounds once you’ve made enough pots to know it by feel.
It’s worth remembering, too, that a slightly imperfect latte still tastes far better than the clumpy, bitter version most people accidentally make on their first few tries. Don’t let chasing café-perfect technique stop you from just making one and adjusting from there — small tweaks to ratio and sweetness matter more to your personal taste than getting every step textbook-precise.
If you’re still figuring out which matcha to actually keep in your kitchen for this, my matcha powder brands comparison is the natural next stop — and my matcha whisk buying guide covers the tools, including a decent milk frother alternative, if you don’t already have a whisk on hand.